Share this!
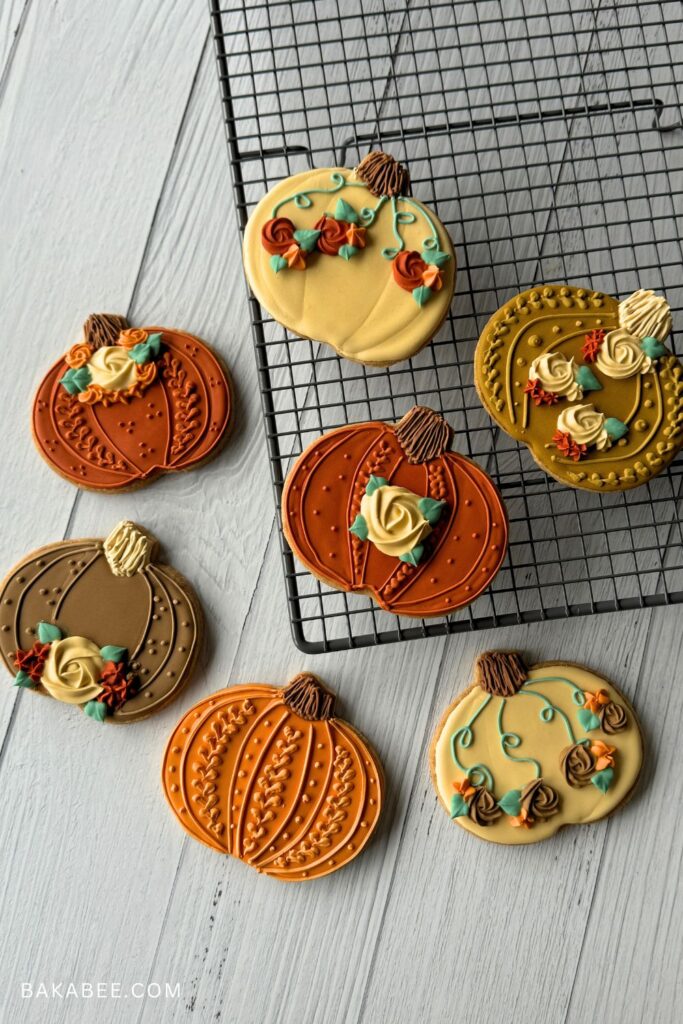
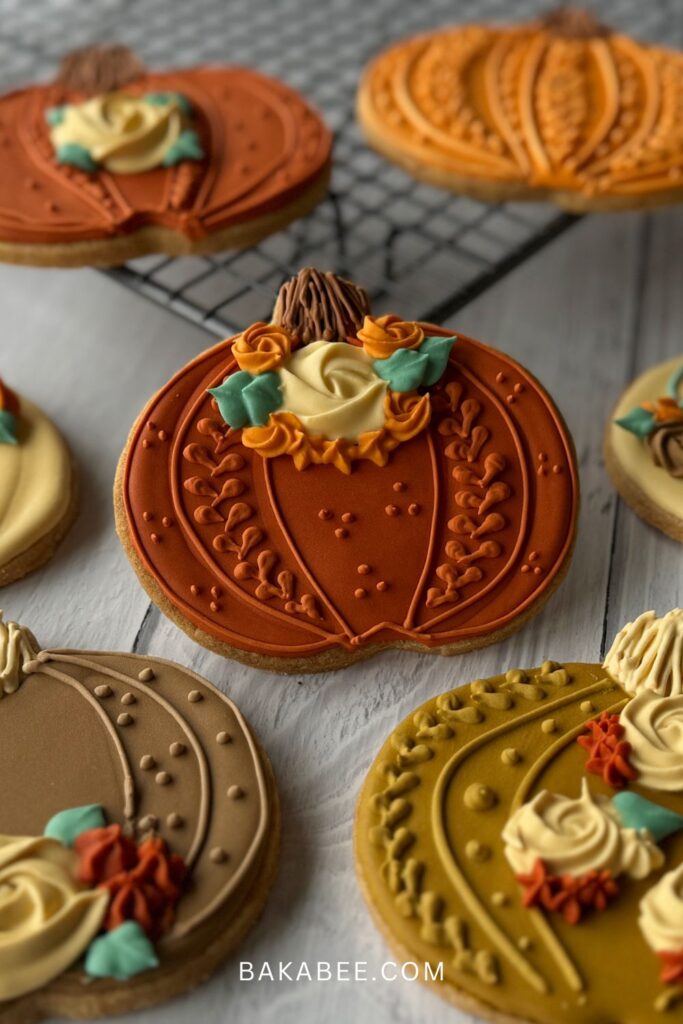
Fall is in full swing, and there’s no better way to celebrate the season than with beautifully decorated pumpkin cookies! In this post, I’ll walk you through how to decorate pumpkin cookies with simple yet stunning decorating techniques that bring out the best of autumn’s colours and textures. From classic burnt orange to intricate roses and leaves, there’s a design here for every level of decorator.
Whether you’re planning treats for a cozy gathering or simply want to add some festive flair to your dessert table, these pumpkin cookies are sure to impress.
So grab your piping bags, roll up your sleeves, and let’s dive into the art of cookie decorating!
How to make royal icing
This royal icing recipe is my go-to one. I have been using this recipe since I started my cookie decorating journey. It is easy to make, just need 3 ingredients and a little bit of patient. That’s what you need!
These 3 ingredients are:
- icing sugar
- meringue powder
- water
You can check out my How to decorate animal cookies with royal icing | cookie decorating for BEGINNERS video to watch and learn how to make this simple royal icing for your cookie decorating project. I promise, it is very easy!
Also, in the video you will learn how to make the different consistencies from flooding the cookies to creating the details. If you are beginners, definitely it’s worth to check it out!
How to create this autumnal colour palette
I L-O-V-E this colour palette so much, it has a warm and cozy vibes.
In the image below, here are the food colouring that I use to create this palette. These are all gel food colouring because it is so concentrated and it will not affect the consistency of the royal icing.
These gel food colours from AmeriColor (apart from the white) are (from left to right):
- Ivory
- Gold
- Egg Yellow
- Tulip Red
- Electric Green
- Warm Brown
- Chocolate Brown
- Forest Green
- White
- Super Black
Consistency is key to successfully create any decorated cookie designs. So please to avoid using powder or liquid one because it will change the desired consistency for piping.
To create this autumnal colour palette, I use approximate a half cup of icing each. If you want a light shade, you can use more icing. The process is super simple and straight forward. Here we go:
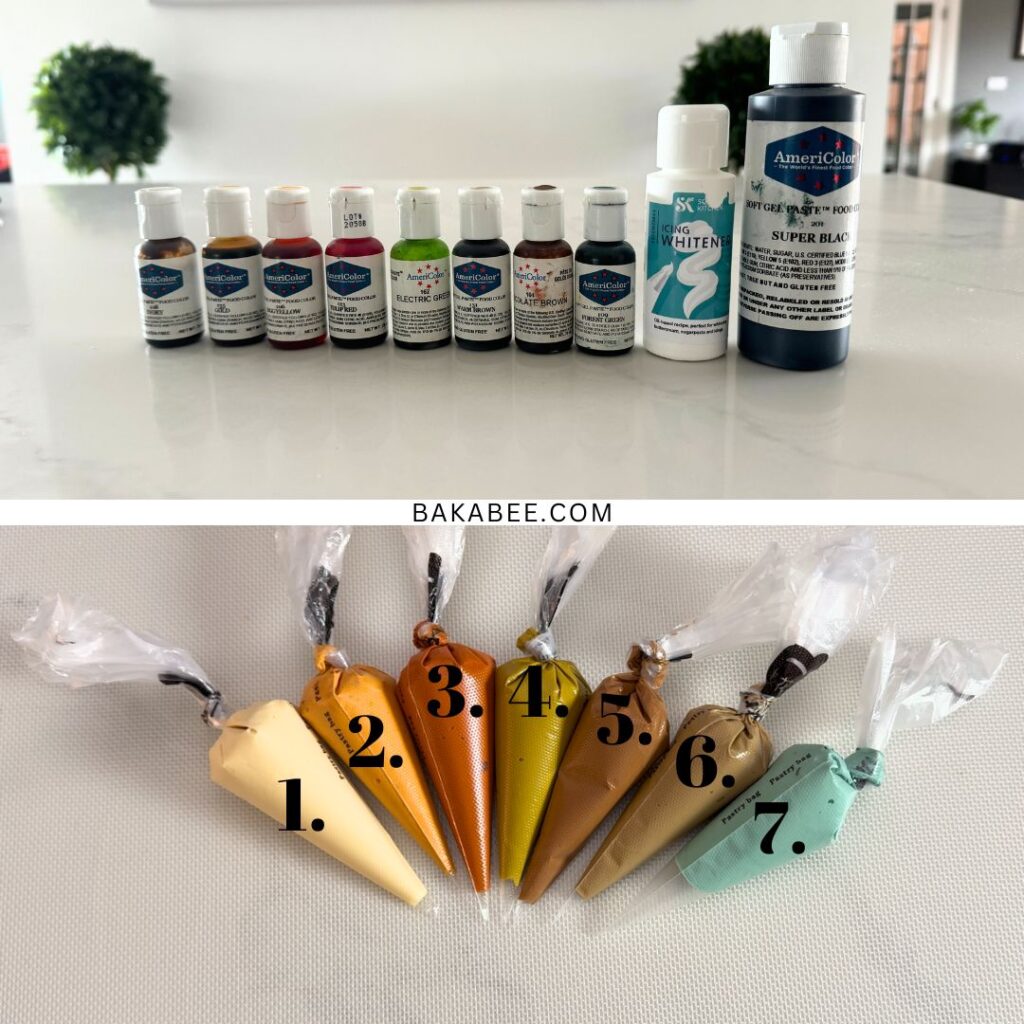
- Basic Ivory: 1 drop ivory
- Pumpkin Burnt Orange: 3 drops egg yellow + 3 drops ivory + 1 drop tulip red
- Autumn Russet: 6 drops tulip red + 5 drops egg yellow +3 drops warm brown
- Autumn Green: 5 drops electric green + 3 drops ivory + 1 drop warm brown
- Dark Chestnut Brown: 4 drops warm brown + 1 drop gold + 1 drop ivory + a tiny hint of black (I use a toothpick to pick up some black food colouring instead of squeezing the bottle)
- Basic Chocolate Brown: 2 drops chocolate brown
- Basic Green: 1 drop forest green
What consistency I use for these fall decorated pumpkins
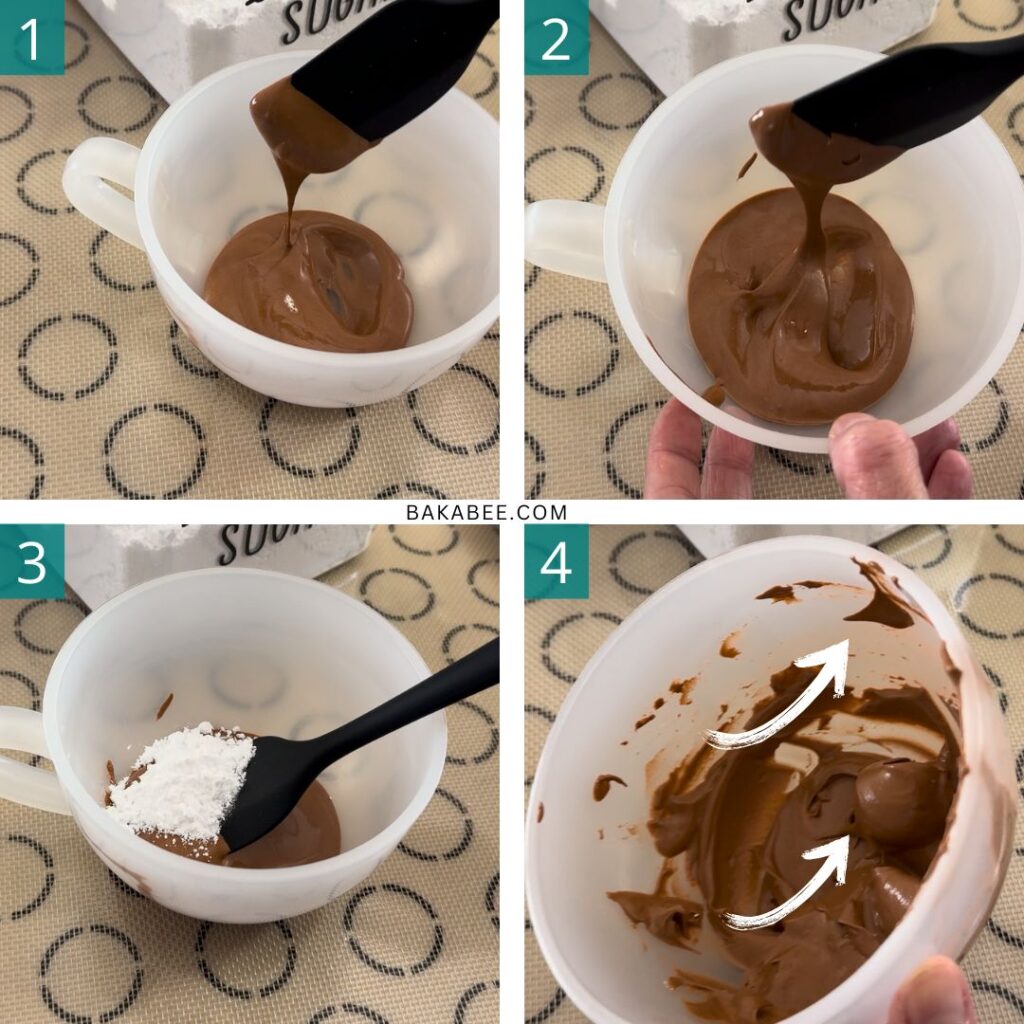
I use two different type of icing consistency for this decorating project, 10-second and piping consistency.
10-second piping consistency
Image 1: As you can see, the icing consistency is quite thin.
Image 2: If you use the spatula to lift up some icing and let it fall back, the pattern will be disappear approximately within 10 seconds. This is called 10-second consistency. This consistency royal icing is perfect for flooding cookies because it self-levels beautifully. You won’t need to spend much time smoothing it out with a tool.
Piping consistency
Image 3: Adjust the consistency from 10-second to piping consistency by simply adding icing sugar. Then stir well until all combined.
Image 4: As you can see, the icing can form a soft peak and hold its shape. This is called piping consistency. This consistency is good for adding intricate details to your cookies because it holds its shape well. This means you can create precise lines, delicate flowers, and other fine details without worrying about them spreading or losing their form. It’s the perfect consistency for achieving a clean, defined look in your cookie decorations.
Pro tip💡: There is no right or wrong consistency as long as it works for you. You can adjust it by either adding water to thin it down or icing sugar to thicken it.
My Go-To Favourites
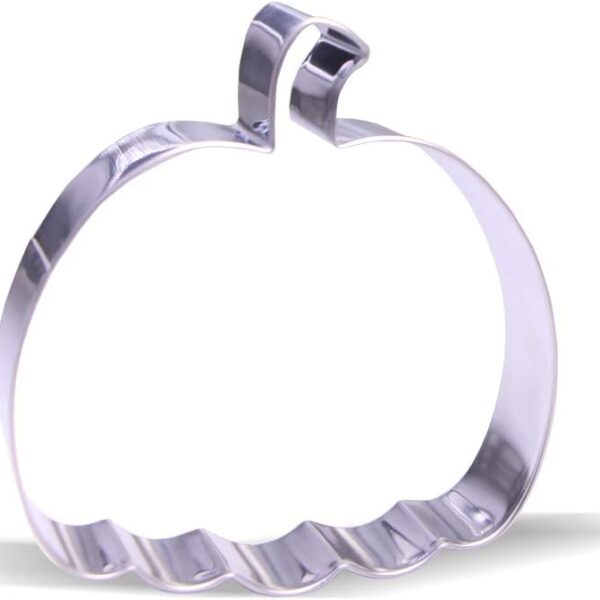 Buy Now →
 Cookie Decorating Turntable with Anti-Slip Silicone Mat
Buy Now →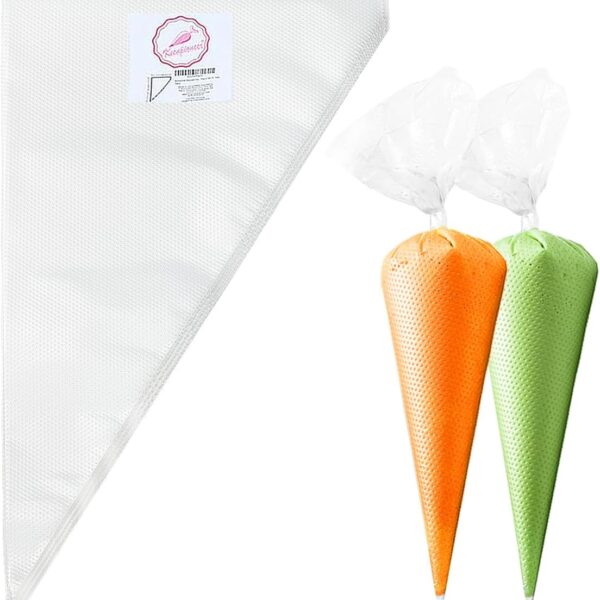
Disposable Decorating and Pastry Bags 14-inch
Buy Now →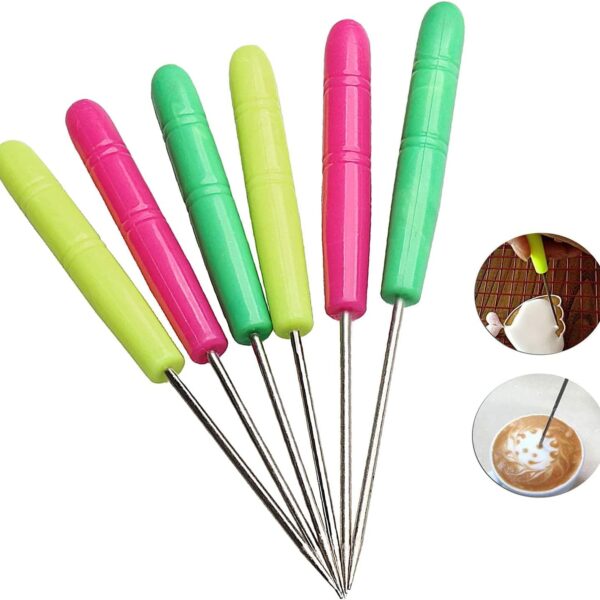
Scriber Needle Cake Decorating Needle
Buy Now →Check out my video tutorial
My go-to sugar cookie recipe for decorated cookies
This sugar cookie recipe is my only go-to recipe. Why?
The reasons are:
- 100% no spread – (this is important because all I need is the proper shape cut-out from the cookie cutter after they’ve been baked to create the desired cookie design).
- sharp and neat edges – these sharp and neat edges will elevate the look of your cookie design
- delicious – these cookies are buttery, crumbly and crispy … just yum! They are also very tasty on theirs own.
- easy to make – the dough comes together in no time.
- no fancy ingredients – just a handful of ingredients that I’m sure they are in your kitchen cupboard.
I also have a video tutorial for how to make these sugar cookies. If you want to learn, definitely check it out!
What piping tips I use
I used 3 different piping tips for piping the roses and leaves. They are 0.5 cm closed star tip, 0.25 cm closed star tip and 0.5 cm leaf tip. You can see the image below.
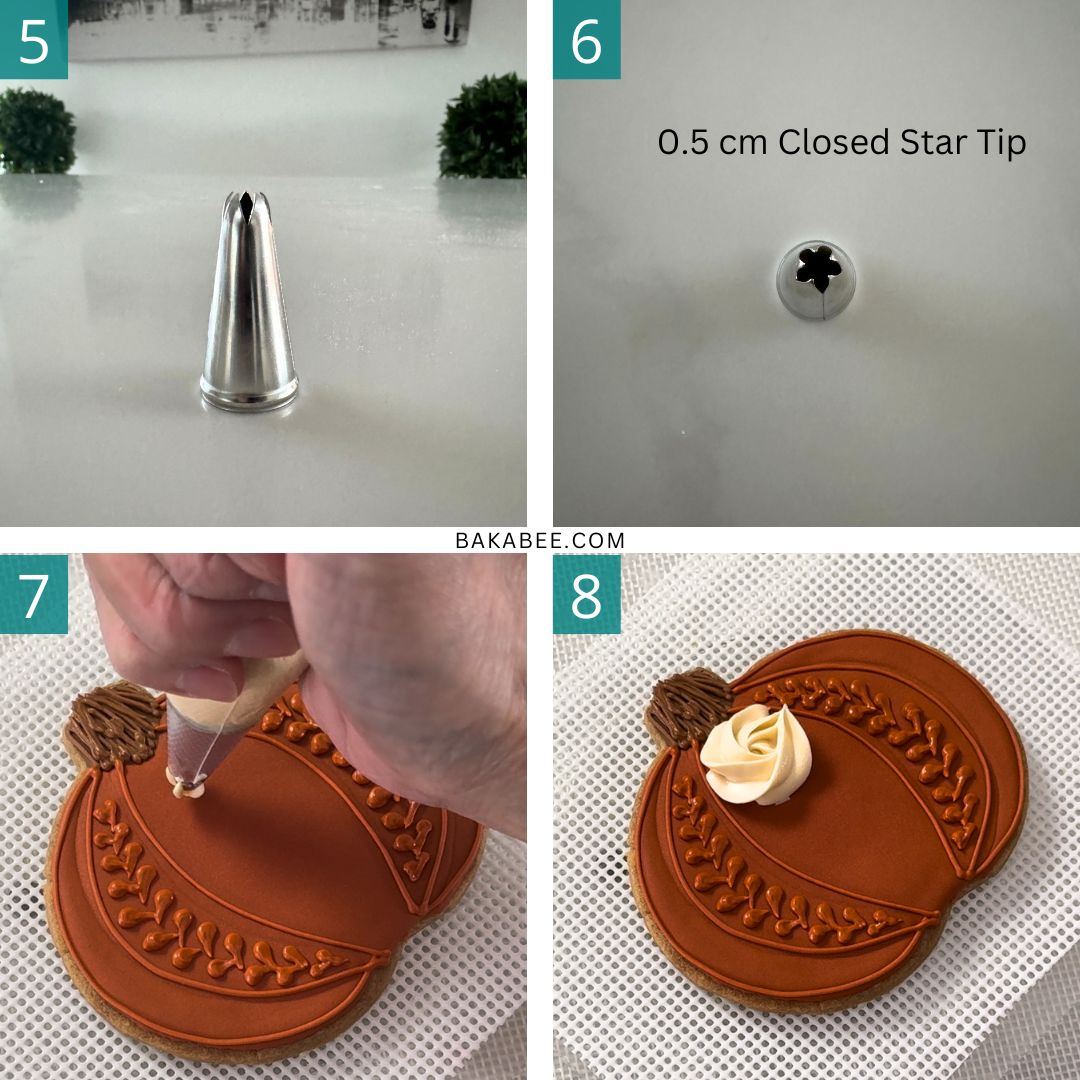
I use this 0.5 cm closed star piping tip (image 5 & 6) to create the rose in the centre. What you need to do is:
- Hold the piping bag straight, apply gentle pressure with your fingers.
- Start from your desired point, and use your wrist to draw a swirl while squeezing the royal icing at the same time. When you finished, release the pressure and lift up the piping bag. That’s it! It’s beautiful, isn’t it?
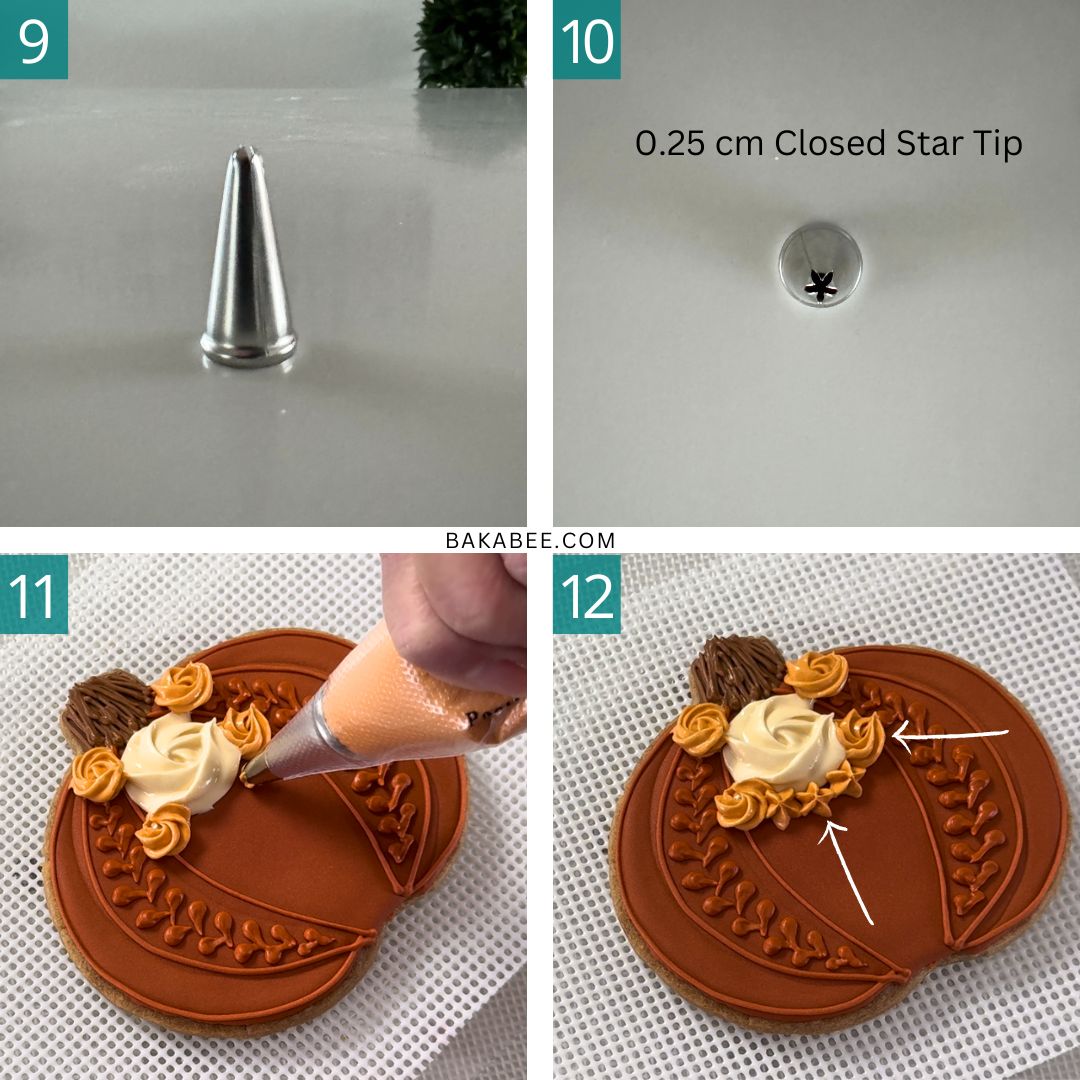
I use this 0.25 cm closed star piping tip (image 9 & 10) to create two different shapes of flowers.
Use the same technique as the above to create those four small roses at the corners. Just draw a smaller swirl. It’s easy!
How about the bottom three small flowers?
They are even easier than you thought! The steps are:
- Hold the piping straight and apply gentle pressure to the piping bag.
- Squeeze the royal icing out to create a flower. When you are happy with it, release the pressure and lift up the piping bag. Continue to pipe as many as you need.
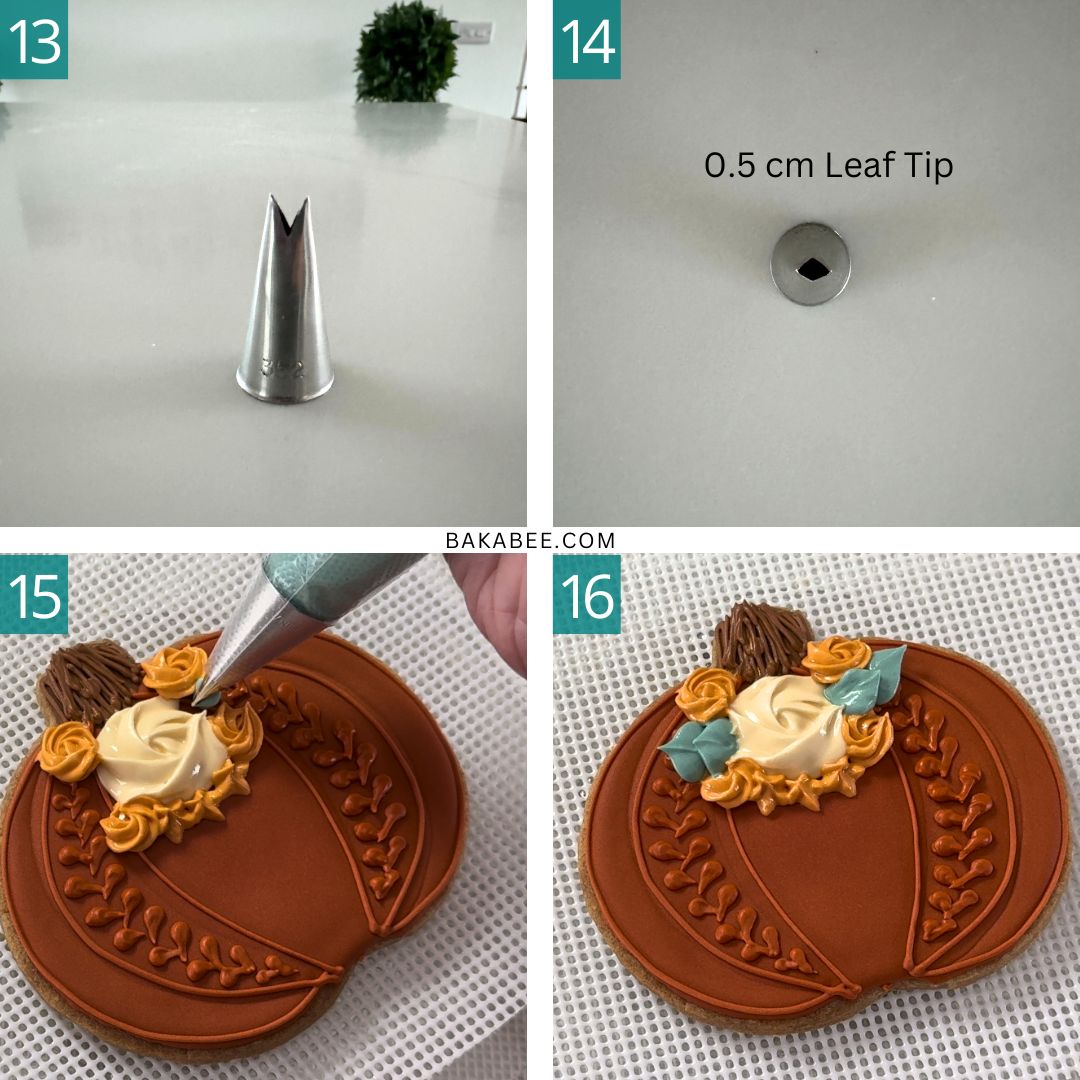
For the leaves, I use this 0.5 leaf tip (image 13 & 14) to create them.
- Place the piping bag at an angle (it depends on how you like the leaves sit), apply gentle pressure onto the piping bag to squeeze out the royal icing to create the leaf.
- When you are happy with the size of the leaf, release the pressure and very gently to pull the piping bag away from the leaf that you’ve just created. Gorgeous, isn’t it!
More Cookie Decorating Fun you might like
- Christmas cookie decorating – Festive Cookie Fun!
- Christmas Cookie Decorating Ideas | Cute and Easy Christmas Cookies (video tutorial) – Elevate Your Cookie Game This Holiday Season!
- Easter Cookies | Cookie decorating of Easter cookies with royal icing (video tutorial) – Easy Easter Cookie Ideas!
- Halloween Cookies | Cookie decorating with royal icing (video tutorial) – Spooky Cookie Fun!
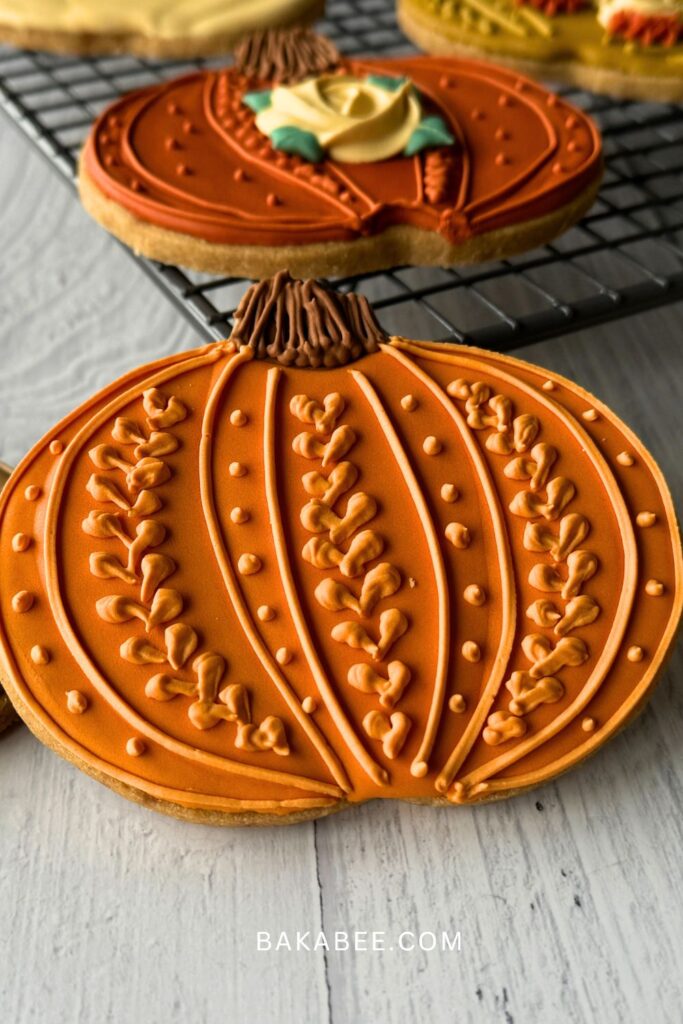
Hope you like these fall pumpkin cookie designs as much as I do. Stay tuned for more!
Keep decorating! See you in the next one!
Share this!


