Share this!
Sugar cookies are my absolute all time favourite. Chocolate sugar cookies are even 10 times better because they are rich in flavour and once they come out from the oven, it’s really hard not to eat them immediately before they are even cool. Need some cookies for your next party? Use these as your ‘cookie Canva’ and create whatever design you fancy.
“I accept the COOKIES!” 😄
Watch this video tutorial
What ingredients do you need?
- Butter – better to use unsalted because we can then control the amount of salt
- Sugar – I use caster sugar because it’s easier to dissolve
- Egg – one large egg at room temperature
- Vanilla extract – I recommend using a high quality one because it affects the taste significantly
- All-purpose flour – remember to sift before mixing it into the wet ingredients
- Cocoa powder – can be sifted with the all-purpose flour to avoid getting any lumps when mixing it with the wet ingredients
- Sea salt – a regular one can get the job done because it’s just for adding flavour
- Baking powder
If you already bake, you probably have all of these ingredients in your cupboard, there’s nothing fancy about this recipe …but if you are just starting out as a baker, these are the ingredients that you might always think about keeping in your cupboard. I can say that they are the basic ingredients for most baking. Why not stock up so you are always ready to give in to temptation 🙂
What’s next?
Before you start, take your butter out from the fridge for 30 mins to allow it to slowly reach room temperature. It should be soft enough for easy beating.
If you are the sort of person who learns by watching rather than reading recipes, then watch my video tutorial before you start. I hope it will also give you a bit of confidence in how simple the process is. I always say ‘If I can do it, so can you!’
Prepare the dry ingredients
All the dry ingredients need to be sifted before being added or mixed with the wet ingredients. So, while we’re waiting for the butter to get to room temperature, use the time to prepare the dry ingredients.
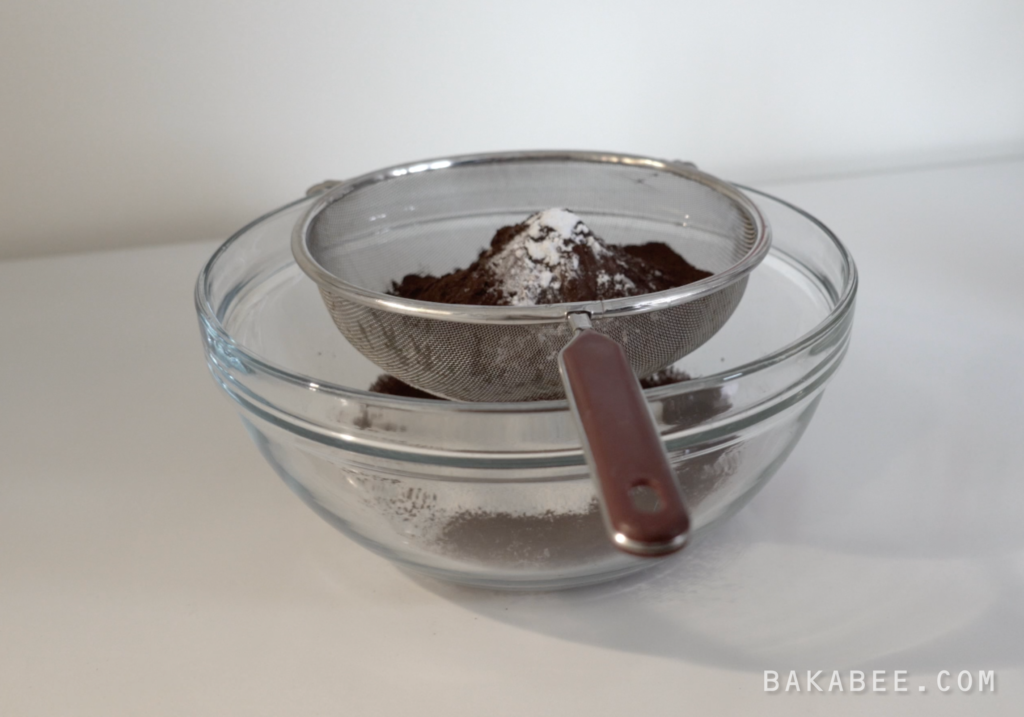
Measure the exact amount of each dry ingredient first, using a kitchen scale. Set them aside. Then get a big mixing bowl and place a fine sieve on top. Pour the all-purpose flour, cocoa powder and baking powder into the sieve. Gently sift them into the mixing bowl. When you finish sifting, add the sea salt directly into the dry mixture. Finally, use a whisk to mix them all together. That’s the dry ingredient mixture done! Easy, isn’t it?
Prepare the wet ingredients
For this, I use my handheld mixer to beat the batter but if you prefer to use your stand mixer, that does the job just as well. Sometimes, though, I like the ease of the hand mixer. All about individual taste!
Get a big mixing bowl and place the room temperature butter into it. Start the mixer and begin to beat the butter. I always do this before I add the sugar because I feel it’s an easier way to create a light and pale coloured butter and sugar mixture. It might take a little longer but I can say it’s worth it. It will take around 5 to 8 mins altogether.
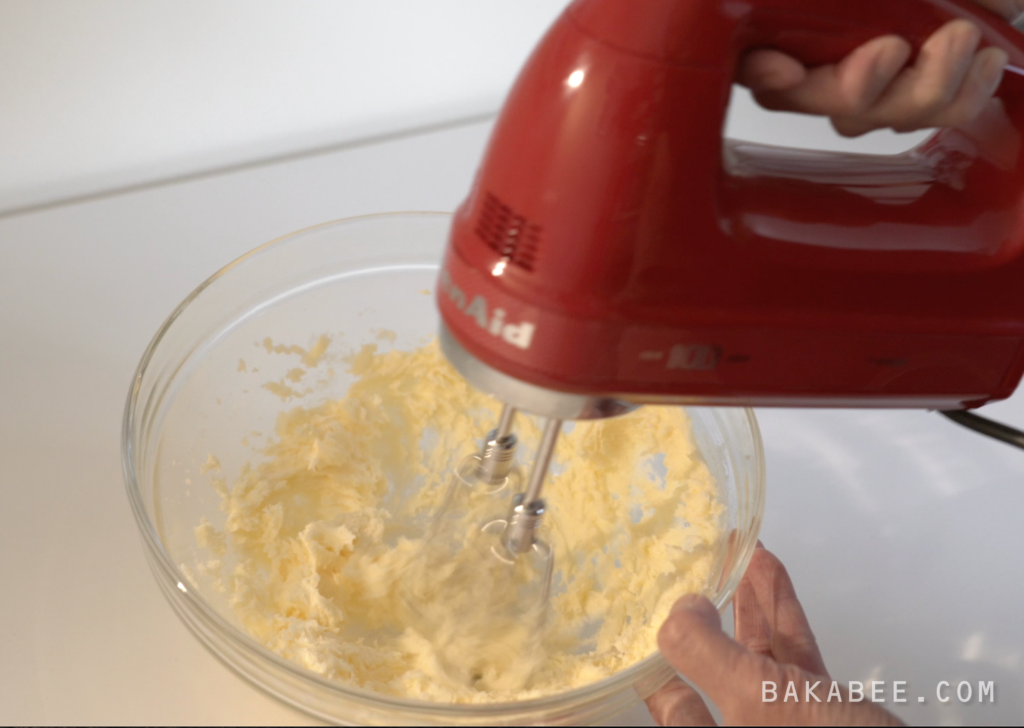
It’s important to be patient in this stage because patient mixing will give us crispy and light cookies when they bake. Cut corners here and your cookies might come out dense and not so crisp.
When the mixture becomes light and pale, you can add the egg and give it a quick mix, then add the vanilla extract in the same way. Now your wet ingredient mixture is done as well! So simple isn’t it?
Mixing the dough
The next step is pretty straight forward, mixing the wet and dry ingredients together. Gently add the dry mixture into the wet mixture. Mix them together using a medium low speed because you don’t want the dry ingredients to fly up to your face (yes, we’ve all done it!).
You should NEVER over mix the dough, BUT how do you know whether it is over mixed or under mixed??
I can give you TWO clues to help with this, look for the moment when:
- the dough suddenly takes on an ice cream like texture
- there are still some dry ingredients sticking onto the sides and the bottom of the bowl

At this point you need to stop your mixer immediately and blend the remaining ingredients together manually, using a spatula. If you follow this advice, I’m 100% sure you won’t over mix the dough. The more you bake, the more you get a feel for this – so make lots of cookies!
Rolling out the dough
Here is another time-saving hack. Roll out the dough before chilling it. Sandwich half of the dough between two sheets of parchment paper and roll out to your desired thickness. I like mine to be 4mm thick and to achieve that I use a special rolling pin with adjustable dough thickness settings. If you like yours a bit thinner or thicker, please bear in mind that you’ll need to adjust your baking time with a shorter bake for a thinner cookie.
Once you’re happy with the dough, then place it in the refrigerator for about 1 to 2 hours or until it becomes firm.
Repeat the process for the other half of the dough.
Silicone lace mould – the fun part
This isn’t an essential step but I love using my silicone lace mould. It’s mainly used for creating cake lace and I have accumulated quite a wide range of moulds over the years. One day, I suddenly thought to myself, ‘why not use a mould on this humble chocolate cookie dough to create patterns that make the cookies look more interesting?’ So here is the silicone lace mould that I am going to use to create the indentations on my cookie dough. The size of it is 39 x 29 cm.

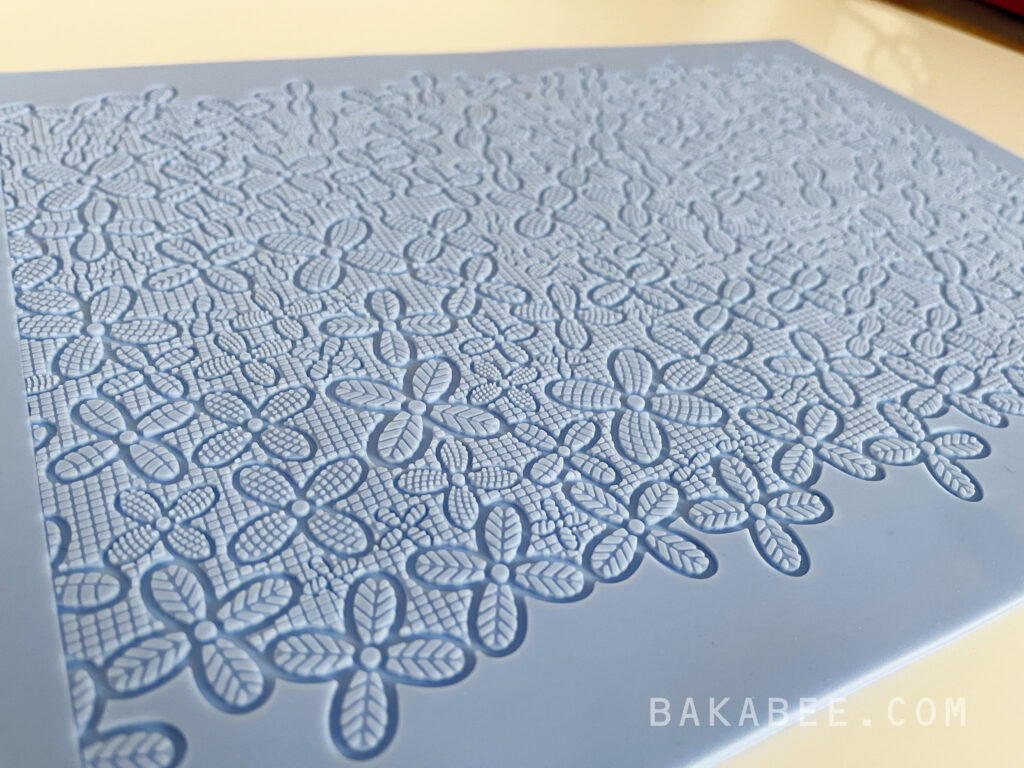
However, as I’ve said, if you don’t have a mould or don’t want to use it, that’s totally fine. Just skip this next step.
How to create the indentation?
CHILLED dough is essential because we don’t want the dough to get stuck onto the lace mould. Therefore, the dough needs to be thoroughly chilled and worked straight out of the fridge.
- Take the chilled dough from the fridge
- Peel off one side of parchment paper
- Flip the dough over the lace mould by holding the other side of the parchment paper
- GENTLY roll out the dough to create an indentation … very gently as we do not intend to roll out the dough again
- Pop the dough with the mould back in the fridge to chill for about 30 mins or until it has firmed up again
- Once the dough is very firm, remove from the fridge, place the parchment paper side on a flat surface and gently peel off the mould. If the dough is firm enough, it should be very easy to peel away. If the dough gets stuck into the mould it means the dough isn’t firm enough, so just pop it back in the fridge to chill until it’s firm enough.
Voilà! Lace patterned chocolate sugar cookie dough is created!
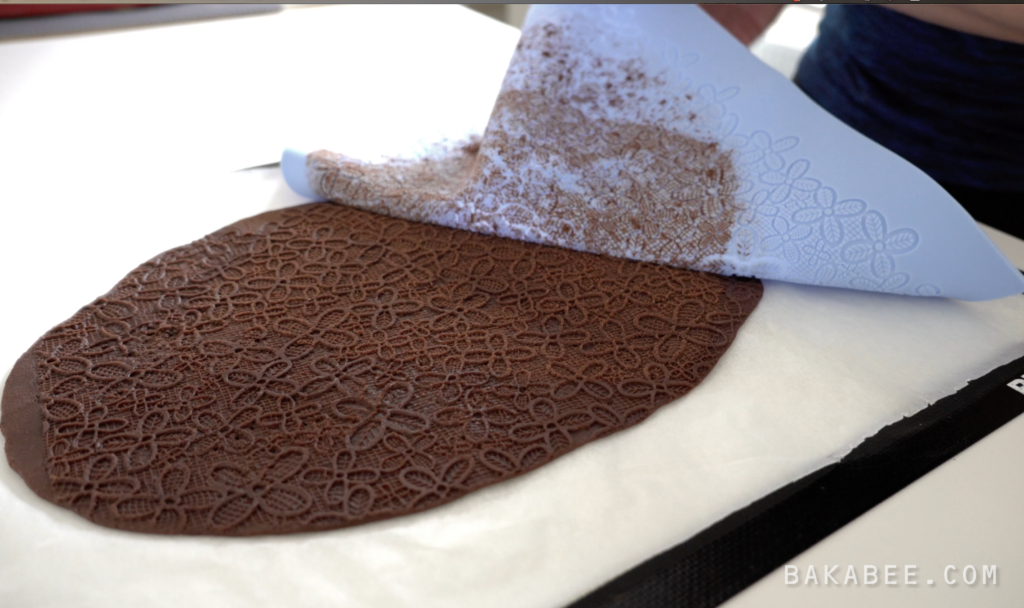
Cut it
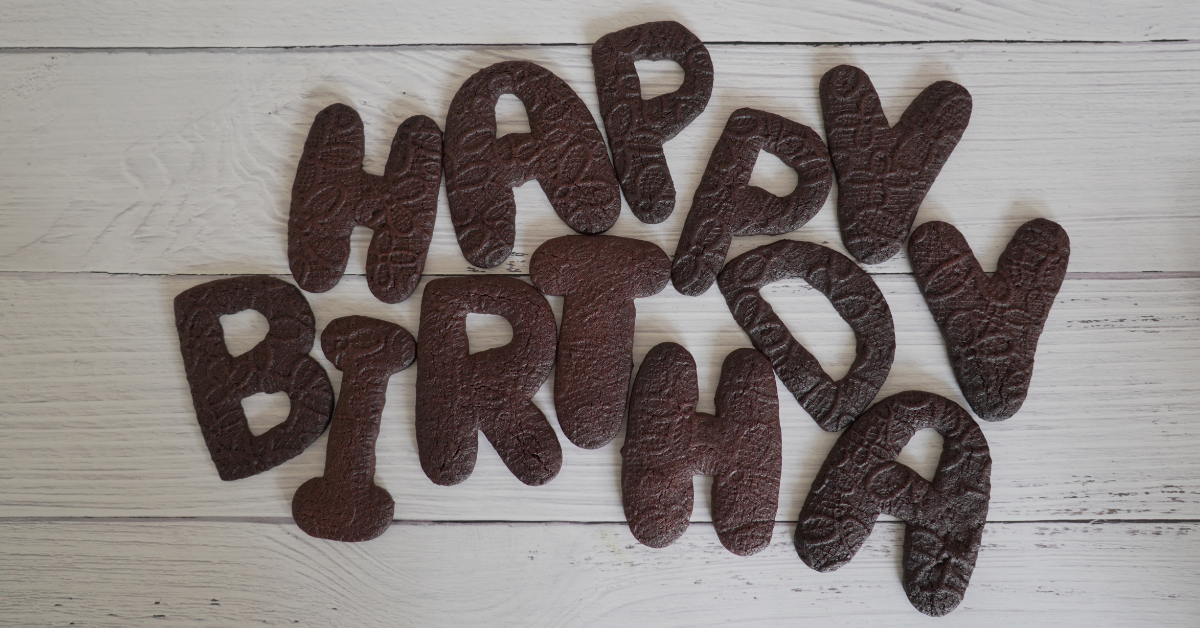
Next use your chosen cookie cutter or cutters to cut out any shape that suits. Since this particular project was for my husband’s birthday, I used huge letters to cut out a birthday message for him as a surprise. You know the drill now, if the cutters get sticky, pop the dough back to the fridge for a while.
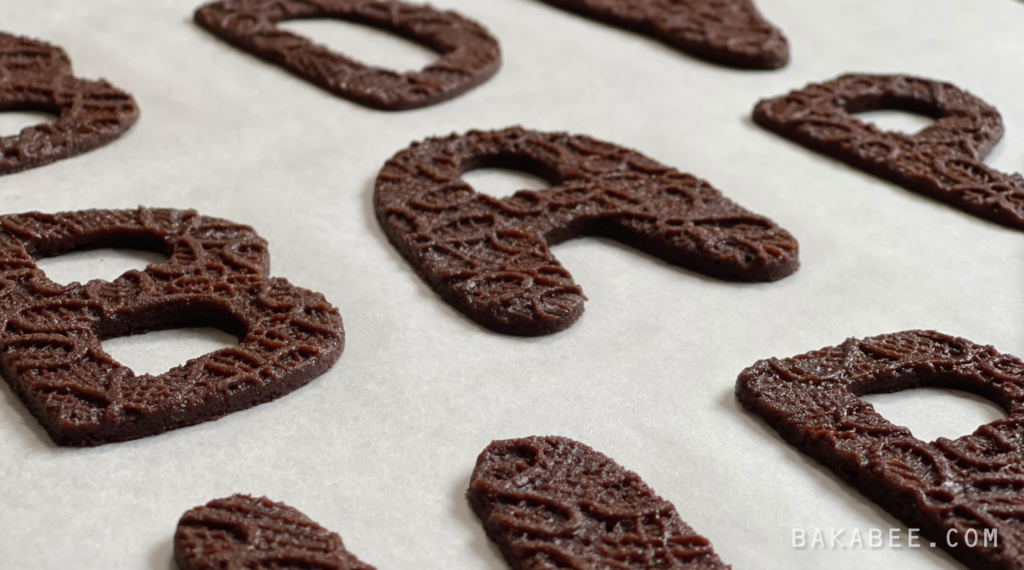
Bake it
Place the cut out cookie shapes, well spaced onto a baking tray lined with parchment paper (I do this as an extra precaution) and bake them in a preheated oven at 165℃ for about 12 to 15 mins (remember to adjust for the thickness you have chosen).
It can be hard to tell whether the cookies are done or not because of the colour of the chocolate dough. So …
What are you looking for?
- The cookies are slightly puffed up
- The edges turn a tiny bit darker
- The backs of the cookies turn hard and crispy (watch your fingers … the cookies are extremely hot)
- The rich chocolate aroma floods the kitchen and makes your mouth water
The baking time will vary depending on the thickness of your cookies and the power of your oven. You know your own oven, so you may need to experiment and adjust for the perfect outcome (another excuse to bake more cookies or maybe bake half of the mix first and see how they come out).
Cool it
Once they’re done, turn off the oven and take the baking tray out. Don’t try to move the hot cookies at the moment. Let them sit on the baking sheet to settle down for around 5 to 10 minutes. In the meantime, you can prepare a wire rack. When the cookies are warm enough to touch, transfer them carefully to the wire rack to cool down completely.
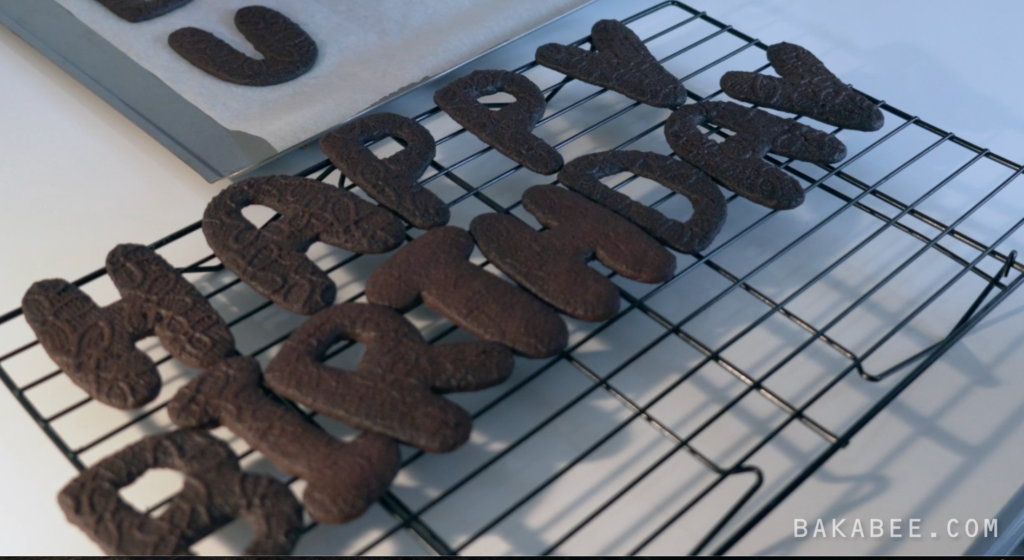
How can I store the cookies?
In theory, you can store them in an airtight container for up to a week. I confess these cookies disappear seriously fast in our house. They NEVER EVER have a chance to last that long. Hahaha…..
Can I make the dough in advance?
YES, you can! Actually I do it all the time.
There are some tips I can share with you or you can watch my video tutorial about my top 5 baking hacks you need to know to see what I actually do for it.
- Sandwich the dough with two sheets of parchment paper
- Roll out the dough into your desired thickness
- Wrap the dough with the parchment paper to avoid the dough getting dry in the freezer well in two layers of cling film
- Take the dough out 5 to 10 minutes before you need to cut it out for easy cutting
- Baking time may be 1 to 2 minutes longer than the usual time (keep an eye on them)
So if you follow this tip… last minute unexpected guests arriving for a cup of coffee, not a problem at all!!!
If you’d still like to see how I make these cookies using the process I’ve described above, then watch my video tutorial to see exactly how I did it. I always say ‘if I can do it, so can you!’ 😉

Chocolate lace sugar cookies
- Prep Time: 30 minutes
- Cook Time: 15 minutes
- Total Time: 2 hours 45 minutes
- Yield: 40 pieces 1x
- Category: desserts, snacks
- Cuisine: American
Description
These chocolate sugar cookies are crispy and full of rich intense chocolate flavour. Guaranteed to deliver 100% no spreading dough so you can cut any shapes you fancy. Perfect with icing, fantastically moreish as they are or irresistible with ice cream.
Ingredients
- 113 g unsalted butter (soften)
- 130 g caster sugar
- 1 egg
- 1 tsp vanilla extract
- 175 g all purpose flour (sifted)
- 35 g cocoa powder
- 1/4 tsp sea salt
- 1/2 tsp baking powder
Instructions
- Place the softened butter in a large mixing bowl.
- Beat them with a hand held mixer at medium to low speed until it turns fluffy in texture and pale in colour.
- Add the egg and gently mix it well.
- Add the vanilla extract and continue to beat the mixture until all the ingredients are well incorporated.
- Get another big mixing bowl, sift the all purpose flour, cocoa powder, sea salt and baking powder into the bowl. Use a whisk to mix them.
- Add the dry ingredients into the butter mixture.
- Mix them together using a hand held mixer at medium speed until the mixture turns into an ice cream like texture. Do not over mix the dough.
- Stop the mixer and mix the rest of the dough by hand using a spatula.
- Divide the dough in half. Sandwich the first half using two sheets of parchment paper. Roll it out into 4 mm thickness.
- Place the rolled dough into the fridge for about 30 to 60 mins or until it becomes firm.
- Repeat the same process to the 2nd half of the dough.
- Place the lace silicone mat on a flat surface. After around 60 mins, take the chilled dough out from the fridge. Peel off one sheet of parchment paper and flip the chilled dough and place the dough onto it.
- Use a rolling pin to gently roll it to create the indentation. Remember, very gently. Then flip it over again to roll on the back of the silicone mat again.
- Then pop the dough with the silicone mat in the fridge for about 2 to 3 hours or until it becomes very firm.
- After 2 hours, the dough should be firm enough now. Place the mat on a flat surface and gently peel off the mat from the dough. If your dough got stuck onto the mat, pop it back into the fridge to chill until you can peel the mat off without sticking.
- Then use your favourite cookie cutters to cut out any shapes you fancy.
- If the dough turns soft, place the dough back in the fridge to chill until it becomes very firm.
- Preheat the oven to 165°C.
- Use an offset spatula to transfer the cut out cookies onto a lined baking sheet.
- Place each cut out cookie apart onto the baking sheet to avoid sticking together.
- Bake them for about 12 to 15 mins in the preheated oven.
- After they are baked, take them out from the oven and let them sit on the baking sheet for about 5 to 10 mins.
- Then transfer them onto wire racks to allow them to cool down completely.
- Store them in an airtight container for up to a week. Enjoy!
Notes
- Baking time will be varied depends on the thickness of the cookies.
- Watch my video tutorial to learn the whole process how I make the cookies.
Nutrition
- Calories: 52
- Sugar: 3.3
- Sodium: 30
- Fat: 2.6
- Saturated Fat: 1.6
- Carbohydrates: 7.1
- Fiber: 0.4
- Protein: 0.8
- Cholesterol: 10
Save it to Pinterest for later!

Try Bakabee’s other recipes
- Coffee Almond cookies 2 ways (step by step tutorial)
- Banana Chocolate Chip Muffins (Gluten Free & Refined Sugar Free) (step by step tutorial)
- Dark Deluxe Brownies with Sea Salt Flakes (step by step tutorial)
Let me know if you have any questions, leave them in the comment box below. I appreciate your feedback very much and if you make this recipe, please come back and rate it as it also helps other readers to decide to make it or not. Thank you! Happy baking!
Share this!

