Share this!
Chinese turnip cake is a perfect dim sum or an appetiser for family gathering during Chinese New Year. No Chinese New Year celebration is completed without it. After reading my post, I am sure you can master this fabulous heritage of Chinese cuisine, Chinese Turnip cake, Lo Bak Go recipe.
Chinese New Year, also known as Lunar New year or Spring Festival. It is the MOST important festival in China and parts of SouthEast Asia. It’s when family members get together and celebrate the beginning of a new year together.
Chinese New Year food
Food plays a very important role at this festival. There are seven lucky foods that Chinese people believe bring luck throughout the whole year. They not only have their own symbolic meaning but from my point of view they are also very tasty. I wouldn’t mind eating them everyday. These are the foods and their meaning:
- Fish – for greater prosperity
- Dumplings – for a lot of wealth
- Good Fortune fruit – for good luck and happiness
- Spring rolls – for a lot of gold
- Nian Go (Chinese New Year cakes) – for attaining higher position and increasing prosperity
- Noodles – for longevity
- Sweet rice balls – for family togetherness
Chinese New Year cakes (Nian Go)
The word ‘cake’ means ‘糕’ in Chinese which share the similar pronunciation of the Chinese word ‘高’ which means ‘tall’. It symbolises Chinese New Year cakes, Nian Go is reputed to bring them a higher position or to increase prosperity in all aspects in their life throughout the year ahead.
Lunar New Year is a time for family and friends to visit each other to express good wishes, bring gifts and red pockets for a Happy New Year. So, apart from sweets, it also symbolises wishing a happy life and serving the many expected visitors Nian Go is also a perfect choice because the cakes will be cut into slices, like a small bite of dim sum. This means that each cake goes a long way and it’s why Nian Go is a MUST-have snack. There are different sorts of cake but here I want to focus on my favourite one – Turnip cake, known as Lo Bak Go.
Chinese Turnip cakes
Chinese people make their food in harmony with the seasons – a very wise thing to do! Turnips (or radishes – see my explanation below) are at their best to harvest in the late Autumn – meaning they are always in good supply for the Lunar New Year. It’s just the perfect time to integrate this seasonal ingredient into dim sum dishes.
The cooked turnips taste mellow and sweet and the tender texture can be mixed with a few simple staple ingredients which you can easily find in most Chinese kitchens. That’s why Turnip cake is one of the most popular Nian Go (cakes) during this festival.
My favourite dim sum
Whenever I go for dim sum in a Chinese restaurant, a plate of Lo Bak Go is often on the list, even though I know how to make it myself and I do love my own version of it that I’m about to share.
When I was young, I would grab every chance to put this incredible savoury dim sum in my mouth and I just fell in love with the taste and its association with the Lunar New Year traditions. It’s ‘A’ list comfort food. I love it!
If you follow my step by step guide here, I’m sure you will find out exactly what I mean. Let me know if you do!
Alright, let’s start.
Watch my video tutorial instead
What equipment I use
Using the right equipment will definitely make the whole cooking process a lot smoother, easier and faster. However, if you don’t have any of the following equipment or utensils, you still can produce something very delicious.
I think that the KitchenAid attachments are genius inventions. They turn my stand mixer into a multi-functional machine. Additionally, I also recommend the meat grinder, it’s super useful.
When I discovered this attachment, my first thought was it can grate my turnips ten times faster than a hand held one. It was obviously my husband’s job before so he was really supportive of the purchase. It’s fast and efficient, and I have no complaints at all (I couldn’t say either of these things about my husband 🙂)

Pro tip: if you use a hand held one, please make sure don’t chop the green sprout away because it’s the part of the turnip that you can hold onto when you grate right to the end.
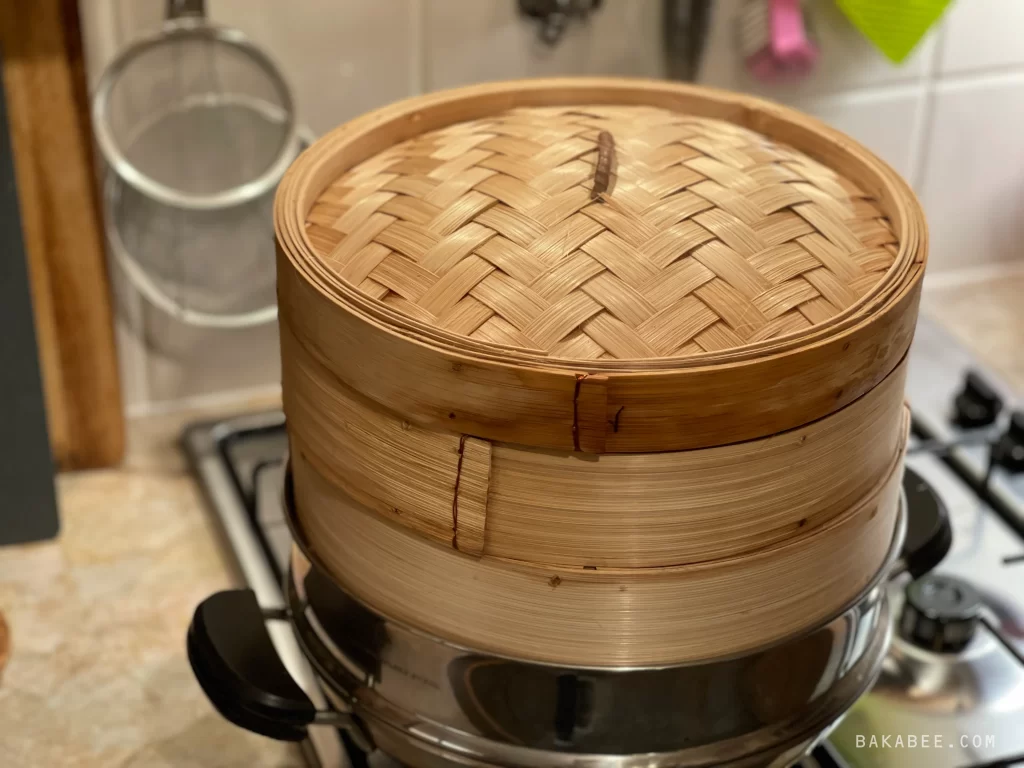
- Bamboo steamers
I like using these to steam my turnip cakes because they are stackable. That means I can steam more than one cake at a time. Also, the bamboo lids are tightly woven which keeps the steam from escaping. I think it’s also more effective because bamboo absorbs and disperses some of the excess moisture while cooking, rather than allowing the steam to re-condense into water and drip back onto the cakes (which can make them soggy).
What ingredients you’ll need
I like to keep it simple because the stars of the show here are the turnips. I don’t want to add too many ingredients to dilute their natural sweetness.
There are only FOUR ingredients in my Chinese turnip cake recipe and you can easily find them in any Chinese grocery store or any Asian section in a supermarket.
However, we need to get something straight here. Turnip cake is not made with European style round turnips. In fact in Singapore this cake is called ‘Carrot Cake’ which is doubly confusing because it’s not made with carrots either. What we actually use are Chinese white radishes which are also called daikon in Japan. The ‘carrot’ name comes from the colloquial name ‘white carrot’ which really just describes their carrot shape – obviously in Singapore this name stuck but in Hong Kong, this beloved dish is called Turnip Cake and that’s what we’re sticking with. Radish Cake just wouldn’t cut it…
Four simple ingredients are:
- Turnips – the heavier the better and make sure there is a green sprout on top. It means they are fresh.
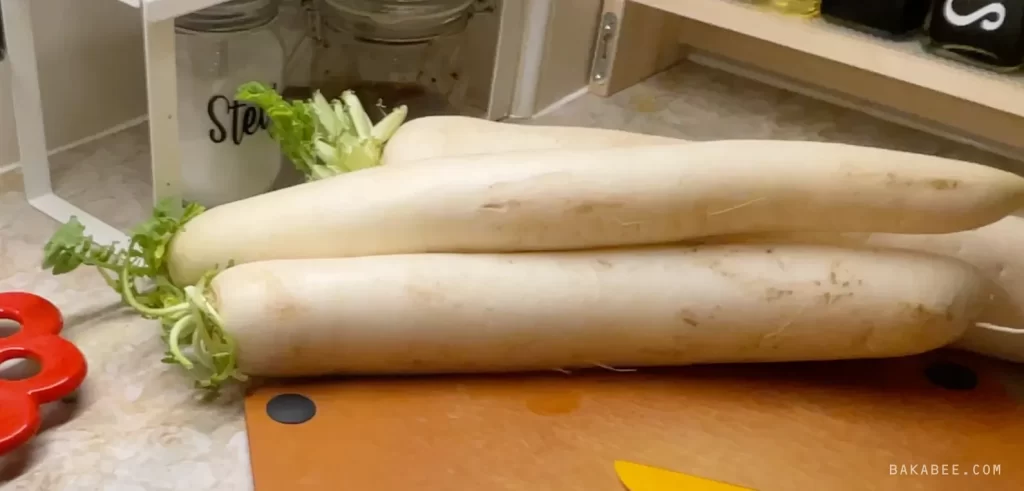
Pro tip: choose the heaviest turnips you can find – the heavier they are, the more moisture they hold – this is just what we want.
- Chinese style pork sausages – I only use Chinese sausages in this recipe because I don’t like my turnip cake to be too complicated in terms of its taste. Every mouthful mixes the sweetness from the turnips with the saltiness from the Chinese style sausages. Mmmm … yum!
Pro tip: You can add other Chinese dried ingredients, like pork belly, shrimps or shiitake mushrooms to layer the flavour if you prefer. However, you will need to steam the pork belly first for easier cutting and soak the dried shrimps and shiitake mushrooms before you use them. Make the cake the way you like it – that’s what I do!
- Rice flour – I always use Erawan Rice flour although there’s no particular reason for this. It’s because wherever or whenever I buy rice flour in any Chinese grocery store or supermarket, I always choose this one. I confess I’ve never tried any other brand so I don’t know the different performance. It seems it’s the go-to brand of rice flour for me. If you try something different and it works please tell me!!
- White sesame seeds – the sesame seeds have to be toasted in order to release their unique nutty flavour. I list ½ to 1 cup in the recipe. Let me be honest with you, my husband and I like them a LOT! We’re sesame addicts. So, if you like toasted white sesame seeds as much as we do, don’t be shy! Add as many as you want! 😄
Prepare the Chinese sausages
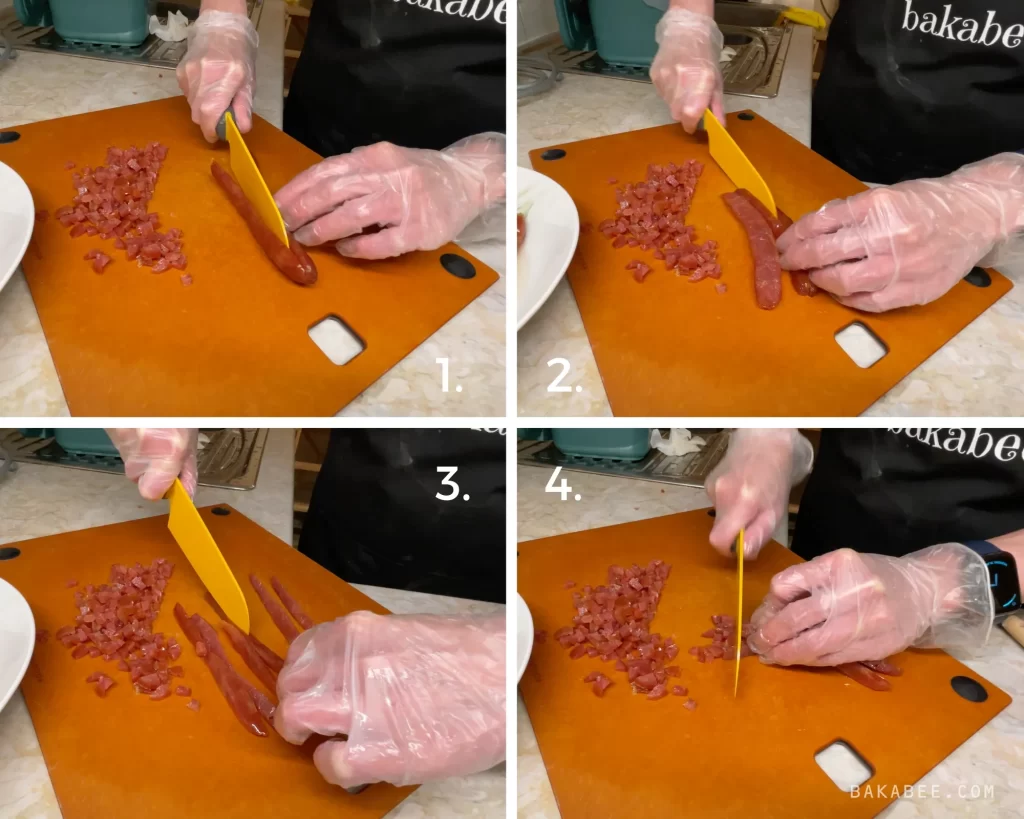
Mostly you’ll find the Chinese sausages are dried and the texture is quite solid. It’s quite hard to cut them into small cubes or to dice them. So, follow my steps here to help you prepare them in an easy and effective way.
- Prepare a wok of boiling water and place the steamer on top.
- Unpack the Chinese sausages and place them on a heat-proof plate. Steam them for about 10 to 15 minutes to soften them. This also lets them release some of their oil content during the steaming process so it makes for a healthier end product.
- After 15 minutes, set them aside to cool down.
How to cut the Chinese sausages in a safe way
My main concern here is that the sausages’ skins are oily and slippery so it’s quite a challenge to hold them tightly when we try to cut them because they tend to slide around.
We need to dice the sausages very small, by this I mean as small as we can, so that they blend beautifully into the cakes. As a result, we will have neat slices when we cut the cake with the sausages evenly distributed.
You can watch my video tutorial to see this step in action.
Prepare and cook the Chinese Turnips (white radish)
- First, peel the turnips. If you find some parts of the skin are quite thick or dry, especially at the top and at the end, just peel deeper until you see the juicy part.
- Prepare a big cooking pot (try to position it so that you can grate / shred the turnips straight into it, this can save you one step of scooping the shredded turnips into the pot after shredding).
- Cut the turnips into strips if you use the KitchenAid slicer / shredder attachment like I do. However, you can omit this step if you use a hand held grater.
- Chop around 40 g of Chinese brown sugar into small pieces and add into the cooking turnips. The brown sugar balances any bitterness from the turnips.
- Close the lid and cook the turnips until they turn translucent. It takes around 35 to 40 minutes to cook through the turnips. Keep checking and stirring them once every 8 to 10 minutes to make sure each bit of turnip is well cooked.
- Pour in the chopped sausages and mix them well with a spatula so that the sausages are well disturbed.
- Turn the medium low heat on to gently heat up the mixture again to make it easier to mix in the flour in the next step.
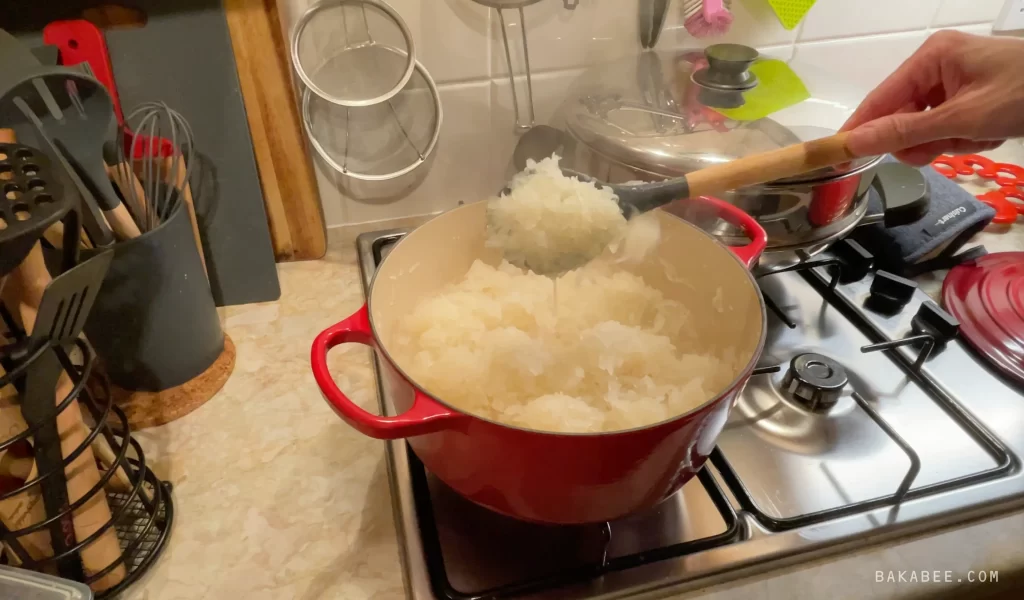
Pro tip: You do not need to add any water into the turnips as they will release their natural water during the cooking process. That’s why the heavier turnips are better.
Mix with the flour
The amount of flour is the most critical to the success of the turnip cake. The right consistency of the mixture will be very succulent and tender to bite into but we should still be able to pick up the slices with our chopsticks.
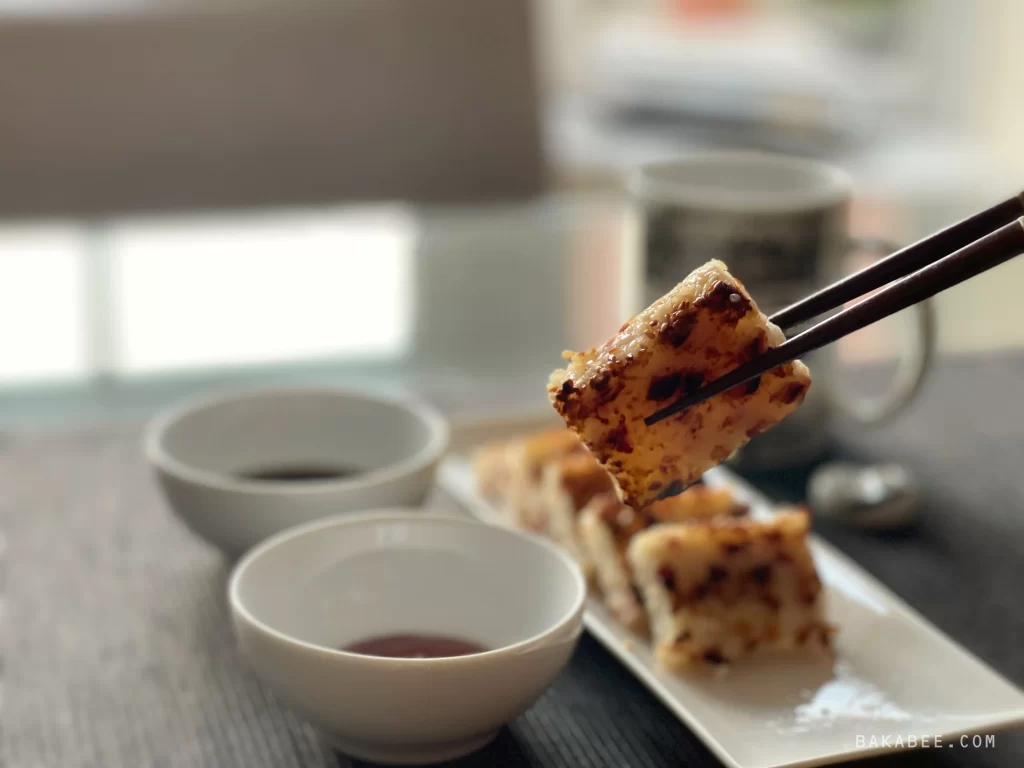
Too much flour … we will end up with a very stiff cake … 🙁
Not enough flour … we will have a soft or even a mushy cake … 🙁
These are both situations that we don’t want after all the grating and chopping, right?
So, we have to get the RIGHT consistency!
Unfortunately, the water content of each turnip is different. Honestly, it’s hard to tell the exact amount of flour that you’ll need to achieve the perfect consistency.
From my experience, the ratio of 3,600g of turnips to around 400 g of rice flour will get me to the right consistency. If you’re a maths person (I’m definitely not), the ratio of turnip : flour is 9:1.
My rule of thumb is to sift in the flour little by little. Do NOT add all 400 g rice flour all at once and check the consistency along the mixing process. You can check out my video tutorial in detail.
Pro tip: the consistency we are aiming for is that it is hard to mix, requiring some effort to stir the mixture but with a bit of effort, it will still move. If you can’t move it at all, it’s too thick. If it’s in the right shape, when you scoop the mixture, it will fall from the spatula back into the bowl.
Containers for steaming the cakes
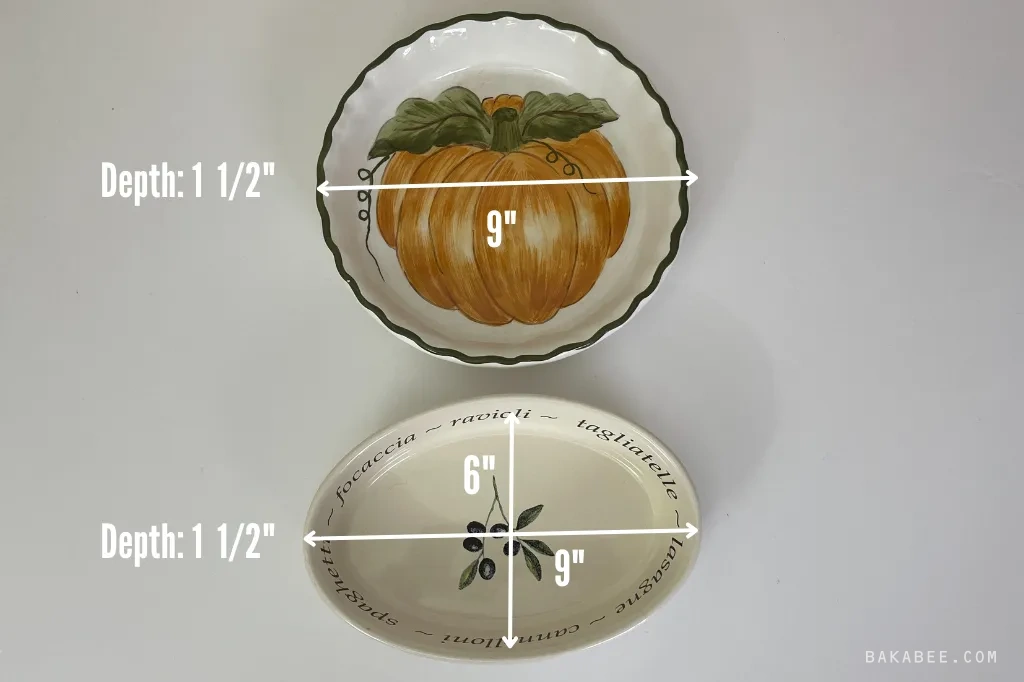
You probably have different shapes and sizes of pie dishes sitting around in your kitchen cupboard. Here’s the chance to use them. These containers are perfect for this recipe.
Why?
- They’re heat proof.
- They’re non-stick, avoiding the need to grease the containers with extra oil.
- They’re environmentally friendly, you can use them over and over again.
However, if you’re going to send the cakes over to neighbours, friends or family, the most common way is to use these aluminium foil containers. They are lightweight, easy to find online and you don’t lose your pie dishes!
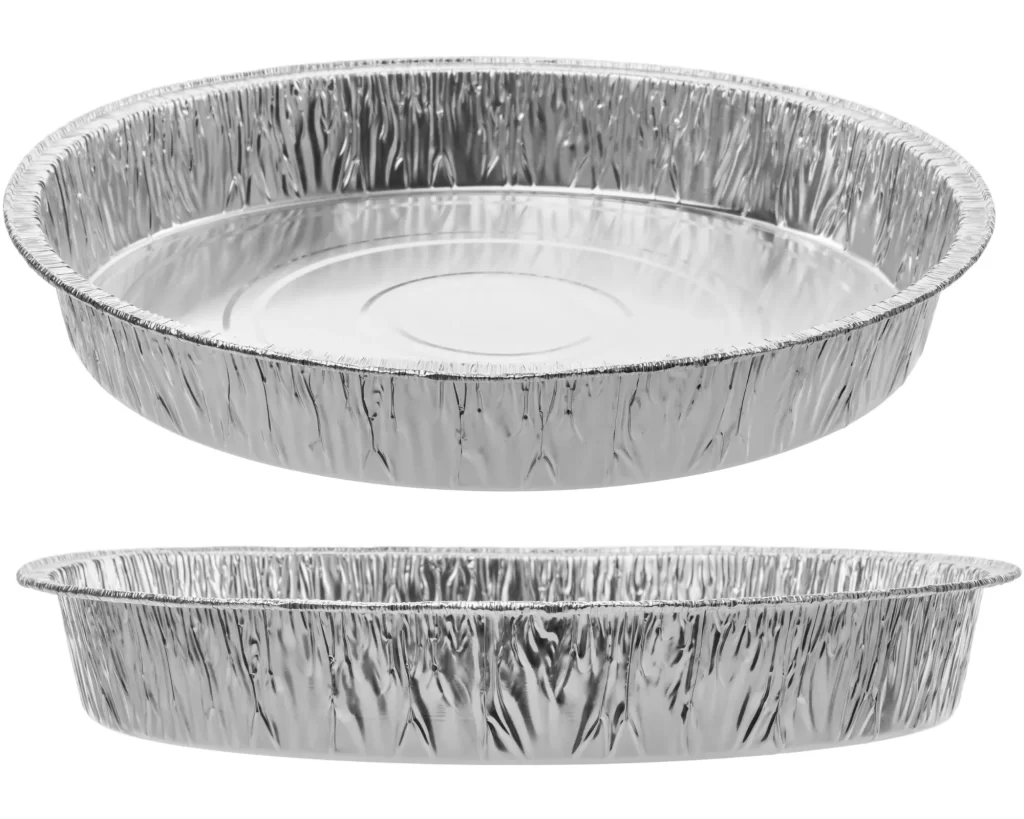
But if you make this choice, remember to oil the containers before you put the batter in, to prevent it from sticking, unless you’re sure they are non-stick. Otherwise, it will be difficult to remove the cakes from the containers.
Regardless of the height of your pie dishes, pack in the mixture to a depth of approximately 4 cm.
Steam the turnip cakes
It’s important that you have enough boiling HOT water in the wok under the bamboo steamers so that you can start the steaming process straight away and control the steaming time precisely.
I set up my three-layer bamboo steamers on top of my wok, so that I can steam my cakes all at once: 3 cakes in just 45 minutes. How efficient is that! 👍 to my bamboo steamers!
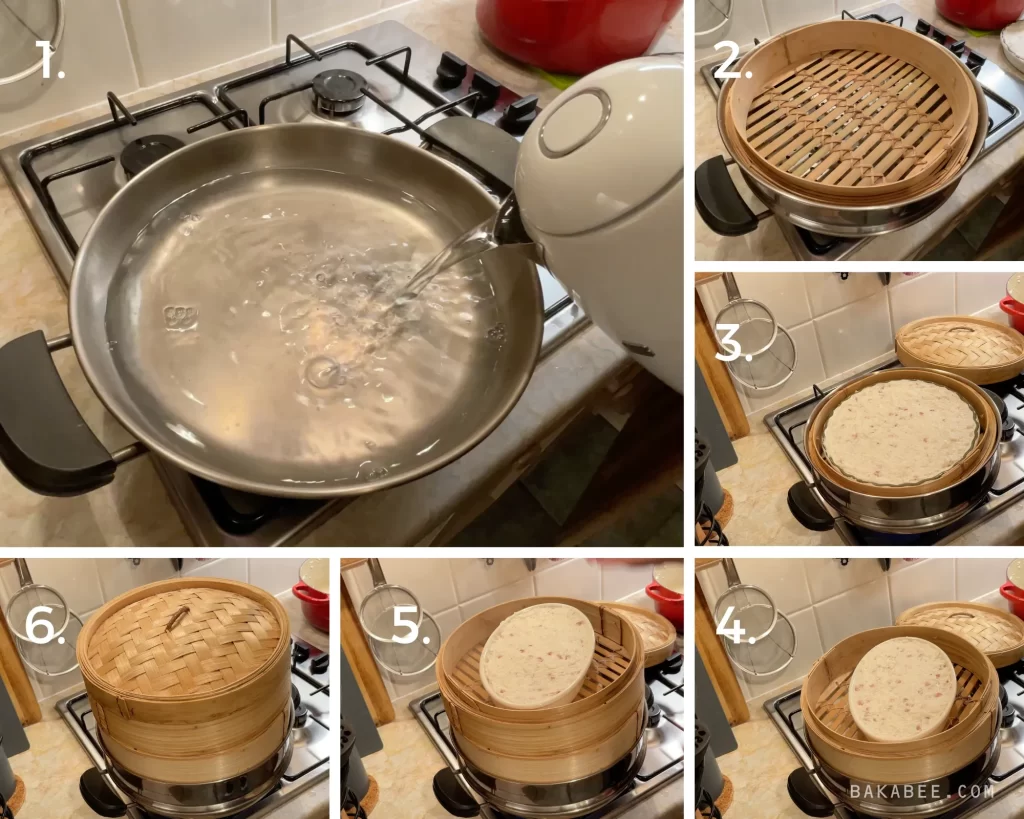
It depends on the thickness of your cakes but there is no harm to steam them for a bit longer if you’re not so sure if they are done.
I recommend that you have at least two steamers on hand. It can really help to reduce the time of the steaming process.
Once the cakes are done, remove them from the steamers and place them on heat proof mats to avoid damaging your worktop, always be careful!
Secret ingredient for my Chinese turnip cakes
It’s time for my ultimate loving ingredient – toasted white sesame seeds. I like toasting them myself in a cast iron pan at medium low heat until they release their natural oil and that unique nutty flavour. When they turn golden brown and start popping around in the pan, turn off the heat and cool them on a sheet of foil.
If you want to save yourself some time, you can use store-bought seeds. Of course you’ll miss that amazing smell in the kitchen – I like making everything from scratch myself, a little bit of a perfectionist …
When the cakes still have a layer of moisture on the surface of the cake, is the best time to sprinkle the toasted white sesame seeds. You’ll instantly smell the nutty flavour from the toasted sesame seeds rising up from the steam…mmmm … this is a moment of joy in its own right but also the moisture also helps the sesame seeds stick better onto the cakes.
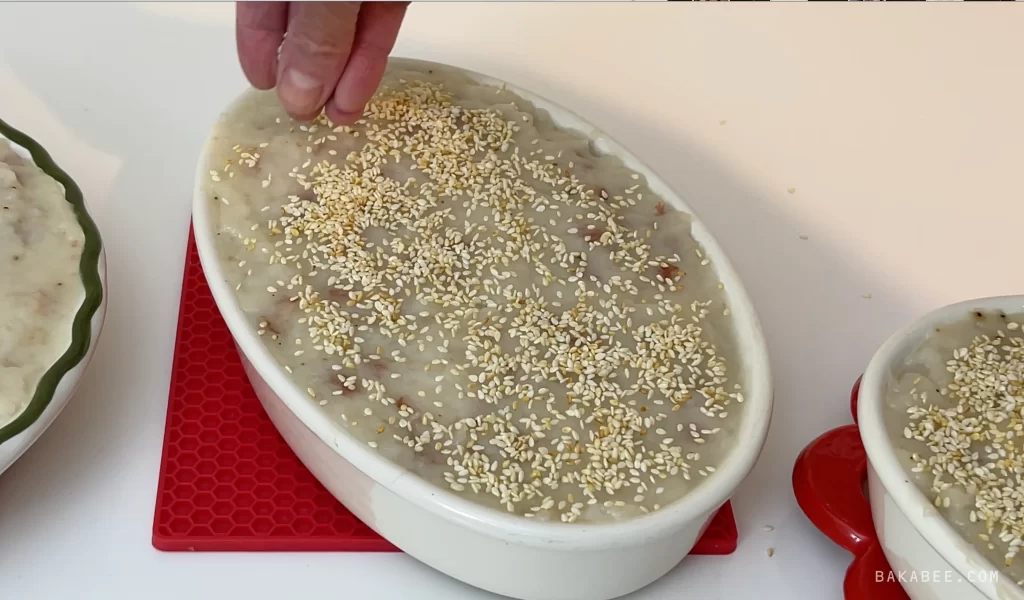
I’ve said ½ to 1 cup of toasted white sesame seeds but honestly, you can sprinkle as much as you want. I really like this finishing touch a LOT! 😄
Rest the cakes
Resting the cakes overnight in the fridge is very important. You will be amazed how much the texture changes in this time. Only after resting are they ready to eat.
You can check out my video tutorial to see how the texture of the cakes changes so completely.
The temptation was so great … the smell of the steamed cakes was so irresistible, that we couldn’t actually wait when we were making the video … it was slightly naughty but it did allow me to show the contrasting textures before and after resting and the taste was already FAN-TA-TIC!!! However, in this case, do what I say, not what I did – resting makes them twice as good to eat.
You have to WAIT!!! The texture of the just-steamed turnip cakes is still too soft and it’s impossible to slice them yet. Certainly, it’s way too soon to pan-fry them, which is the most delicious way to enjoy this dim sum. So, once again: PLEASE WAIT 🙂
Once the cakes have cooled, wrap them well using cling film and place them in the fridge overnight.
How to slice the cakes
The most common and delicious way to serve this wonderful dim sum is to pan fry them with a little bit of oil in a non-stick frying pan.
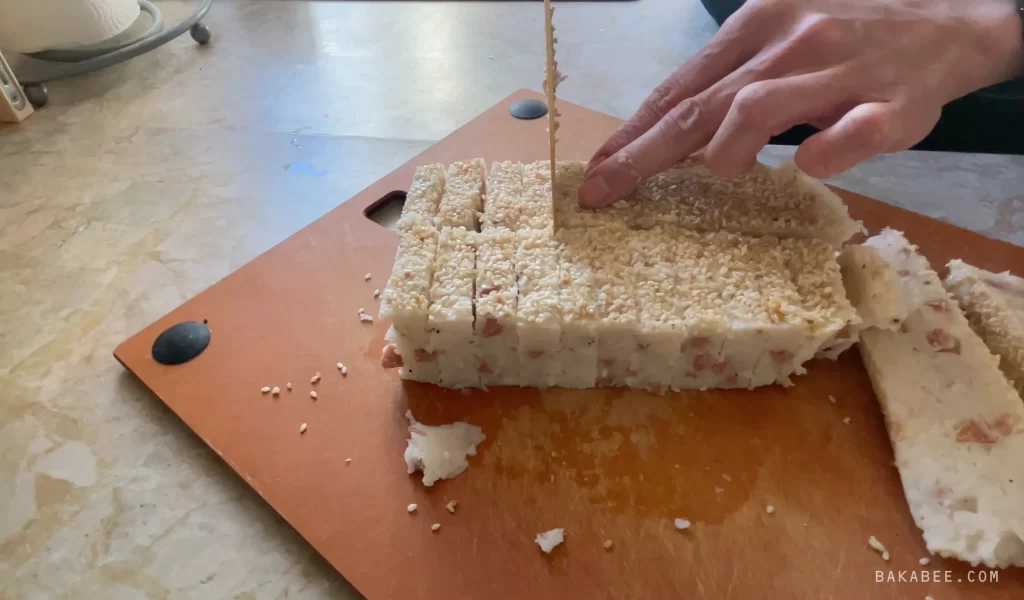
First we need to slice the cakes (which we have made to a depth of about 4 cm) into approximately 1 cm thick rectangular pieces. This is a rough guide, it depends on your personal preference. I like each slice not too thick and not too thin, not too big or not too small, just the right portion! Generally, I end up with a rectangular slice which is 1 cm thick and about 4 cm x 5 cm – nothing scientific about this, cut the size and shape you want but remember we are going to pan fry them.
Traditionally, dim sum is a small, bite-size portion. You might polish off a slice of this cake in 2 or 3 mouthfuls, dipping into an accompanying sauce for each bite. This is the spirit of Chinese dim sum.
How to serve Chinese turnip cakes
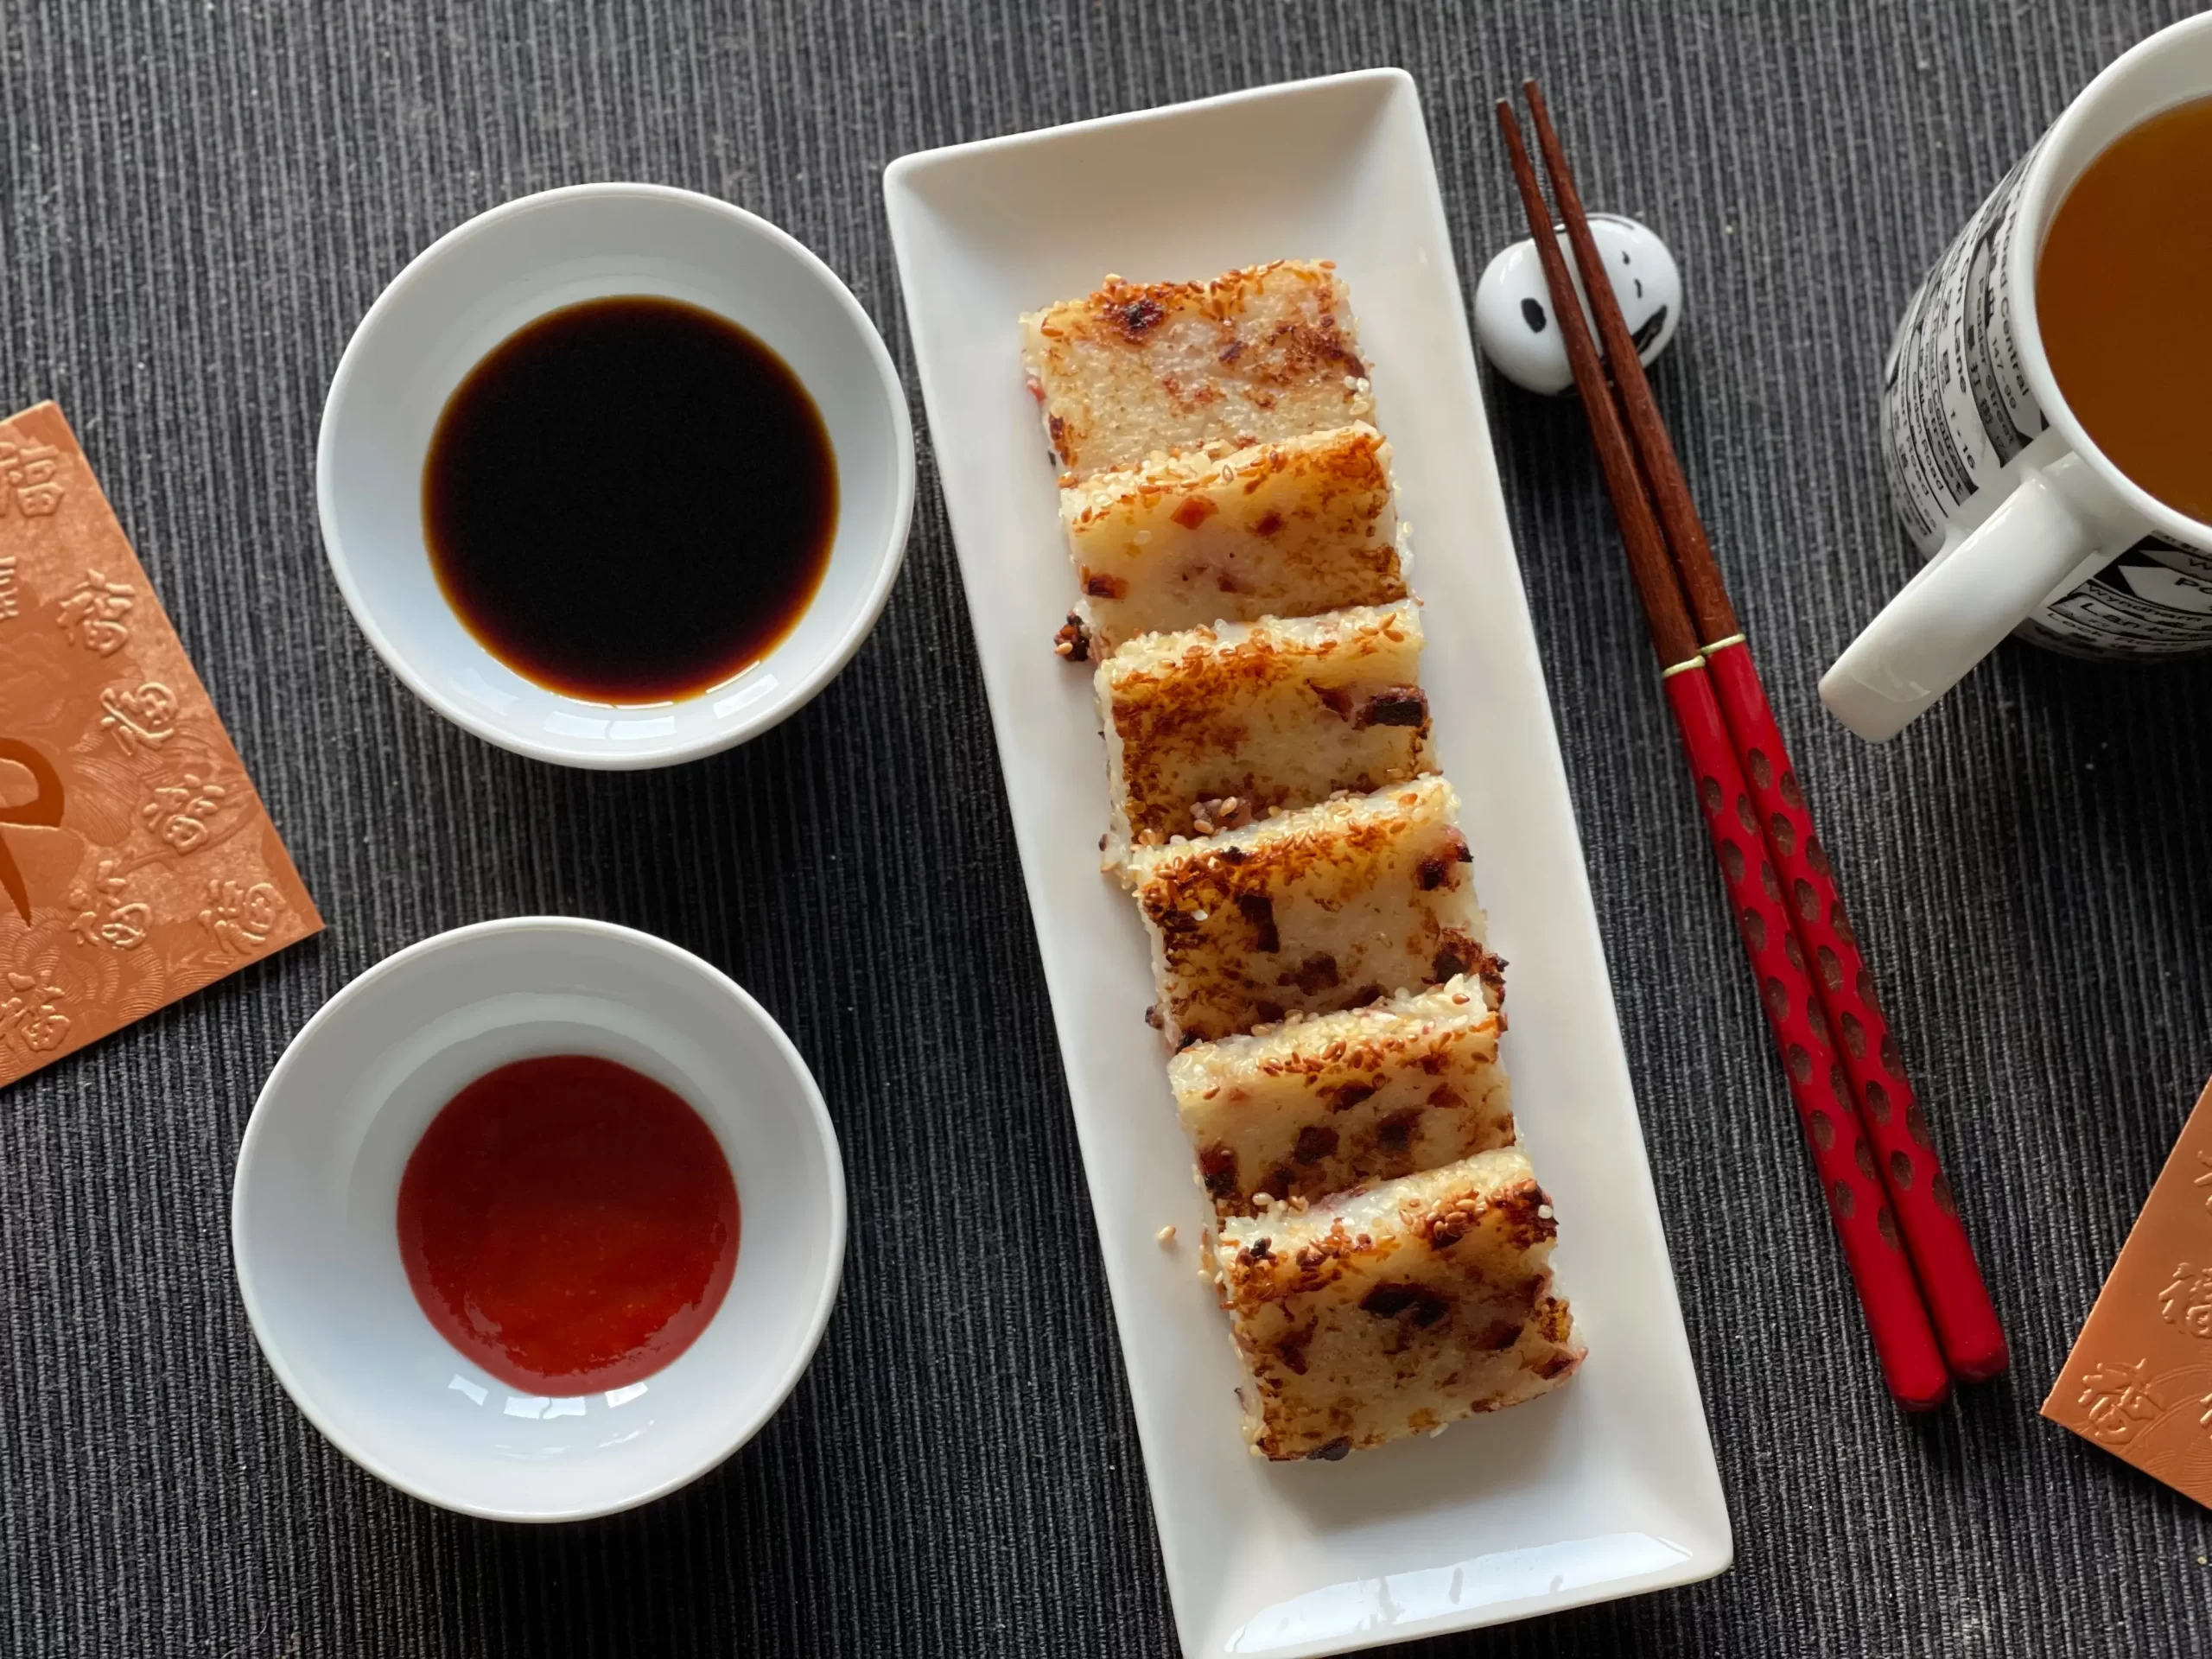
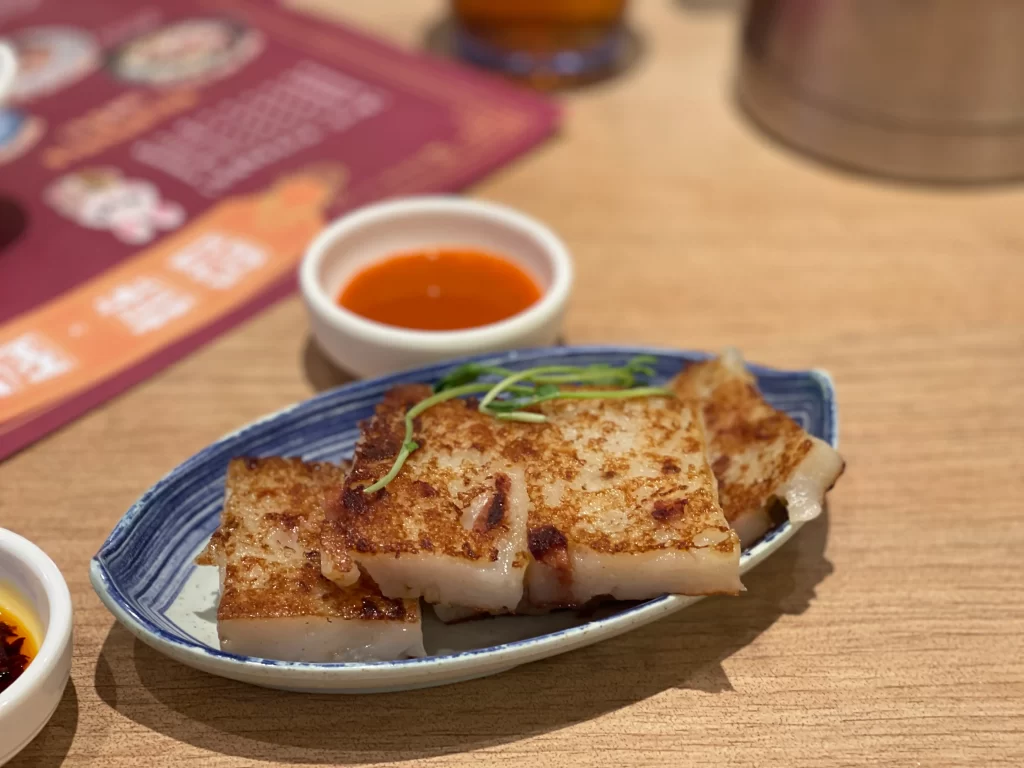
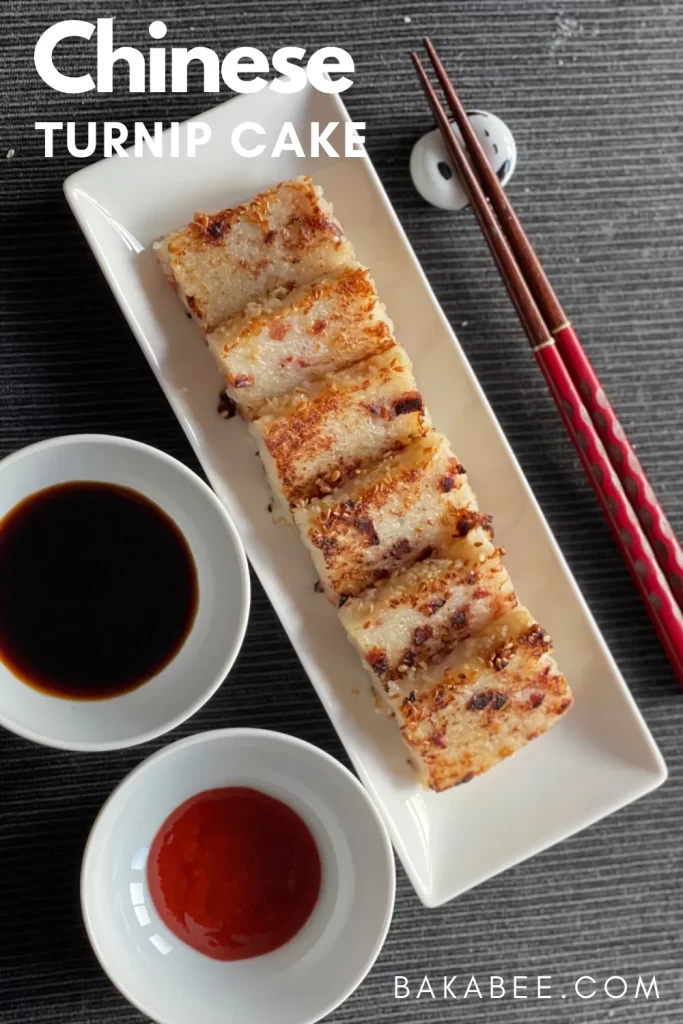
The best and the most delicious way to serve the turnip cakes is to pan fry them with a little bit of your favourite oil in a non-stick frying pan at medium heat. Pan-fry each side for around 2 to 3 minutes until it turns golden brown and has an irresistible crispy finish. My mouth is watering thinking about this.
Prepare a pretty serving plate, always eat with your eyes first.
Place the warm slices onto the dish and serve with my two favourites: soy sauce and chilli sauce. Simple food brings me such joy and happiness. 😚
How to store the turnip cakes
I like storing the sliced turnip cakes in the freezer using really helpful fridge / freezer storage boxes which I bought online. They are stackable and save me sooo much space, both in my fridge and my freezer.
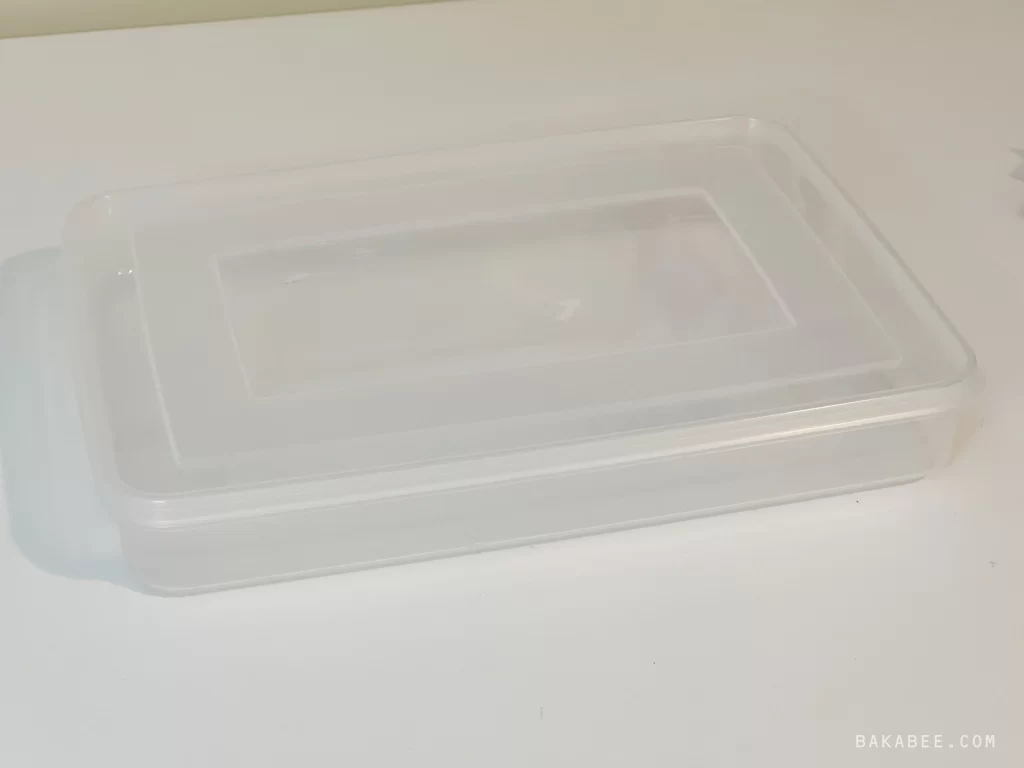
I use them to store my meat as well. Whenever I need to defrost some meat from the freezer, I just need to transfer the box from the freezer to the fridge. No more hassle to take the meat out from one storage box to another to defrost it. These boxes were definitely a game changer for me! I highly recommend them.
Alright, I have the storage boxes … I have the cakes…
Now, I just need to pack the cakes well into the boxes and store them in the freezer. Surprisingly, each box can hold almost 1 ½ batches of my turnip cakes. Great capacity!!!
The cakes can be kept in the freezer for up to a month but believe me, they never last that long in our house! Hahaha …
Save it to Pinterest for later
FAQs for Chinese turnip cakes
- Can I make a smaller batch?
Yes, you can. Just adjust the amount of the ingredients proportionally. For example, 900 g turnips to 100 g rice flour.
- How long can I keep the steamed turnip cakes in the fridge?
They can be kept in airtight containers for up to a week. If you can’t finish all the cakes, I recommend that you store them in the freezer instead.
- Do I need to defrost them in advance?
No, you don’t. You can take them out straight from the freezer and pan-fry them at medium low heat to semi-defrost them in the frying pan first, then turn up to medium heat to pan-fry them until they have the crispy tops and bottoms.
- Can I re-heat the cake by steaming them?
Yes, you can. This is also another way to serve in Chinese dim sum restaurants. Often, they will serve the steamed turnip cake with soy sauce drizzled on top.
I really hope you like this recipe and will give it a try. Let me know by leaving a comment and rating it, I’d love to hear what you think!
Print
Chinese Turnip Cake (Lo Bak Go)
- Prep Time: 1 hour
- Cook Time: 45 minutes
- Total Time: 25 hours 45 minutes
- Yield: 8 1x
- Category: appetizer, snacks
- Cuisine: Chinese
Description
Learn how to make this sweet and succulent savoury sensation – it couldn't be more simple with just four simple basic ingredients and a huge wallop of flavour. Taste those salty Chinese sausages, diced so small that there is a salty sweetness in every mouthful; salivate over those crispy pan fried cakes, sizzling in the pan; contain yourself in the rush to grab your chopsticks and dip your cakes into soy and chilli sauce.
Ingredients
- 3600 g Chinese white radish (turnips)
- 400 g rice flour
- 8 Chinese pork sausages (often sold as 4 linked pairs)
- 1/2 – 1 cup white sesame seeds (toasted)
- 40 g Chinese brown sugar
Instructions
Prepare the Chinese pork sausages
- Prepare a wok with boiling water. Place the pork sausages onto a plate and steam them for about 10 to 15 minutes or until they are softened.
- Remove them from the steamers and let them cool down until they are warm to the touch.
- Cut each sausage in half using a sharp knife.
- Cut each half into thin strips. Line the strips up and cut them (dice them) into very small pieces.
- Place the diced sausages into a bowl. Set it aside.
Prepare the Chinese white radishes (turnips)
- Wash the turnips and peel the skin off.
- Chop each turnip into three big pieces. Cut each chunk into thick pieces. Then cut each piece into strips.
- Attach KitchenAid vegetable slicer / shredder onto the stand mixer and place a big pot underneath the shredder to catch the shredder turnips.
- Turn the mixer on to the medium high speed and start to grate the turnips.
- When you finish grating all the turnips, place the pot onto the stove and close the lid.
- Cook the turnips at medium heat. Do not add any water to the turnips while cooking as they will release their natural water.
- Chop the Chinese brown sugar block into very small pieces and add them into the turnips.
- Stir and check the turnips once every 8 to 10 minutes to make sure every bit of turnips is well cooked.
- Cook the turnips until they become translucent, it takes around 35 to 40 minutes.
- Turn the heat down to medium low heat and add in the Chinese sausage pieces and mix in well until the pieces are evenly distributed. Then turn off the heat.
Assemble and steam the cakes
- Remove the turnip batter from the heat.
- Place a sieve on top of the pot and sift in the flour a little bit at a time.
- Mix in the flour using a spatula with a wooden handle.
- Stir until flour is integrated then continue to add a little bit of flour at a time and stir in.
- Continue this process until you find it is slightly hard to stir but you still can move the batter. To test if the batter is the right consistency, scoop the batter and it should still fall off from the spatula but is not runny.
- Prepare some pie dishes, evenly distributing the batter into them to a depth of around 4 cm (1 ½ inch). Use an offset spatula to level them up to make them look tidy and neat.
- Prepare a wok with boiling water, get the bamboo steamers ready.
- Place each pie dish inside the steamer, stacking them up, if you have the capacity (I have 3 bamboo steamers so I can steam all 3 cakes at once.)
- Steam the cakes for about 45 to 50 minutes. Check the level of boiling water half way to make sure there is enough boiling water in the wok. If not, boil some more in a kettle and add it in.
- When cakes are cooked ( a little extra time won't hurt if not sure), remove them from the steamers and place them on heat proof mats.
- Sprinkle toasted white sesame seeds on top of each steamed turnip cake ( as many as you want).
- Use an offset spatula to press down the sesame seeds so that they will stick better onto the cake.
- Let the cakes cool down completely and wrap them well. Place them in the fridge to set overnight.
Slice and serve the cakes
- Take the set cakes out from the fridge and unwrap them.
- Slice the cakes into 1 cm thick strips, giving you a cake slice that is 1 cm thick and approximately 4 cm x 5 cm in dimension (adjust to preference).
- Get a non-stick frying pan and turn to medium heat with a thin layer of your favourite oil.
- Pan-fry the slices for about 2 to 3 minutes on each side or until they turn golden brown with crispy surfaces.
- Place them on a serving plate, serve with soy sauce and chilli sauce. Enjoy!
Notes
- Watch my video tutorial to see the process in motion.
- You will lose some turnips after peeling and grating. It is better to buy some extra.
- You can add / replace other Chinese dry goods to suit your taste, such as dried pork belly, dried shiitake mushrooms.
- When pan frying from frozen (no need to defrost), can partially defrost for a minute in the an on a low/medium heat before turning up to medium heat to pan fry them around 3 minutes per side.
- Store the cakes in the freezer for up to a month.
Nutrition
- Calories: 325
- Sugar: 5
- Sodium: 56
- Fat: 11.2
- Saturated Fat: 2
- Carbohydrates: 51.4
- Fiber: 4.6
- Protein: 7.8
- Cholesterol: 5
More tasty recipes for you
- Black Sesame Chiffon Cake – if you like white sesame seeds, try this one!
- Pandan Chiffon Cake – Singapore delight!
- Pandan Coconut Lamingtons – fusion twists, you’d love it!
Keep cooking! 😉
Share this!

