What is chiffon cake?
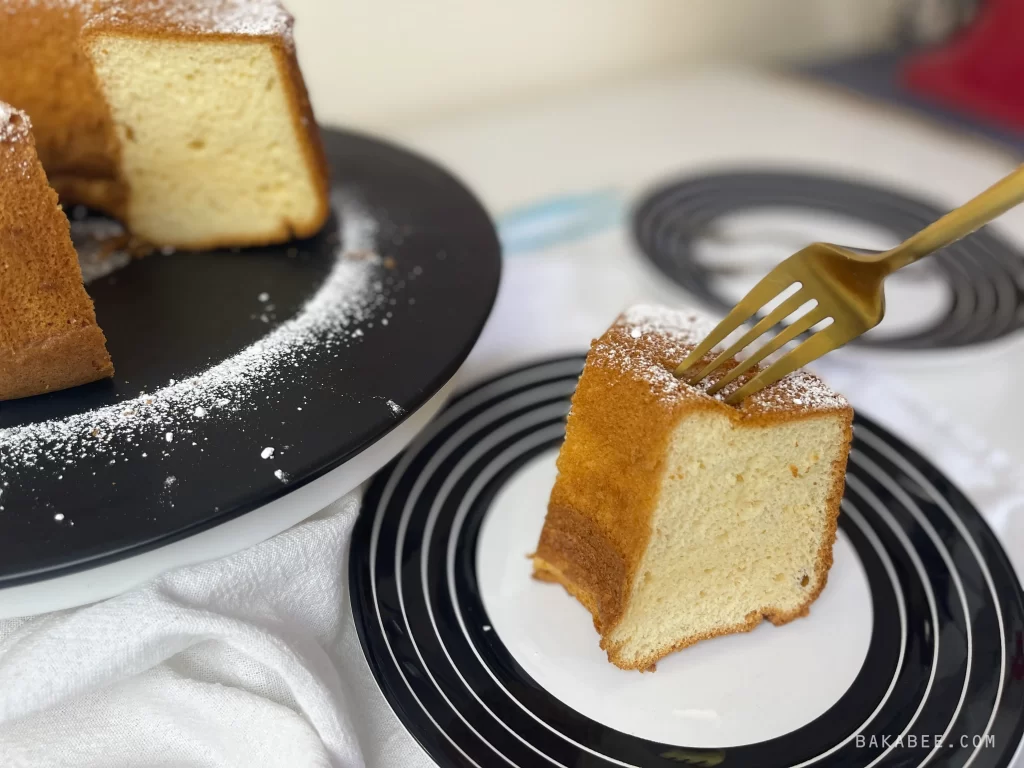
It is pronounced as SHE-fon cake. A chiffon cake is a very light, fluffy and airy cake with a spongy texture. Its ingredients are as simple as eggs, oil, sugar, flour and baking powder and flavourings, which most bakers’ cupboards have.
A chiffon cake needs to be baked in a specific chiffon tube pan which allows the cake to cling along the sides and the funnel to rise to its ideal height.
In this post, I’m going to share with you the classic chiffon cake recipe, VANILLA CHIFFON CAKE. It is truly a masterpiece of baking – a delicate and airy creation that captures the essence of simplicity and sophistication.
A little fun background
Chiffon cake originated in 1927, created by an American insurance agent, Harry Baker. Mr Baker (great name) came up with an idea for a cake that was lighter and more airy than an angel food cake whilst having more flavour than a sponge cake. So he replaced the creaming butter method with vegetable oil and whipped the egg whites in a way that they would puff up in the oven. He kept this recipe a secret for over 20 years but in 1947, he agreed to sell the recipe to General Mills (from seattletimes.com).
What makes a perfect chiffon cake?
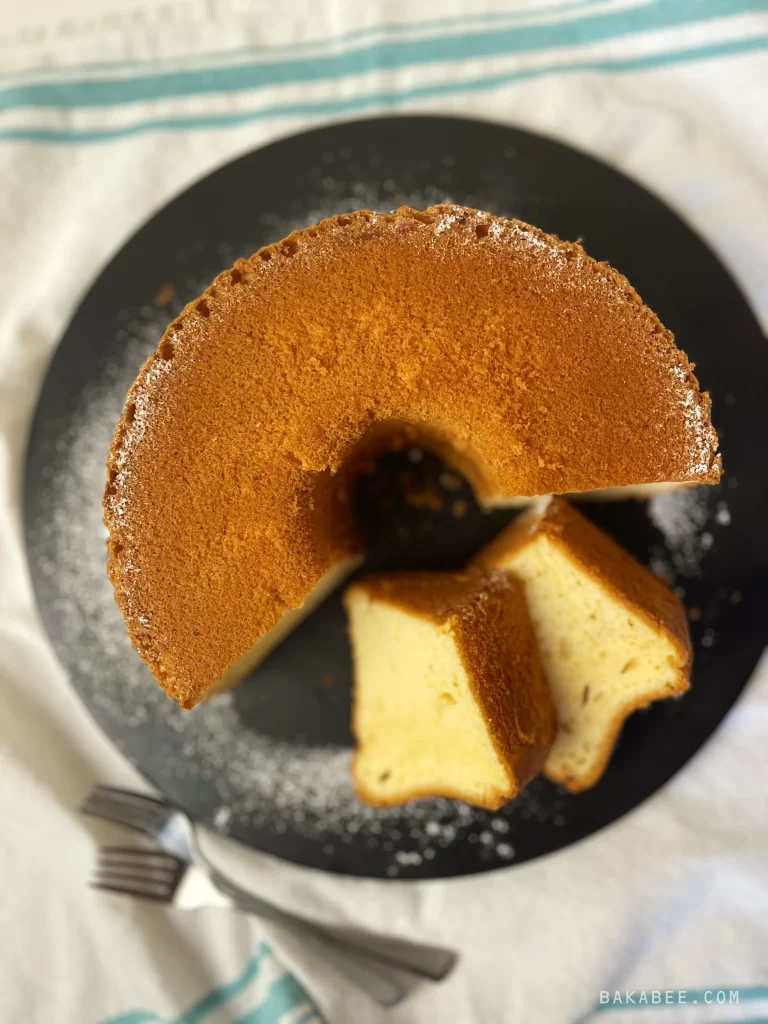
A perfect chiffon cake has a delicate texture. Not dense at all! Here are some essentials features:
- It rises properly in its cake pan while baking
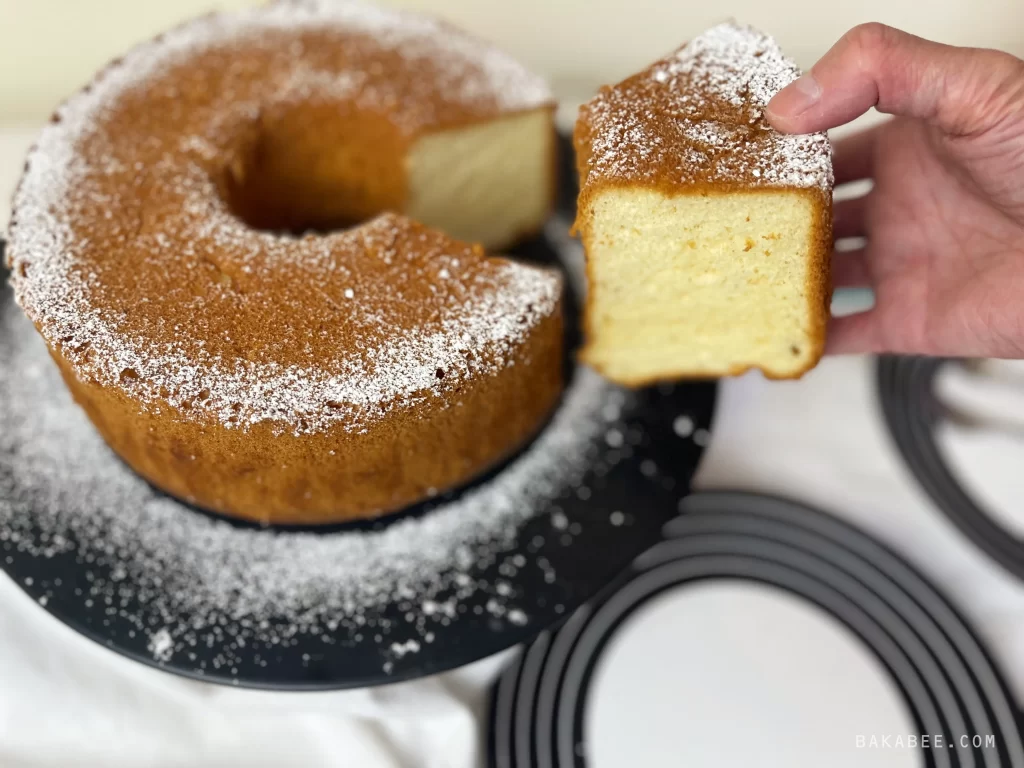
- The texture is airy, fluffy, spongy, moist and soft
- No big holes or air pockets inside the cake
- No shrinking when cools after being removed from the pan
What ingredients do you need to achieve this signature texture?
- Cake flour – which has a lower protein content than all-purpose flour. This results in less gluten formation when mixed, leading to a softer and more tender texture.
- Eggs – play a very important role. They need to be separated carefully. Then mix the egg yolks with sugar and beat them until pale in colour and thick in texture. The egg whites need to be whisked until a stiff peak forms. Both help to achieve the airy, light texture.
- Vegetable oil – any neutral oil is fine. It adds moisture to the cake and creates a tender texture.
- Liquids (water / milk / juice) – provide moisture and hydration of the dry ingredients, enhancing the taste. Milk provides a mild richness and a more velvety texture, citrus juice adds a refreshing and tangy flavour and water encourages a lighter and fluffier texture.
- Caster sugar – always use caster sugar instead of granulated. It dissolves more easily when incorporated into the egg whites. This is important because you want the sugar to dissolve fully to avoid a grainy texture in the beaten egg whites.
- Vanilla extract – adds a delightful aroma and flavour to the cake. Remember to use a high or premium quality extract, especially for this basic VANILLA CHIFFON CAKE. DO NOT use vanilla essence, which is synthetic. This choice will significantly affect the taste of the cake.
- Cream of tartar – adds acidity. When added to egg whites, this helps stabilise the protein structure. Also, it helps prevent over-whisking of the egg whites. If you don’t have any to hand, you can always replace it with lemon juice or white vinegar.
- Salt – never add too much, typically around ¼ to ½ teaspoon. The purpose is primarily to enhance flavour and provide a subtle balance.
- Baking powder – is not typically used in chiffon cake recipes. However, some may include a small amount of baking powder for additional leavening.
What cake pans do we use for chiffon cakes?
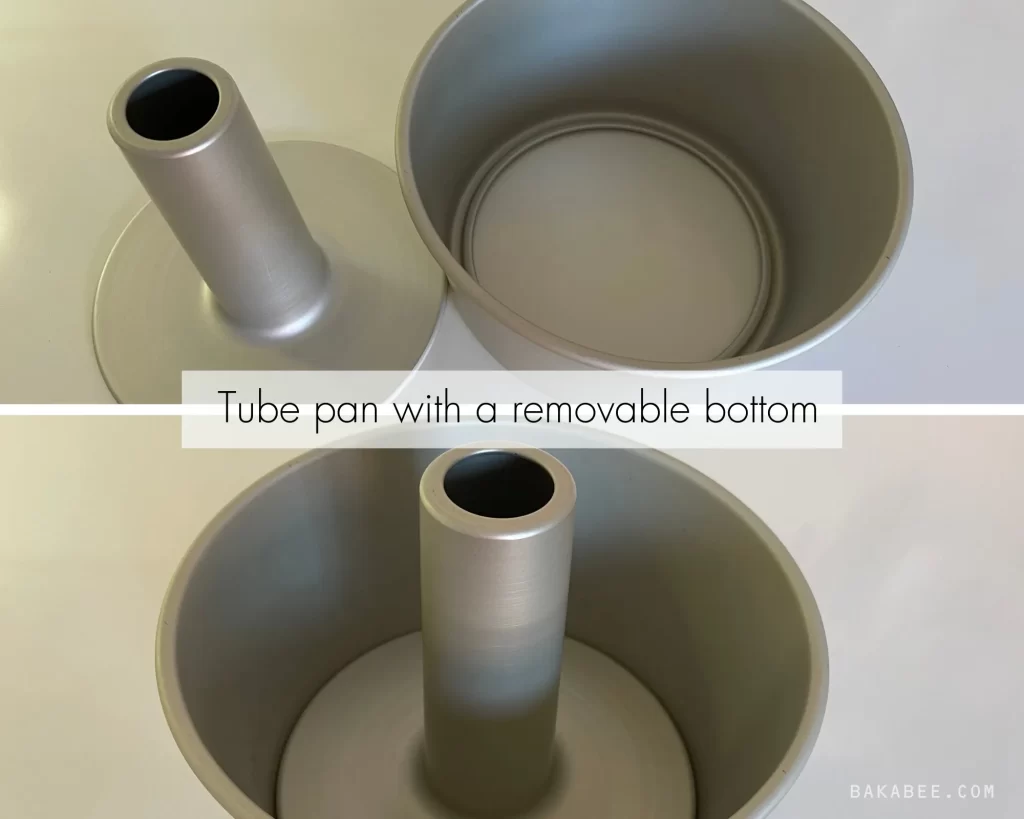
Tube pans are commonly used for baking angel food cakes, chiffon cakes or foam-based cakes that rely on whipped egg whites for their light and airy texture. They are typically round with high sides and a hollow tube in the centre. They will also feature a removable bottom that allows for an easy release of the baked cake from the pan while preserving its shape and texture.
When using a tube pan, it’s important NOT to grease or line the pan with parchment paper, as the cake needs to cling to the sides of the pan to rise properly.
Right – so we know all the ingredients and have chosen the right pan. Now let me share with you my step-by-step guide on how to make a perfect vanilla chiffon cake.
Step 1: Make a perfect cake batter
Our aim is to incorporate as much air as we can in the batter so that it helps create the light, airy and delicate texture.
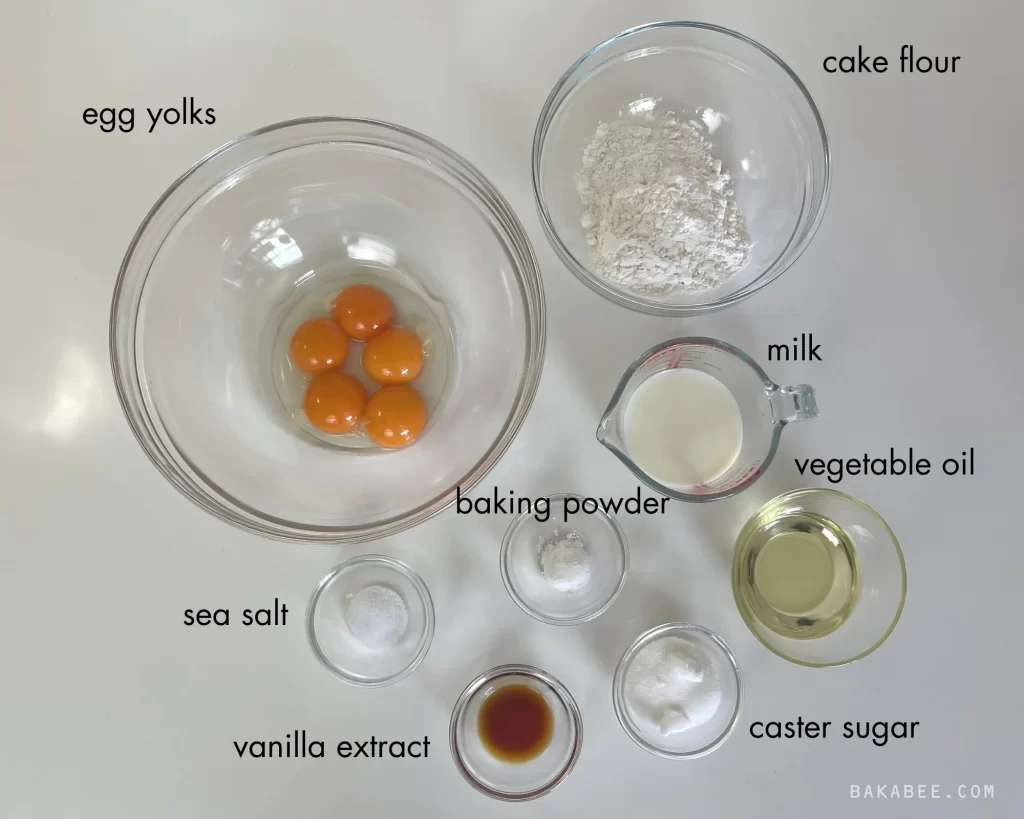
Let’s start with the dry ingredients first, place the cake flour, baking powder and salt in a medium mixing bowl. Mix well with a whisk, then set aside. I always mix the dry ingredients first because I find it makes the baking process a lot smoother.
Now for the wet ingredients. Place the egg yolks and sugar in a large mixing bowl and give it a very good mix. By this I mean that you need to mix it long enough to develop its texture. You should notice that the egg yolk mixture will gradually become paler in colour and thicker in texture. It takes around 5 minutes at medium speed with a hand-held mixer. You can see the images to compare the difference between before and after. In this process we aim to incorporate as much air as we can into the mixture to achieve a light and airy chiffon cake.
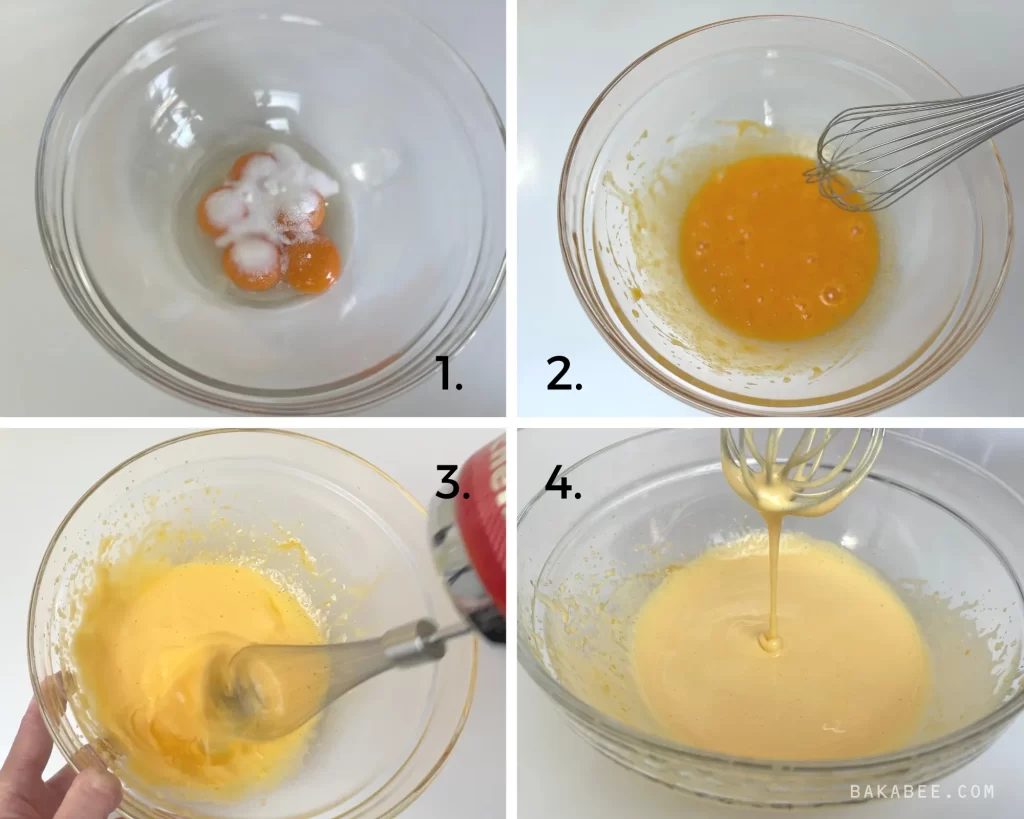
Once the mixture has developed its own texture, we can add the rest of the ingredients, the flavouring and neutral oil. After adding them in, a further quick mix is fine.
Now place a sift on top of the egg yolk mixture and sift in the dry ingredients. Two reasons for sifting: first, to get rid of any lumps in the flour, second, to incorporate air into the mixture. The more air we incorporate, the better the rise and the light texture.
Gently mix the ingredients together until well combined. At this stage, you will feel the body of the mixture. Don’t forget to scrape the sides and the bottom of the bowl to make sure everything is well mixed or until you can’t see any dry ingredients.
Once completely incorporated, set the mix aside.
Step 2: Whip the perfect meringue (beaten egg whites)
A crucial step, before you even start, is to make 100% certain that your tools are grease-free and dry. This gives you the best chance to achieve the desired volume, stability and texture. Any traces of grease or fat can inhibit the formation of stable and voluminous foam.
I suggest that you wipe the bowl and whisk with a clean paper towel dampened with vinegar or lemon juice to remove any potential grease or residue.
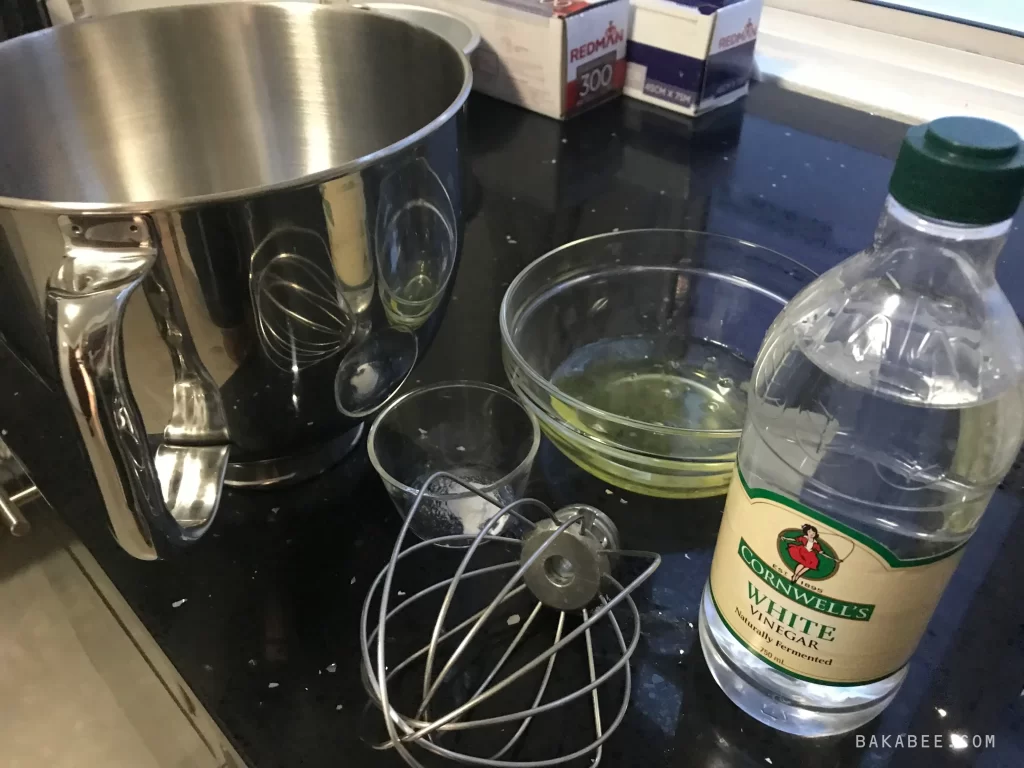
Also, please be cautious with your hands as well. Make sure they are clean and free from any greasy or oily substances when handling egg whites.
Now we’re ready to start:
- Begin beating the egg whites at a medium speed in a clean bowl with cream of tartar / lemon juice / vinegar.
- As the egg whites start to become frothy, gradually add the sugar in three portions. Give a minute or so in between to allow the sugar to dissolve. Adding sugar helps stabilise the foam and adds sweetness.
- Once all the sugar is added, increase the speed to high and continue to whip the egg whites until stiff peaks form. Stiff peaks are attained when you lift the whisk or beaters from the egg whites, and the peaks stand upright without collapsing. The foam should be glossy and smooth in appearance.
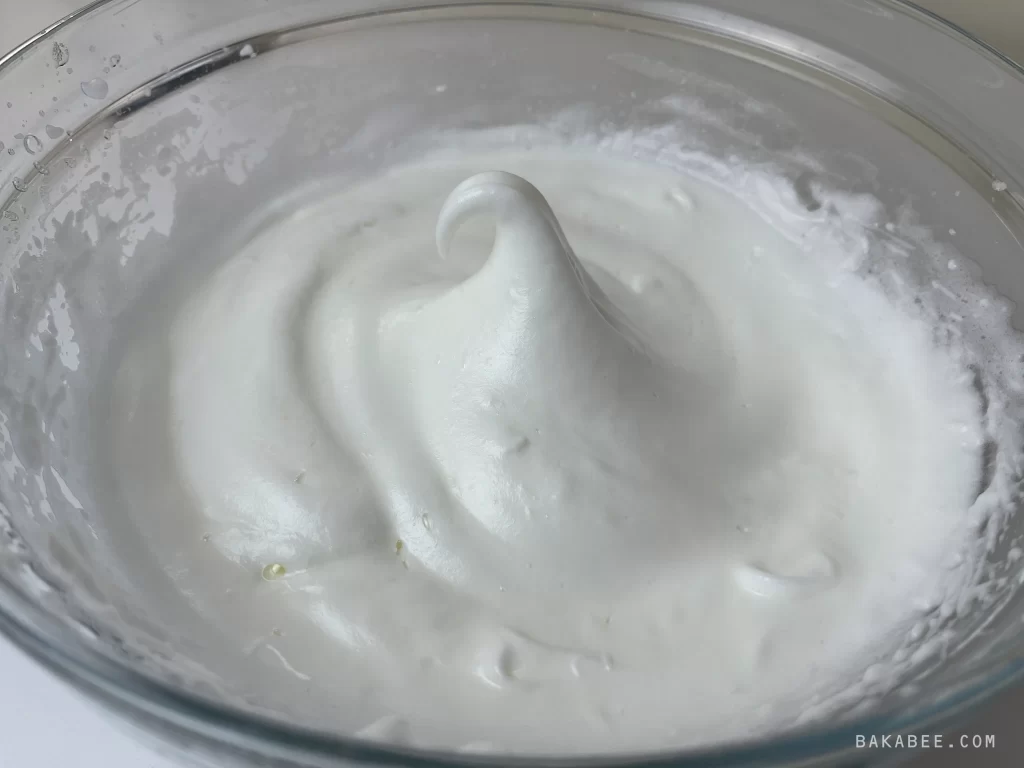
- At this point, check the texture of the whipped egg whites. Gently rub a small amount of the foam between your fingers; it should feel smooth and not grainy. If it feels grainy, continue beating until the texture becomes smooth.
- Once the meringue is done, we need to use it immediately or they may begin to deflate. That’s the reason why we needed to make the egg yolk mixture first. Now we can move straight onto the next step.
Step 3: Fold the meringue into the cake batter
Pro tip: The key to success is to be gentle and avoid excessive stirring or mixing. It helps preserve the airiness of the whipped egg whites and results in a light and fluffy chiffon cake.
Here are the steps:
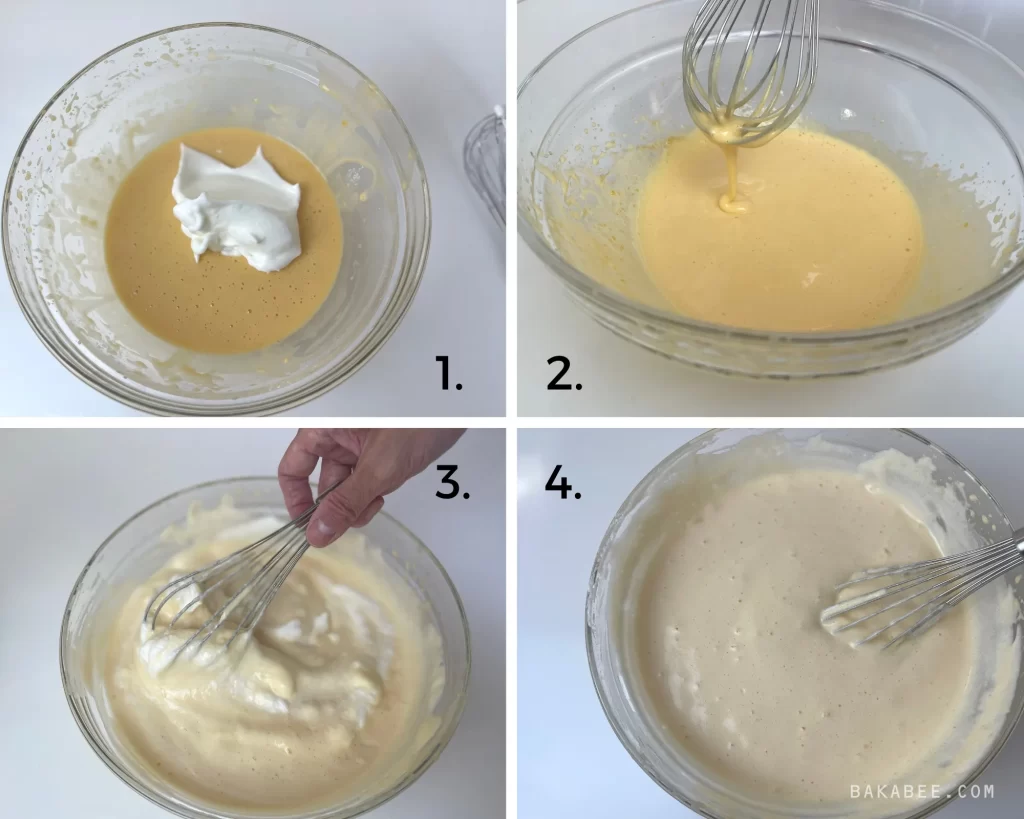
- Take a small amount of meringue using a spatula and add it to the cake batter. Using a whisk to loosen the batter first. This initial addition will help lighten the batter and make it easier to incorporate the remaining egg whites.
- Then scoop about ⅓ of meringue and gently fold into the mixture using a whisk, then fold from the bottom and bring the batter up and over the meringue. At the same time, rotate the bowl slightly and repeat the folding motion.
- Continue this gentle folding action until the meringue is mostly incorporated, and no large streaks of egg whites remain.
- Add the remaining meringue in portions into the batter. Continue to fold gently until the meringue is fully incorporated. Be careful not to over mix, as this can deflate the air trapped in the egg whites and result in a denser cake.
- Finally, carefully check the batter to ensure there is no unmixed batter or egg whites. The vanilla chiffon cake batter should have a uniform and consistent texture.
Step 4: Pour the airy cake batter into the cake pan
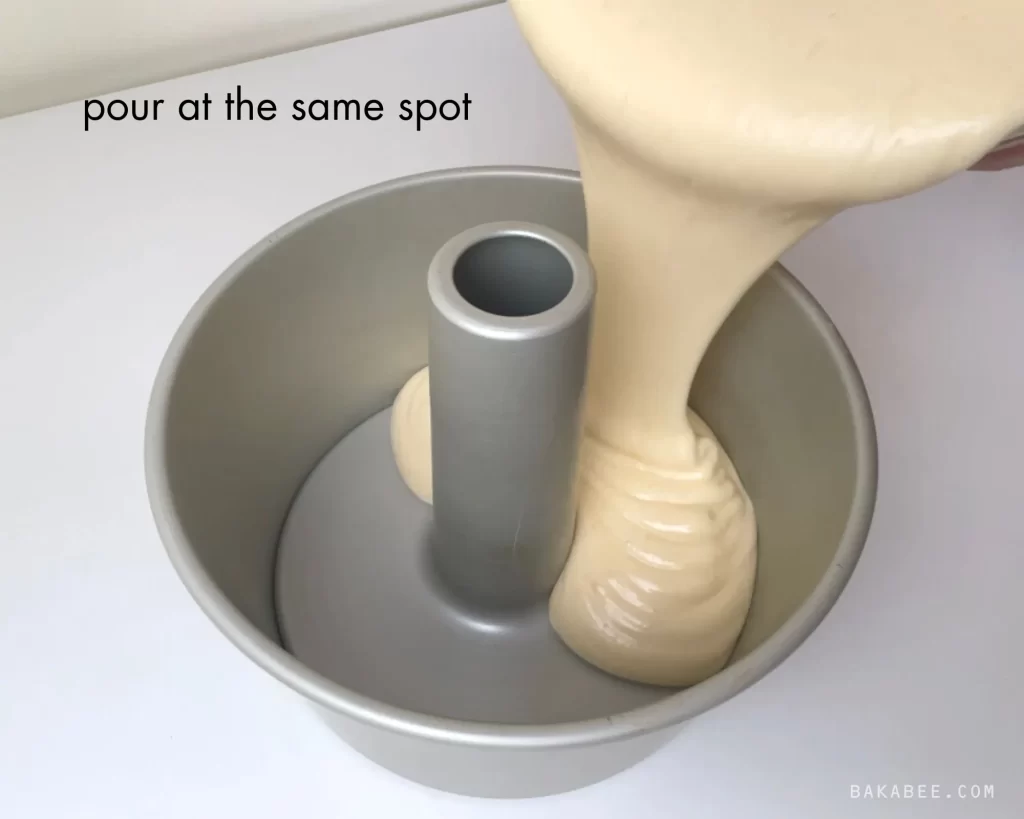
- Do NOT grease the chiffon tube pan. The cake needs to cling to the sides and centre of the tin for support as it rises.
- Hold the mixing bowl tight and pour the batter in, all at once, at the same spot.
- Scrape in the remaining batter using a spatula, trying to add the mix into the same place in the cake tin (see note below)
- Shake the tin gently to distribute the batter evenly.
Note: I have tried to pour the batter while rotating the pan, which you often see recommended. However, I find it slightly challenging to control both the batter and the pan so I have found that the result is also perfectly fine if you pour in the batter at the same spot and then gently shake the pan to evenly distribute the batter. It’s more controlled with less mess.
Step 5: Avoid big air holes
As I mentioned earlier, a perfect chiffon cake doesn’t have big holes or air pockets inside the cake. Remember, a few small bubbles are generally acceptable and should not significantly affect the final outcome of the cake. Don’t be too much of a perfectionist here.
Here are two simple tricks to minimise the chance of big air bubbles:
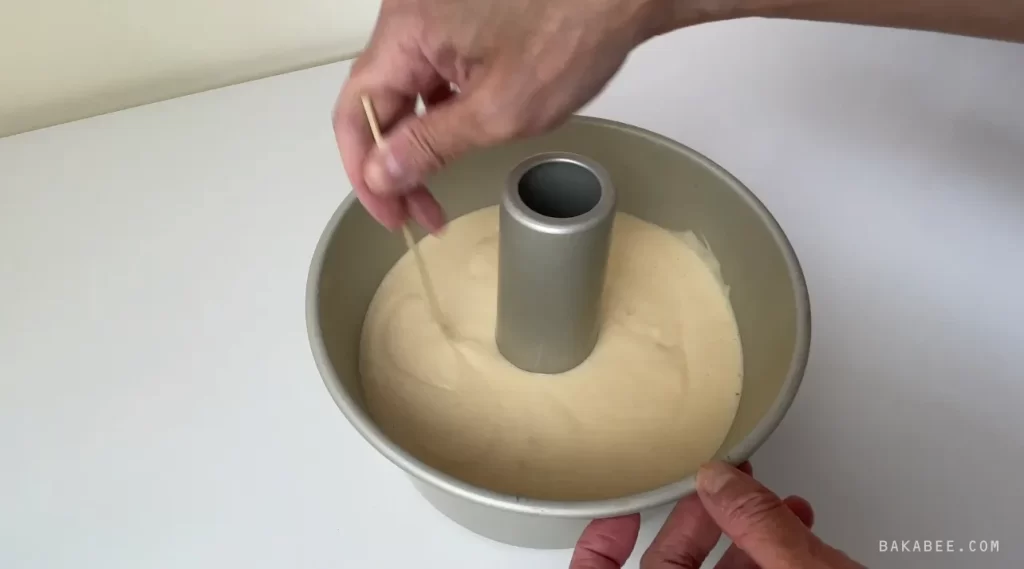
- Once the whole cake batter is in the tube pan, hold the pan with two hands and lift it up a few centimetres above your work surface. Drop it a few times against the work surface. If there are big air bubbles trapped inside the batter, they should rise to the surface and burst.
- Additionally, you can gently run a long wooden skewer or platter knife through the batter in a swirling motion. This helps to remove any trapped air pockets inside the batter.
Step 6: Bake for perfection
Chiffon cake is very sensitive to the oven temperature. If it’s too hot, the top of the cake may get burnt before it is baked. On the other hand, if the temperature is too low, the cake may not rise to its ideal height.
After all the careful mixing and folding, placing the chiffon cake batter in the oven seems a very straight forward step. However, each oven is different, even if they come from the same brand and same model. Some ovens might have a hotter spot at the back than the other areas. You know your oven so find the right spot for an even bake.
Also, it is possible that the setting of your oven doesn’t display the exact temperature. Here are my three tips to help you bake your chiffon cake successfully.
Tip 1: Get an oven thermometer
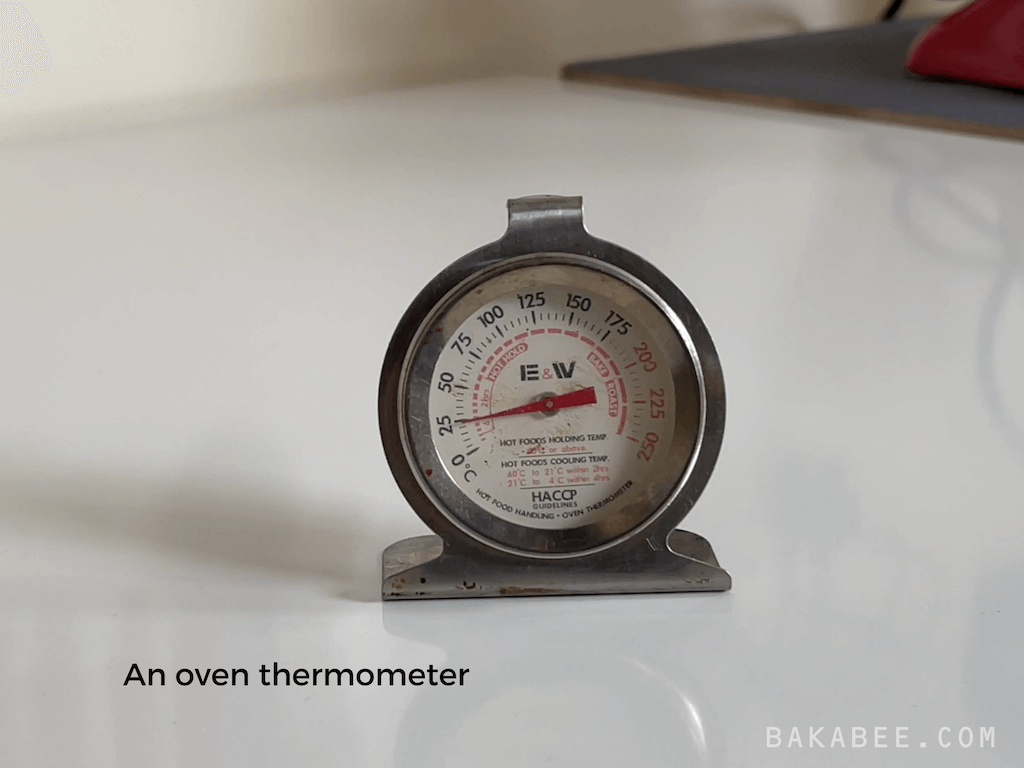
My advice is to get an oven thermometer and place it in the oven to make sure the oven reaches the exact temperature that you desire before you place the cake pan in.
Tip 2: Lower rack
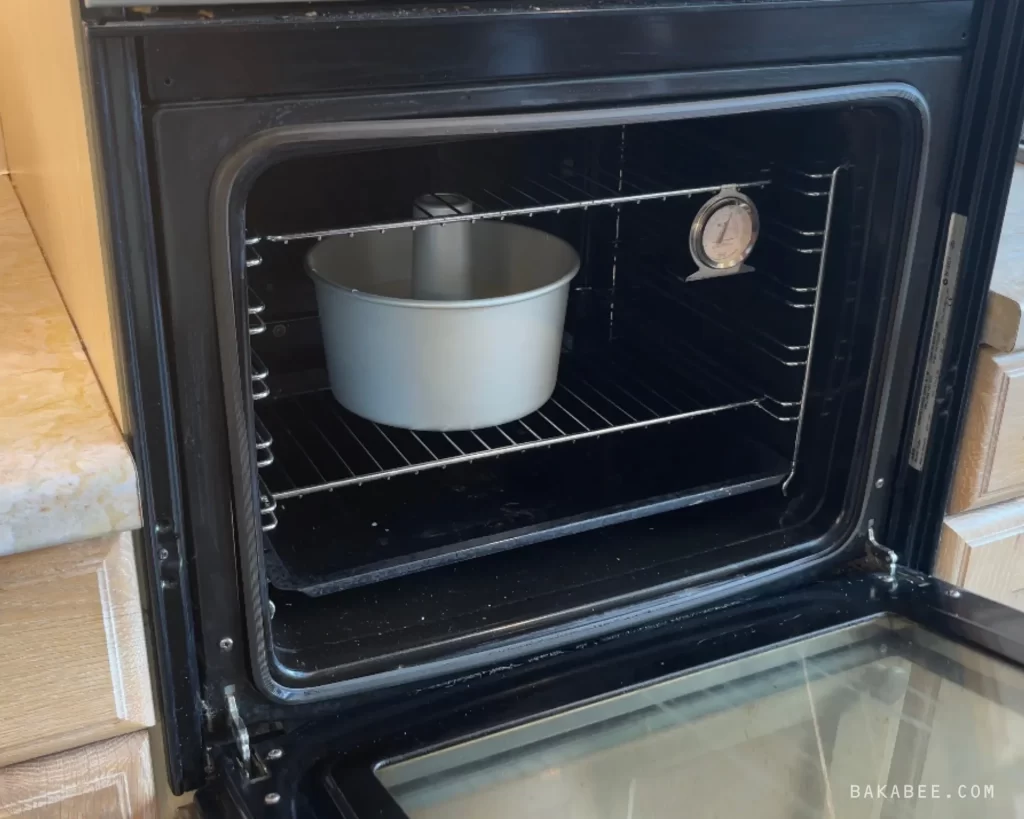
Chiffon cake needs more heat from the bottom of the pan in order to help it rise properly. Therefore, place the cake pan on a lower rack in your oven.
Tip 3: No interruptions
Try not to open the oven door at all during the baking process. Once the door is opened, the heat in the oven will drop and this will affect the baking process. Keep an eye on the cake, if it doesn’t burn on the top, it should be fine. If you are not so sure if it is baked or not, try to check it after 35 mins but not before.
Step 7: Cool it upside down
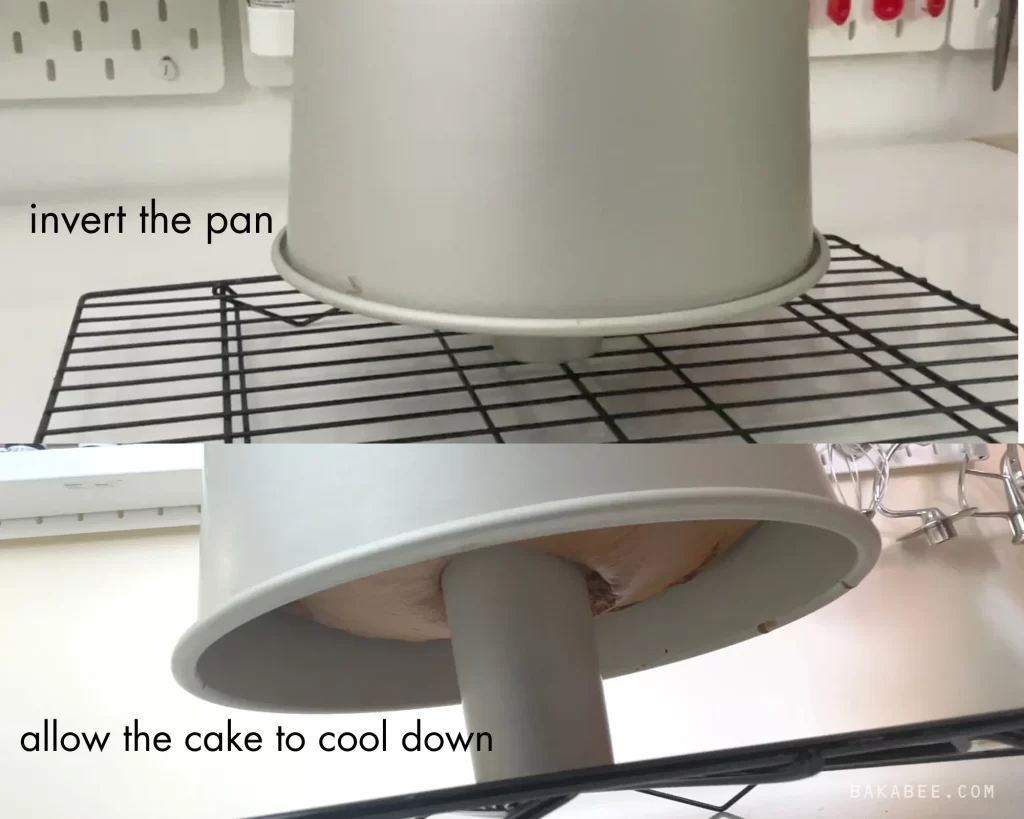
This is a very crucial step. Prepare a wire rack or an inverted bowl on a flat surface before the cake is done. Once it is done, you need to invert the baked vanilla chiffon cake on the wire rack while it is cooling. This helps the cake to stay tall and straight and more importantly, prevents it from collapsing under its own weight once it is cooled.
Step 8: Remove the cake from the pan
I have tried two different ways to remove / un-mould the cake from the pan. I didn’t invent these methods, I watched a lot of videos from fellow bakers and I tried both methods to see what works.
Method no. 1:
- Use your hand to gently press down the cake, releasing it from the edge of the pan. Slightly turn the pan and continue to press down the next part of the cake until you go right round.
- Then repeat the same process for the funnel. The ring of the cake mould should come out easily.
- Now for the base of the pan, once again, slightly press the bottom of the cake away from the pan and continue to work your way round the rest of the cake.
- Once you finish this process, the whole chiffon cake should be un-mould beautifully.
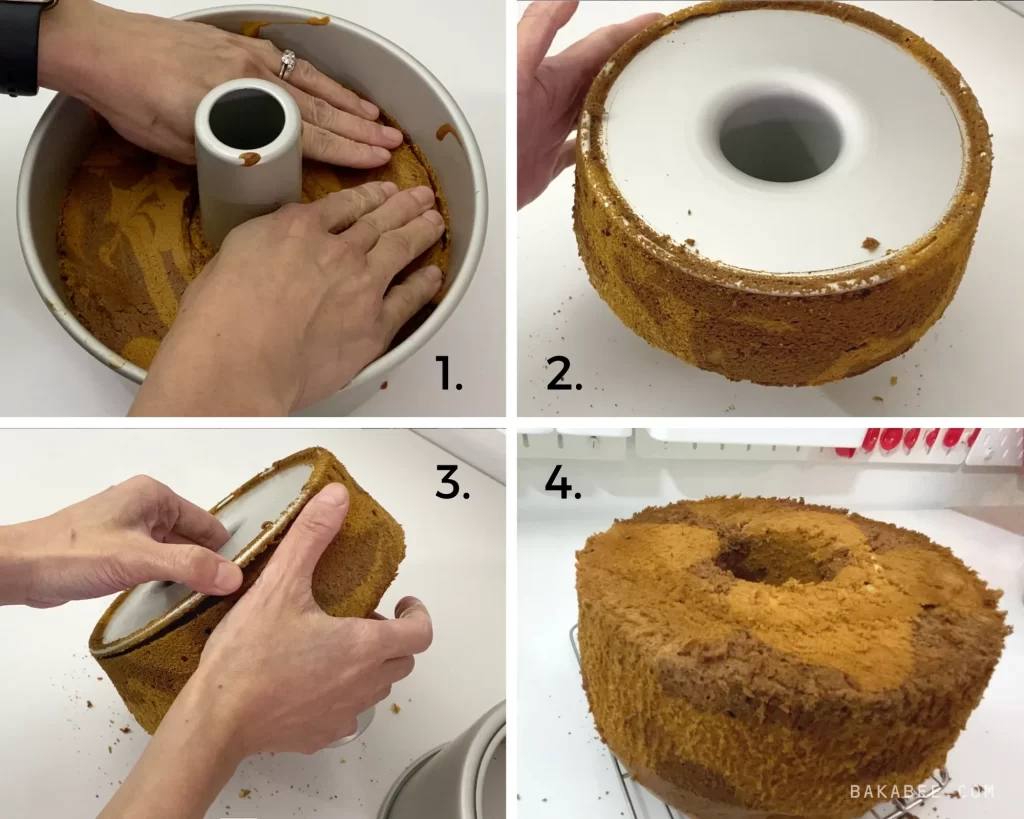
Method no. 2:
- Use a platter knife or a specialised chiffon cake release knife to glide along the cake pan.
- Then repeat the same process for the funnel. Please be careful, as this part is small, you may need to do it a tiny section at a time. When you finish these two parts, the cake ring should come out easily.
- Finally, do the same process for the base of the pan. The whole chiffon cake should un-mould perfectly.
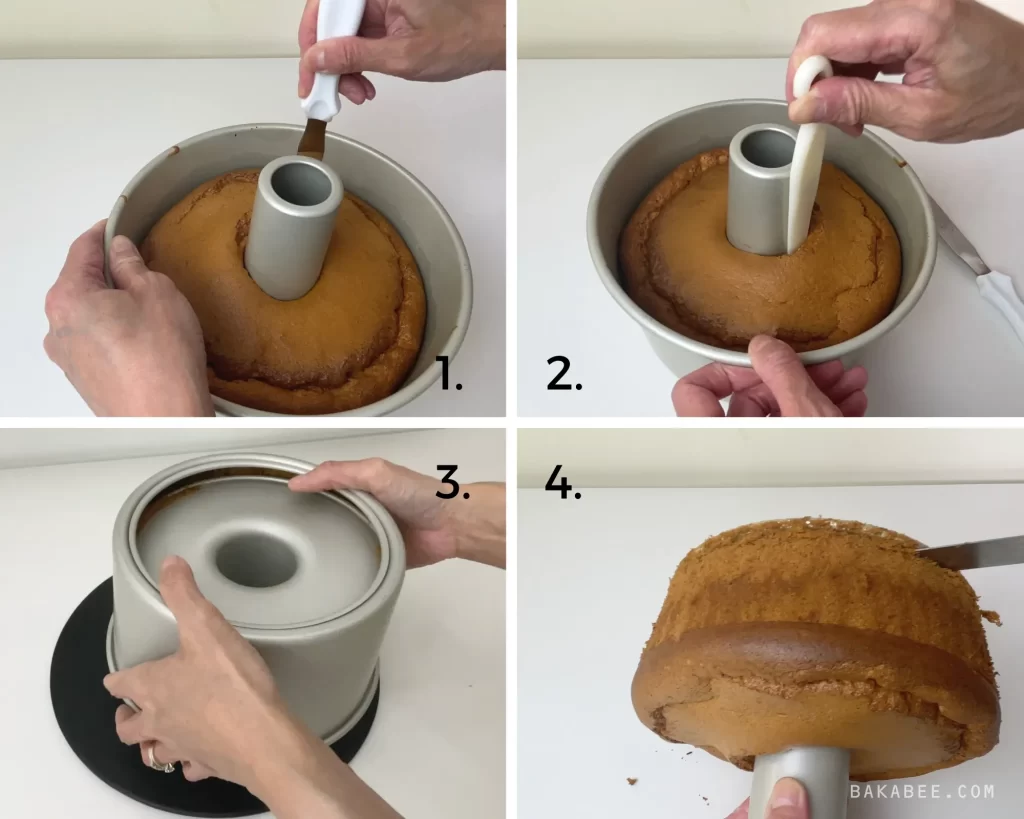
From my experience, I prefer Method no. 2 because:
- Easy and Efficient Release: A chiffon cake knife, with its long and flat blade, provides excellent leverage for releasing the chiffon cake from the pan. The thin edge helps to separate the cake from the sides, while the length of the blade allows you to reach the centre of the cake without any difficulty. This makes the un-moulding process easier, quicker and less likely to cause any breakage or sticking of the cake to the pan.
- Clean and Neat Presentation: It ensures a clean and neat presentation. The thin and flat edge of the chiffon cake knife allows you to separate the cake from the sides of the pan smoothly, preventing any damage or unevenness. This results in a beautiful and intact cake that can be easily transferred to a serving platter without visible damage.
- Maintain the lightness and spongy texture: Chiffon cakes are known for their light and delicate texture. Using a chiffon cake knife for un-moulding helps protect the texture by minimising handling and potential damage to the cake. The gentle and precise action of the knife allows you to release the cake from the pan without compressing and deflating it, maintaining its airy and fluffy consistency.
When it comes to choosing a method for un-moulding a chiffon cake, there is no definitive right or wrong approach. It’s all about finding a technique that works best for you and yields the desired results. The ultimate goal is to release the cake cleanly. Explore different options and see what works.
Step 9: Serve it
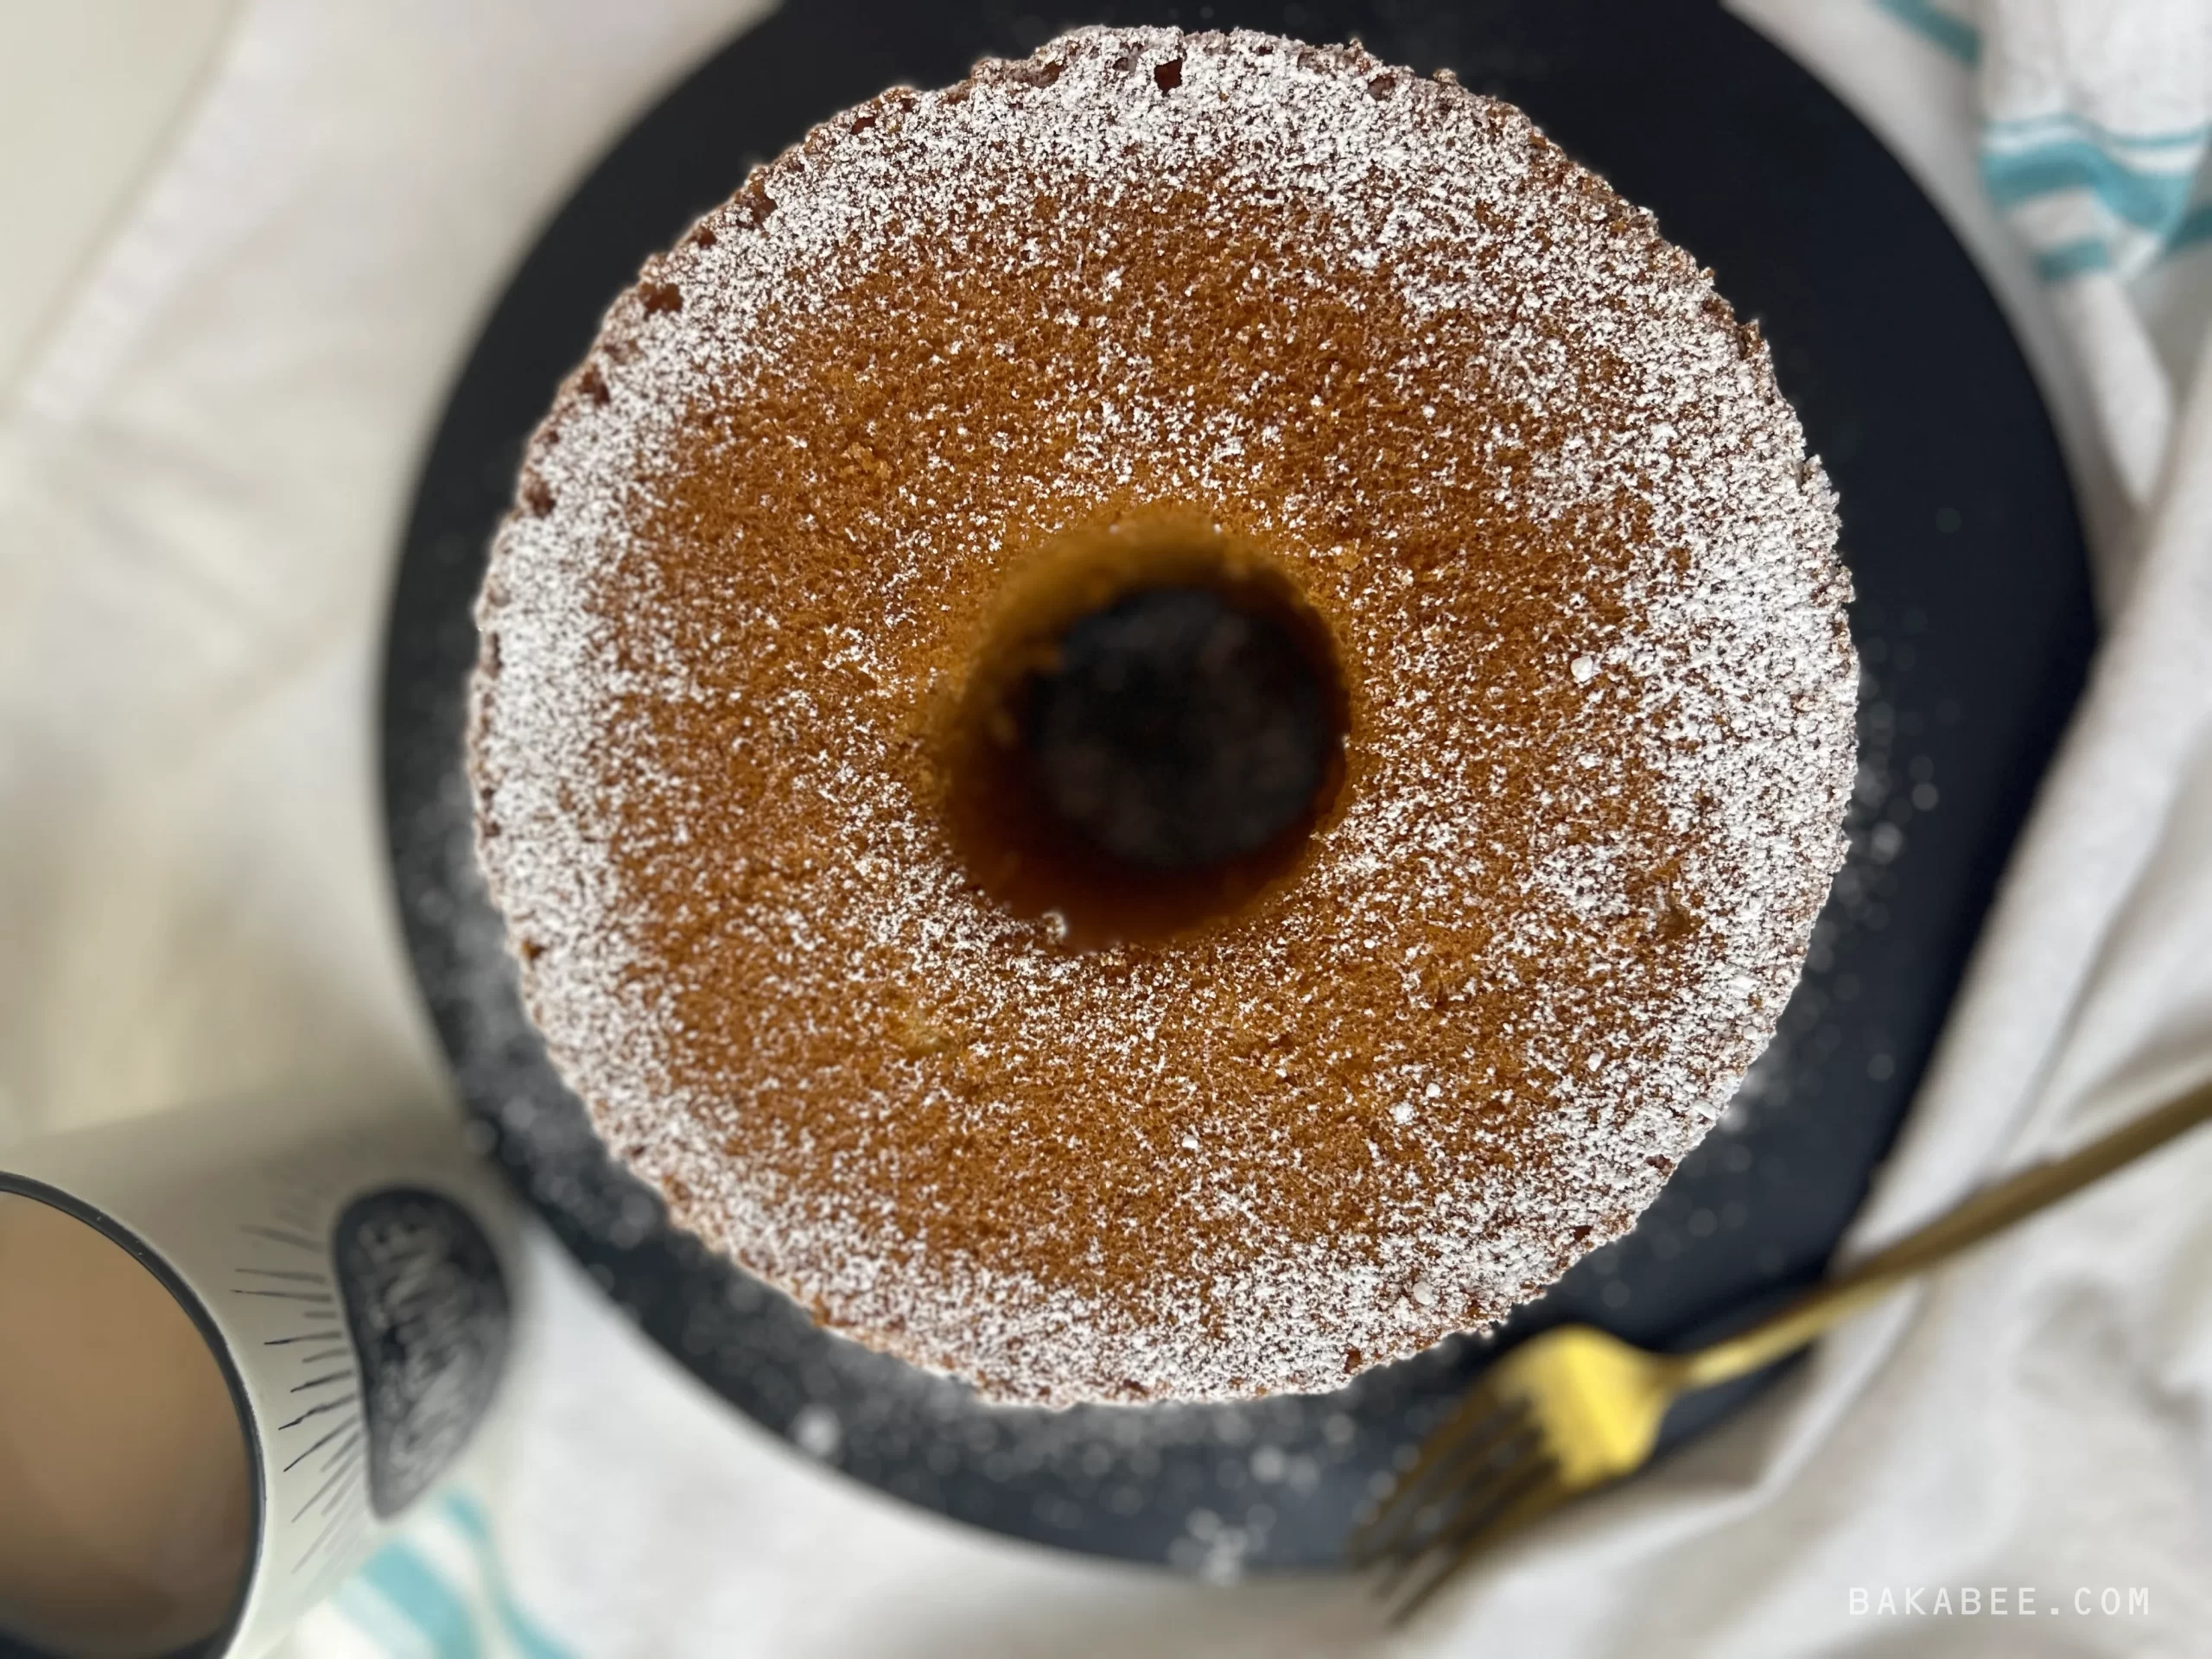
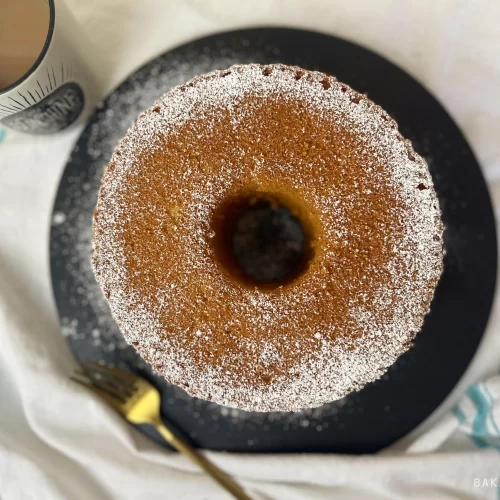
Chiffon cake is a true work of edible art, boasting an exquisite and captivating appearance. It’s tall and elegant and the surface of the cake showcases a velvety-smooth texture. From its minimalist look, you don’t need much decoration. Let it stand proudly on its own. Less is more!
Here is how I would serve this elegant vanilla chiffon cake:
- Select a clean and presentable plate
- Dust the cake with a light touch of icing sugar for garnish
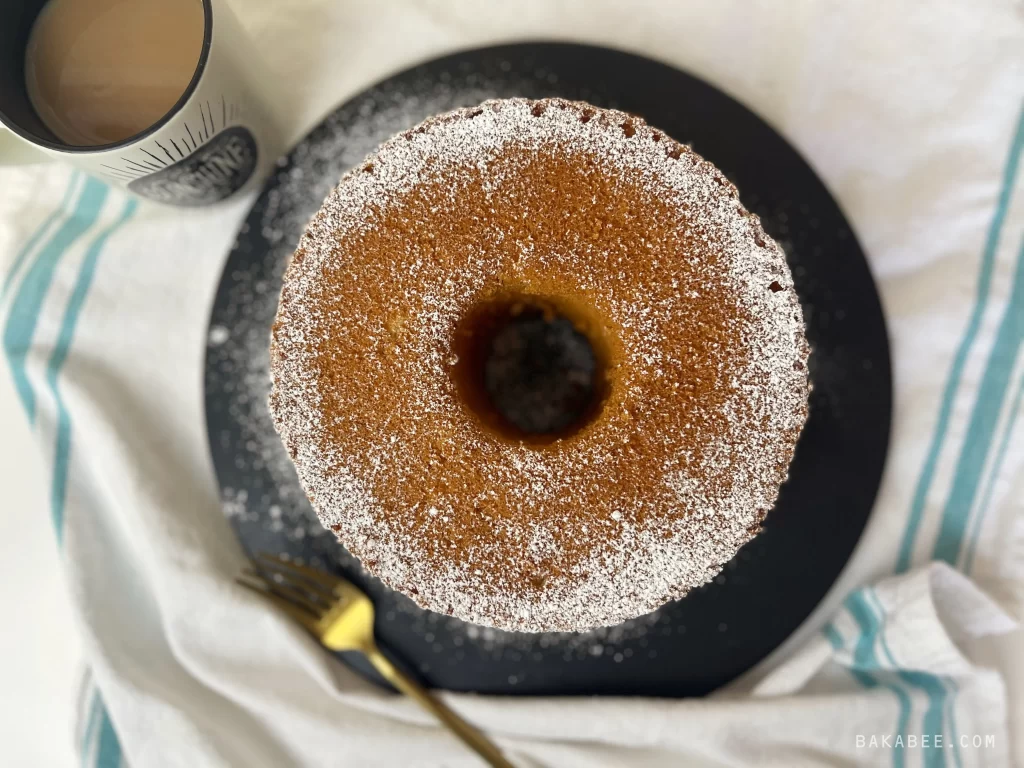
- Slice the cake with a sharp serrated knife, cut clean and even slices of the chiffon cake
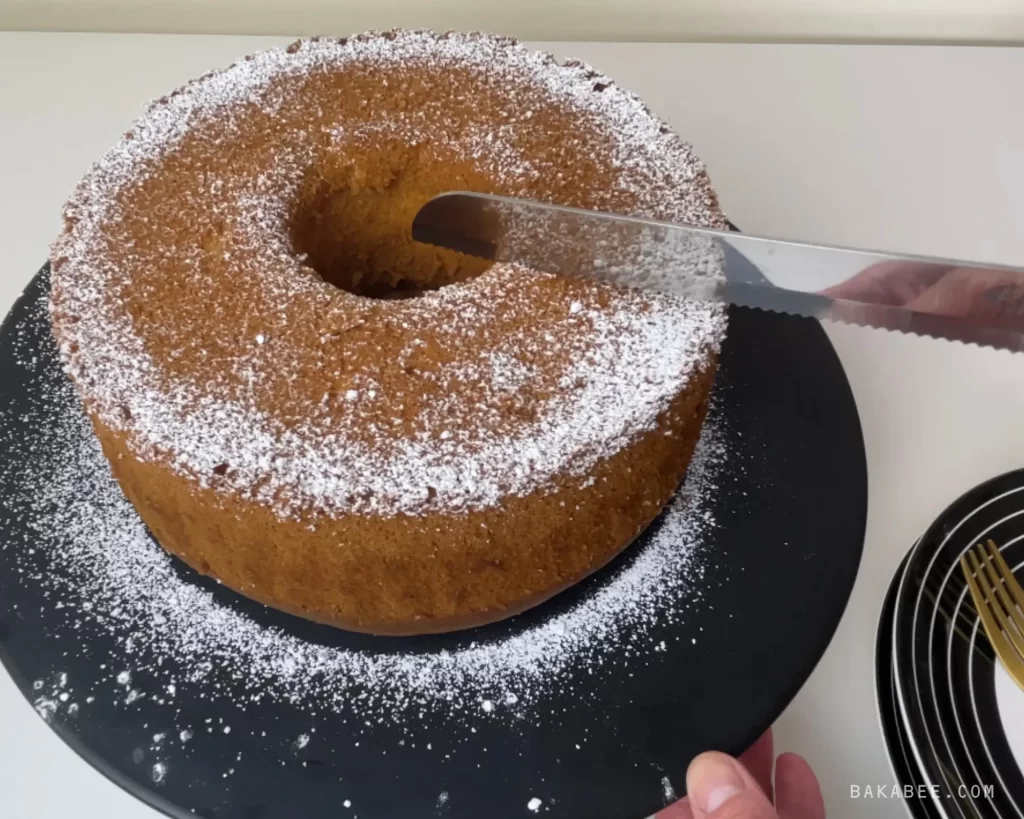
- Place the sliced vanilla chiffon cake on individual plates and pair it with a cup of my favourite coffee.
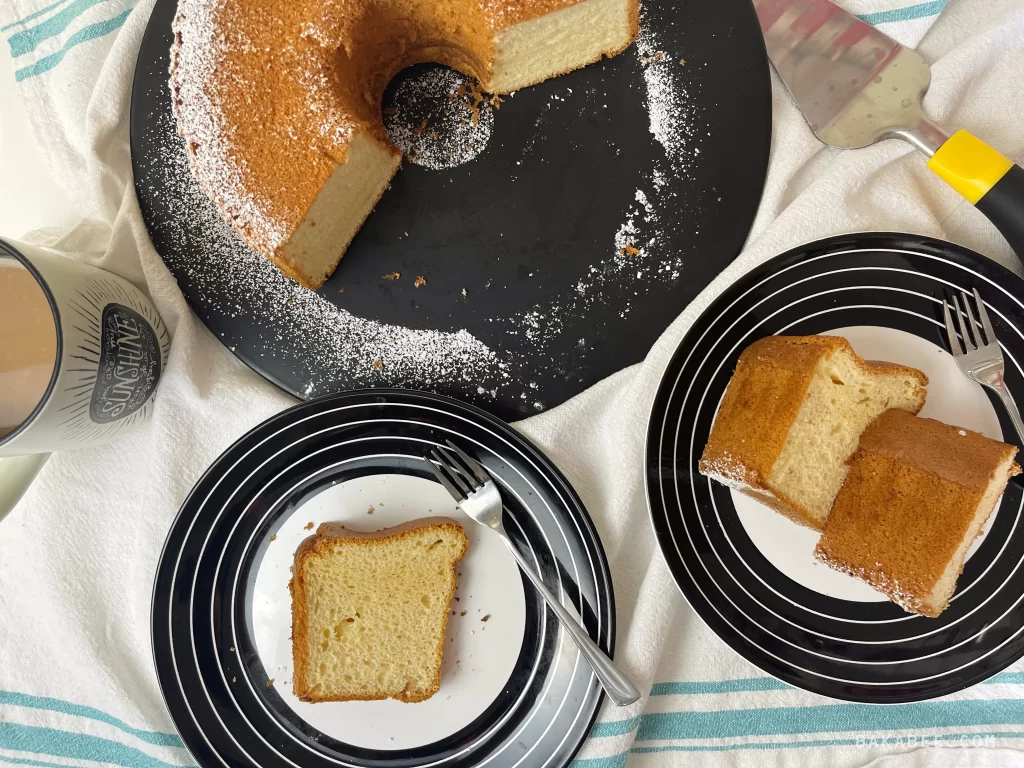
However, if you would like to even enhance your exquisite vanilla chiffon cake, you can decorate the cake with fresh fruits, whipped cream or any other desired toppings to enhance the presentation and flavour. It’s totally up to your personal preference.
Step 10: Storing chiffon cake
It is always best to eat the chiffon cake on the same day as it is baked (never a problem in my house). However, freshly baked chiffon cake can keep well at room temperature for up to 3 days. If your room is hot, it’s better to keep the cake in the refrigerator (take cake out from the refrigerator 10 to 15 minutes before serving).
It’s always a good idea to keep the cake in an airtight container or well wrapped with cling film.
Save this vanilla chiffon cake recipe
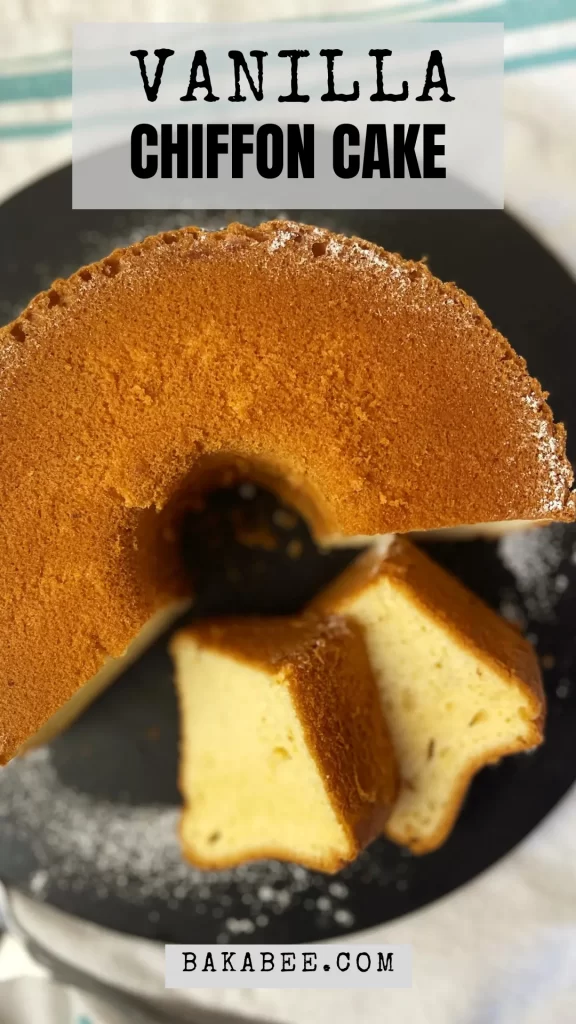
Vanilla Chiffon Cake
INGREDIENTS
Cake batter
- 95 g cake flour (sifted)
- 5 egg yolks
- 30 g caster sugar
- 80 g milk
- 40 g vegetable oil
- 1 tsp baking powder
- 1 ½ tsp vanilla extract
Meringue
- 5 egg whites
- 70 g caster sugar
- ½ tsp vinegar
INSTRUCTIONS
Cake batter
- Preheat the oven to 160℃.
- Add the flour, baking powder and salt to a medium mixing bowl. Mix well and set aside.
- Combine egg yolks and caster sugar in a large mixing bowl, whisk at medium speed using a hand-held mixer until the mixture thickens and turns pale in colour. This should take around 5 minutes.
- Add milk and oil into the mixture and whisk together until well blended.
- Place a sieve on top of the mixing bowl. Sift in the dry ingredients. Whisk the mixture at medium speed until the batter is well mixed. Set aside.
Prepare the meringue
- Pour the egg whites and vinegar into a clean and dry mixing bowl. Use a hand-held mixer with a whisk attachment. Whisk them at medium speed until foamy.
- Add the caster sugar into the egg whites in three portions. Allow around 1 minute in between adding each portion to allow the sugar to dissolve.
- After adding all the sugar, turn the mixer to medium high speed and continue to whisk the meringue until it reaches its stiff peak form. You can check it by drawing the meringue out, using the whisk. If a firm peak is formed, it's done.
Fold the meringue into the cake batter
- Using a spatula, scoop a small amount of meringue and add it to the cake batter. Mix it in, using a manual whisk, this helps to loosen the thick texture for easier mixing.
- Scoop ⅓ of the meringue into the batter and continue to mix it in using the manual whisk until you can't see any white patches. Keep your movements very gentle and always mix in the same direction.
- Continue to scoop in the remaining portions of meringue until everything is well mixed.
Bake and cool the cake
- Prepare a tube pan. DO NOT grease it.
- Pour the cake batter into the pan at the same spot.
- Shake the pan a few times to evenly distribute the batter inside the pan.
- Hold the pan a few centimetres off the work surface and then drop it to get rid of any big air pockets trapped in the batter.
- Run a skewer in the batter in a swirling motion, again to remove any remaining air pockets.
- Place the pan on the lowest rack in the preheated oven and bake around 40 to 45 minutes. DO NOT attempt to open the oven door while the cake is baking.
- To check if the cake is done, no sooner that 35 minutes into the baking time, insert a skewer in the centre of the cake and if it comes out clean, it means the cake is done.
- Take the cake pan out from the oven and immediately invert the pan onto a wire rack. Allow it to cool down completely.
Un-mould the cake
- Prepare a serving plate.
- Run an icing palette knife along the edges and the funnel of the pan.
- Invert the pan and use your thumbs to push the bottom of the pan down.
- The cake should slide free from the pan leaving only the funnel in place.
- Now run the palette knife along the base of the funnel. The cake should come out nicely.
- Serve it on its own with a cup of tea / coffee or dust it with icing sugar for garnish. Enjoy!
NOTES
- The recipe is for a 8-inch tube pan.
- If you do not have vinegar on hand, you can replace it with either 1/2 tsp lemon juice or 1/4 tsp cream of tartar instead.
NUTRITION
More chiffon cake recipes for your next bakes
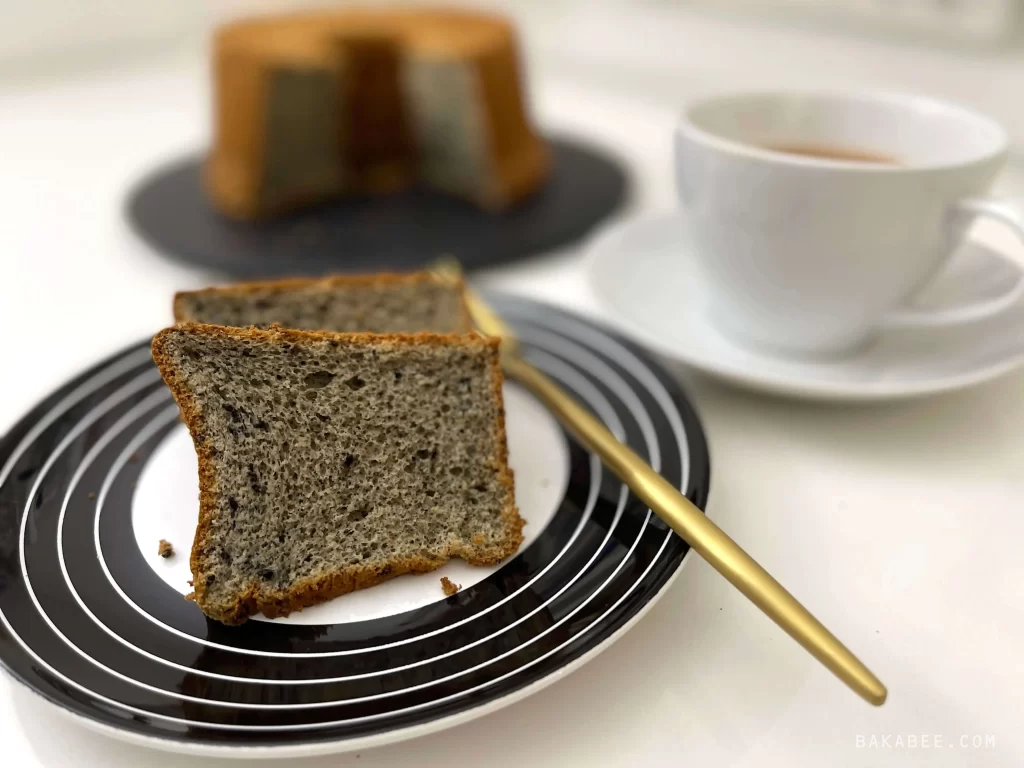
Black Sesame Chiffon Cake
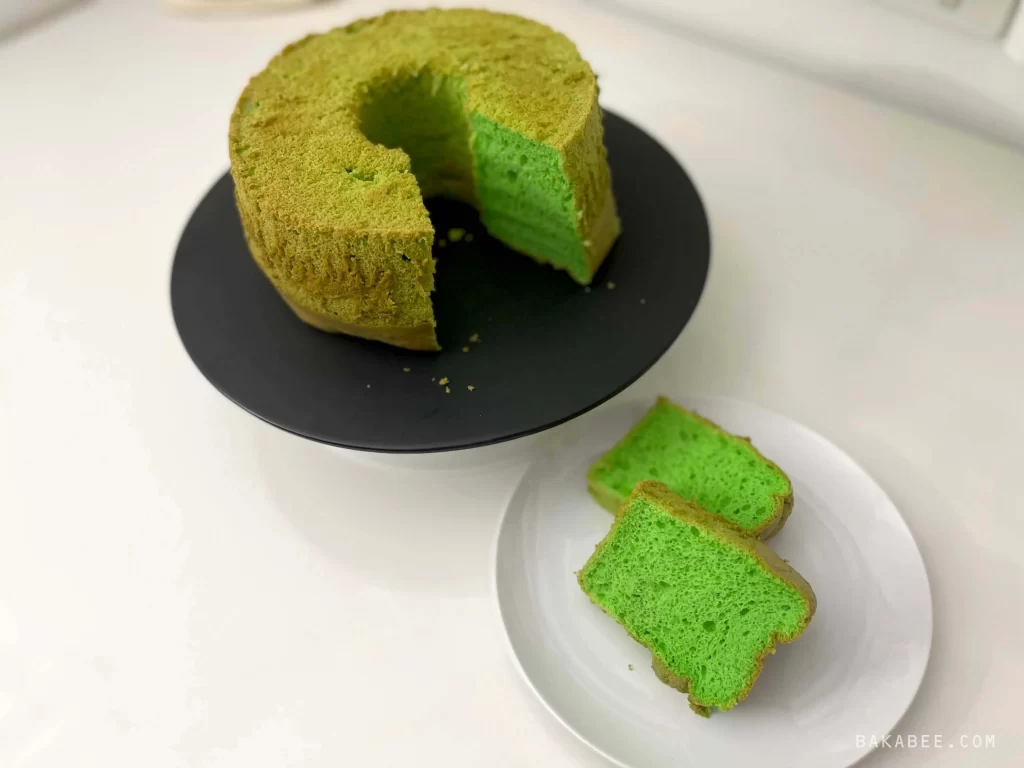
Pandan Chiffon Cake
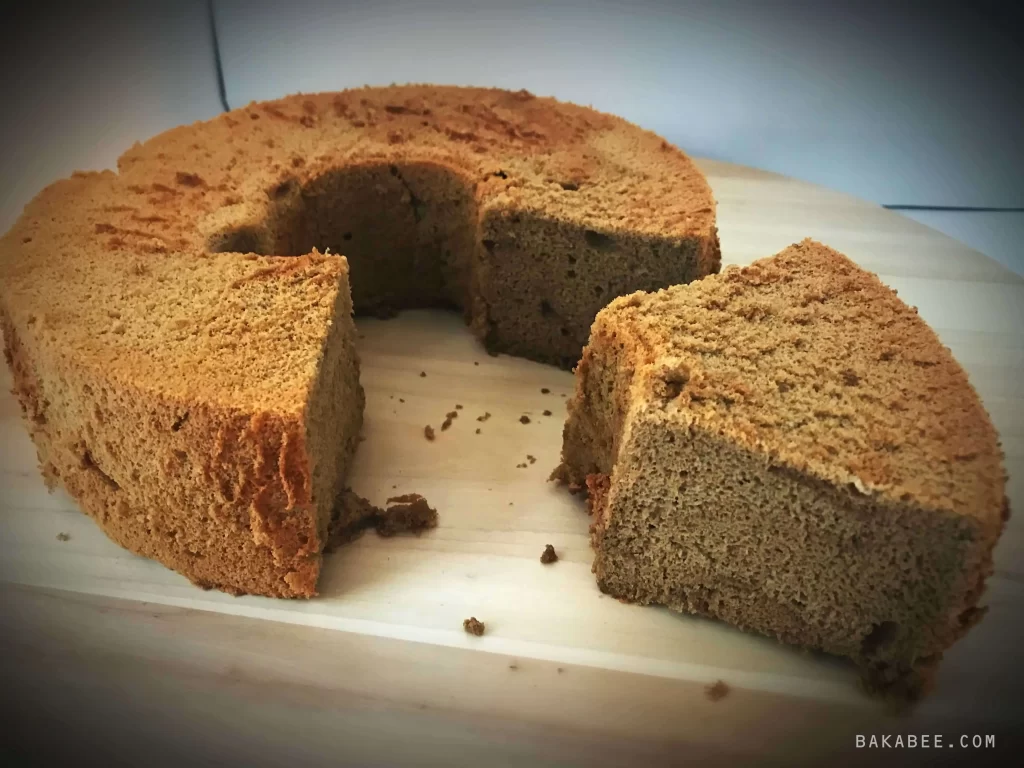
Coffee Chiffon Cake
Thanks so much for stopping by! Hope you will enjoy this recipe and all the tips.
If you love my Vanilla Chiffon Cake recipe, please feel free to give a star rating when you post a comment to let me know what you thought. Your star ratings help and encourage more people to try my recipes. I truly appreciate your support! If you have any recipe suggestions I would also love to hear them.
Keep Baking! 😉

