Share this!
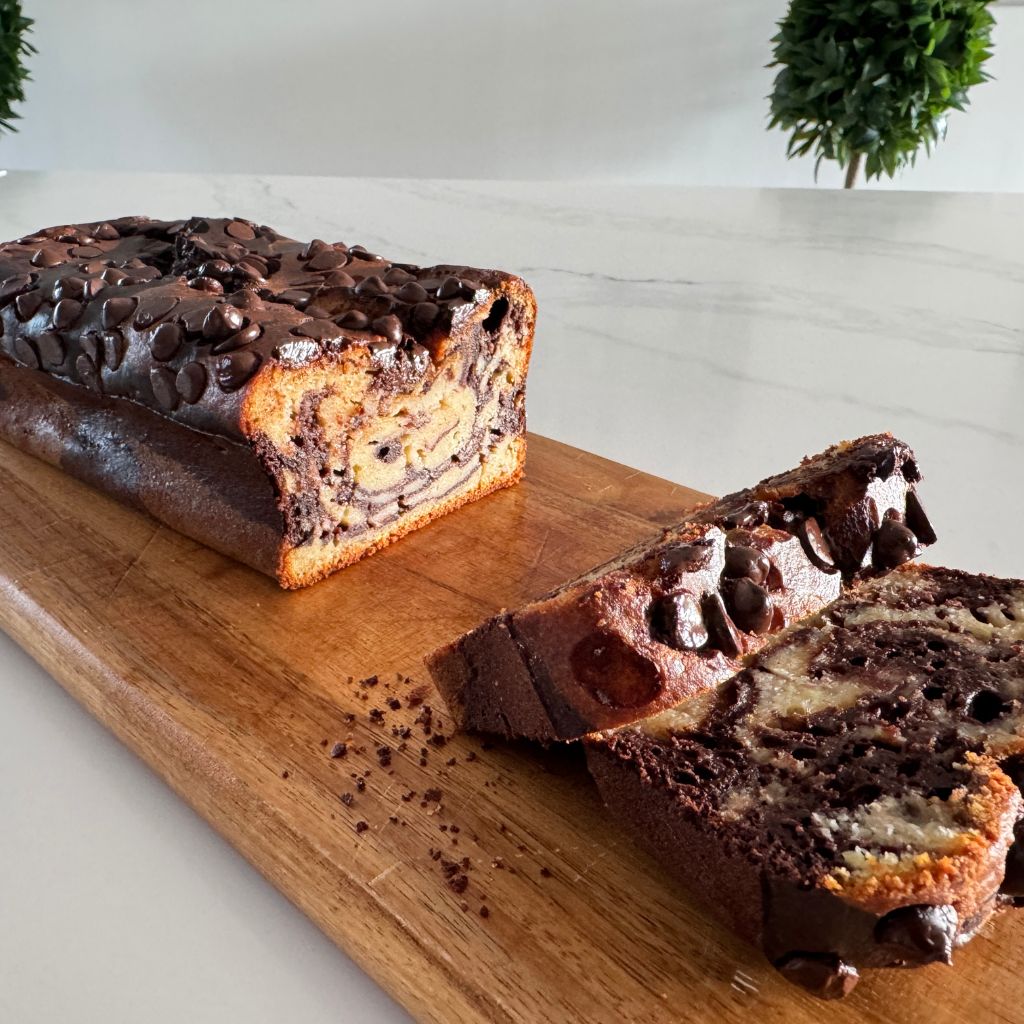
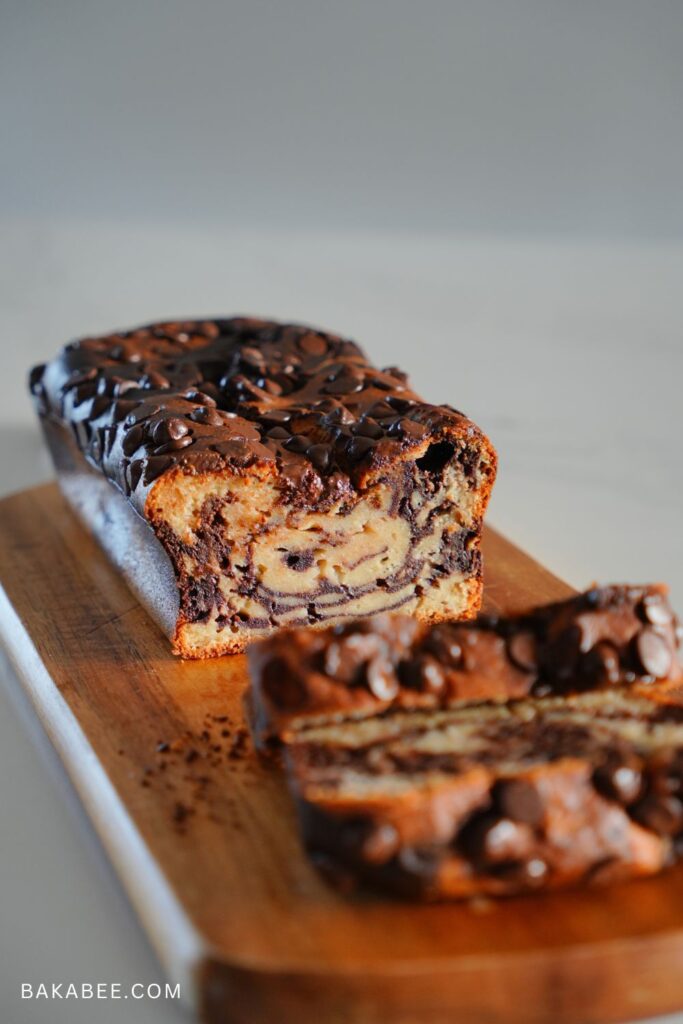
Got a couple of overripe bananas sitting in your fruit bowl? Don’t toss them — turn them into something irresistible! This Chocolate Marbled Banana Loaf is the perfect blend of natural banana sweetness and rich, indulgent chocolate.
With a beautiful marbled swirl, this loaf is not just a treat for your taste buds but also a showstopper for your table. Whether you’re enjoying a slice with your morning coffee or serving it as an afternoon snack, this recipe is a delicious way to use up those extra bananas while creating something truly special. Ready to bake?
Let’s get started!
Why I love this chocolate marbled banana loaf
- Perfect Use for Overripe Bananas: It’s a simple, no-waste recipe that turns overripe bananas into a delicious treat.
- Moist and Flavourful: The combination of sweet bananas and rich chocolate creates an incredibly moist, indulgent loaf.
- Beautiful Marbled Effect: It looks as good as it tastes, making it a showstopper for sharing or gifting.
- Beginner-Friendly: With clear, step-by-step instructions, even new bakers can achieve perfect results.
- Customisable: The chocolate chips on top are optional, so readers can make it as indulgent or as light as they prefer.
Check out the video tutorial
My go-to favourites
 Buy Now →
 Ingredients in this chocolate marbled banana loaf
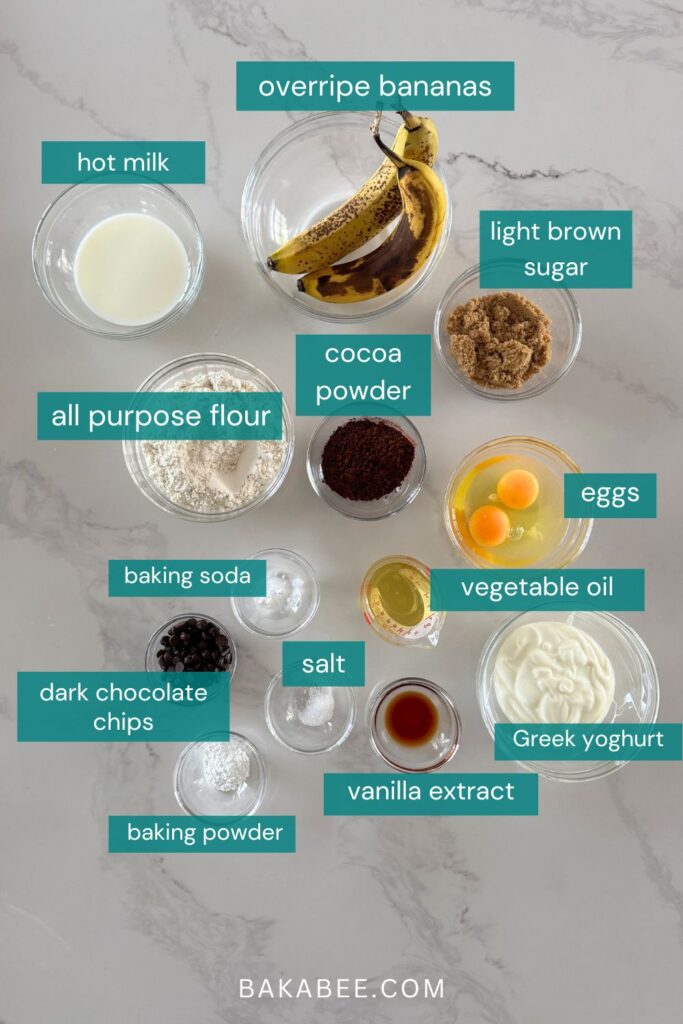
At a glance: Here is a quick snapshot of what ingredients are in this recipe. Please see the recipe card below for specific quantities.
- Overripe Bananas: The riper, the better—bananas with brown spots are the sweetest and most flavourful.
- Light Brown Sugar: Adds sweetness and a slight caramel flavour, keeping the loaf moist.
- Vegetable Oil: Keeps the loaf tender and moist without adding too much density.
- Greek Yogurt: Adds moisture, slight tanginess, and helps maintain a soft texture. Full-fat works best, but low-fat also works. For your reference, I use low-fat in this recipe.
- Eggs: Make sure eggs are at room temperature for smoother mixing.
- Vanilla Extract: Enhances the overall flavour, making the chocolate and banana flavours more pronounced.
- All-Purpose Flour: Make sure to sift the flour to avoid lumps and achieve a light texture.
- Baking Powder and Baking Soda: They are leavening agents to help the loaf rise. Make sure they are fresh (replace if older than six months).
- Salt: Always use sea salt, it balances sweetness and enhances overall flavour.
- Unsweetened Cocoa Powder (for the marble effect): Dissolve in hot milk for a smoother, more intense cocoa taste.
- Hot Milk: It needs to be hot enough to dissolve / activate the cocoa powder, giving a deep chocolate flavour.
- Chocolate Chips (optional topping): Add extra indulgence and a chocolatey bite. Sprinkle them on top just before baking for the best presentation.
How to make this chocolate marbled banana loaf
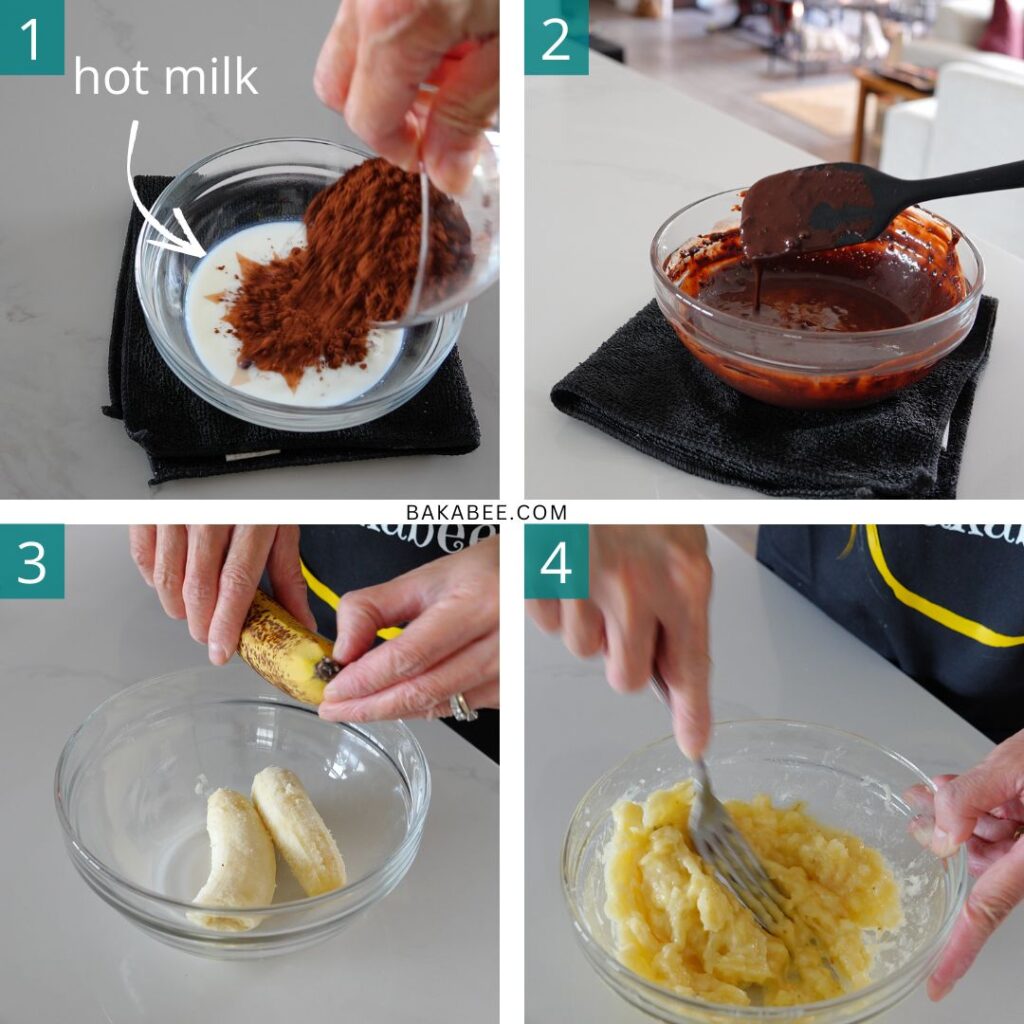
- Mix cocoa powder into hot milk.
- Stir until the cocoa powder is completely dissolved.
- Peel two large overripe bananas. A quick tip—peeling from the bottom end is easier and less messy.
- Mash them well with a fork until mostly smooth.
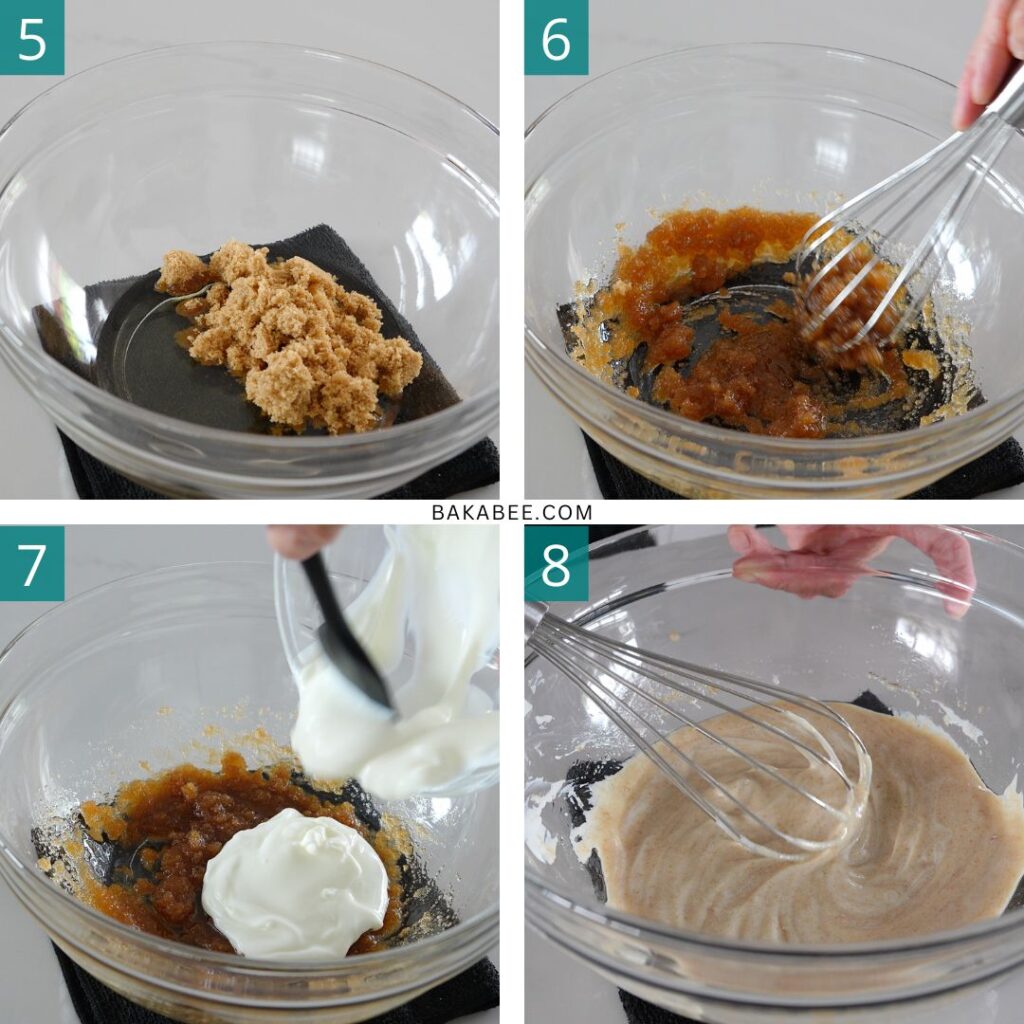
- Mix vegetable oil and light brown sugar in a mixing bowl.
- Mix until well combined.
- Add Greek yoghurt. It helps keep the loaf soft and moist.
- Mix until fully incorporated.
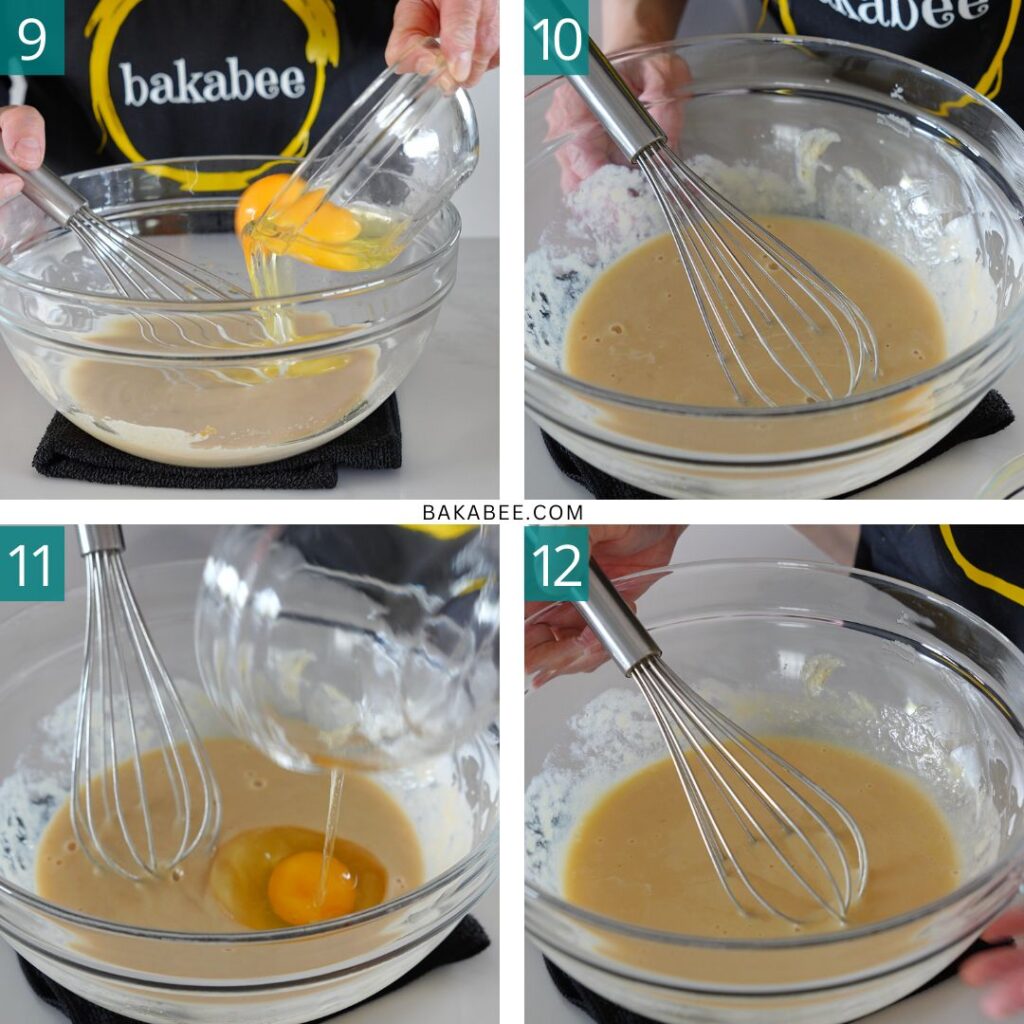
- Add the eggs — one at a time.
- Whisk well after each addition.
- Add the second egg.
- Whisk well until well combined.
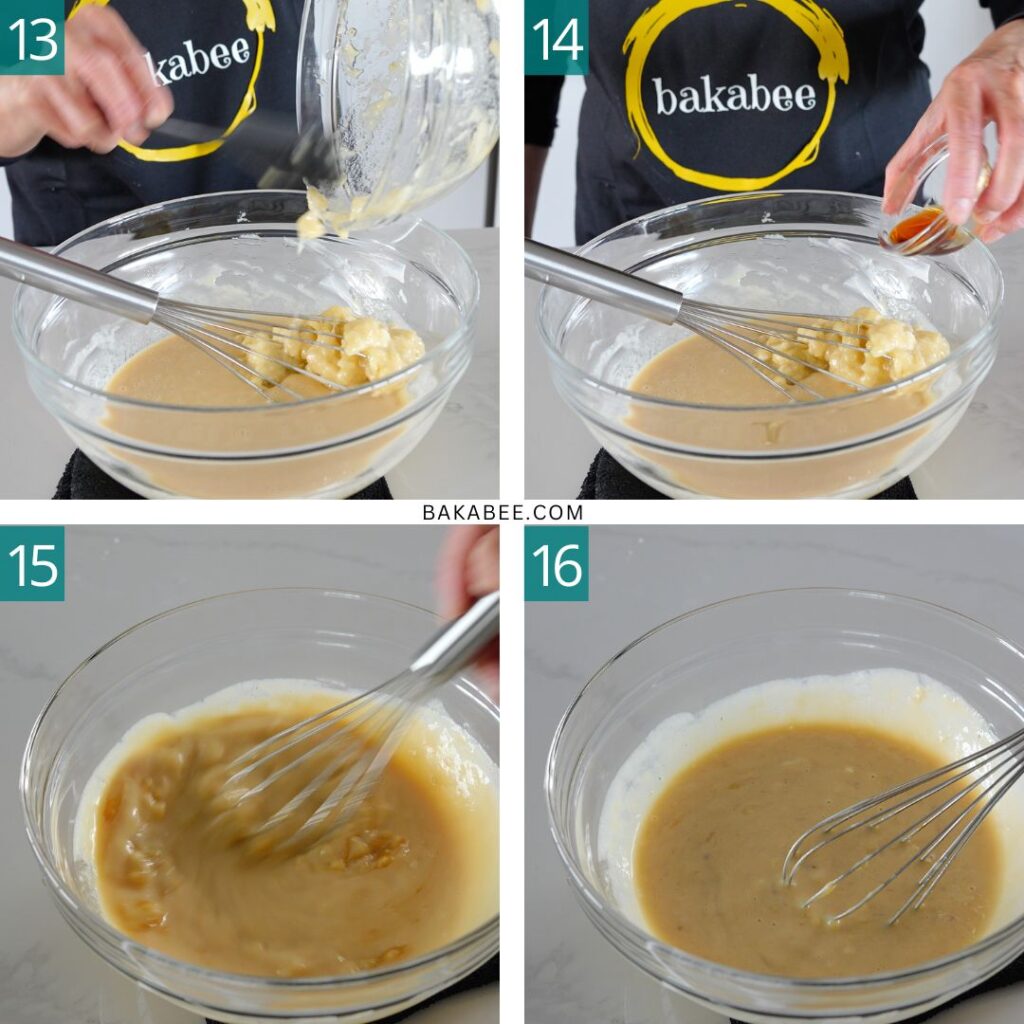
- Add mashed bananas.
- Add vanilla extract.
- Mix well.
- Keep mixing until the batter turns smooth.
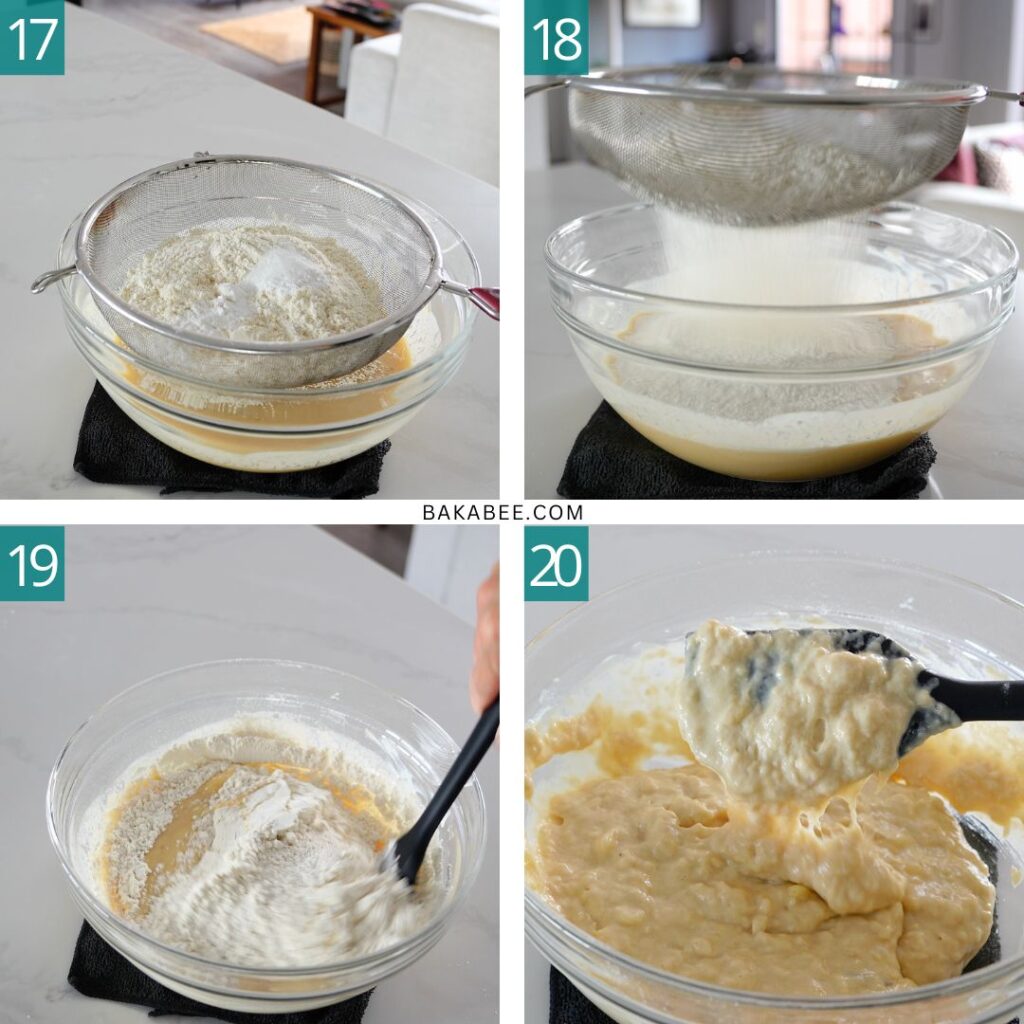
- Place a sieve on the mixing bowl, add flour, baking powder, baking soda and salt.
- Sift them to remove any lumps and aerate the dry ingredients mix.
- Gently mix using a silicon spatula.
- Mix until there are no traces of flour left in the batter.
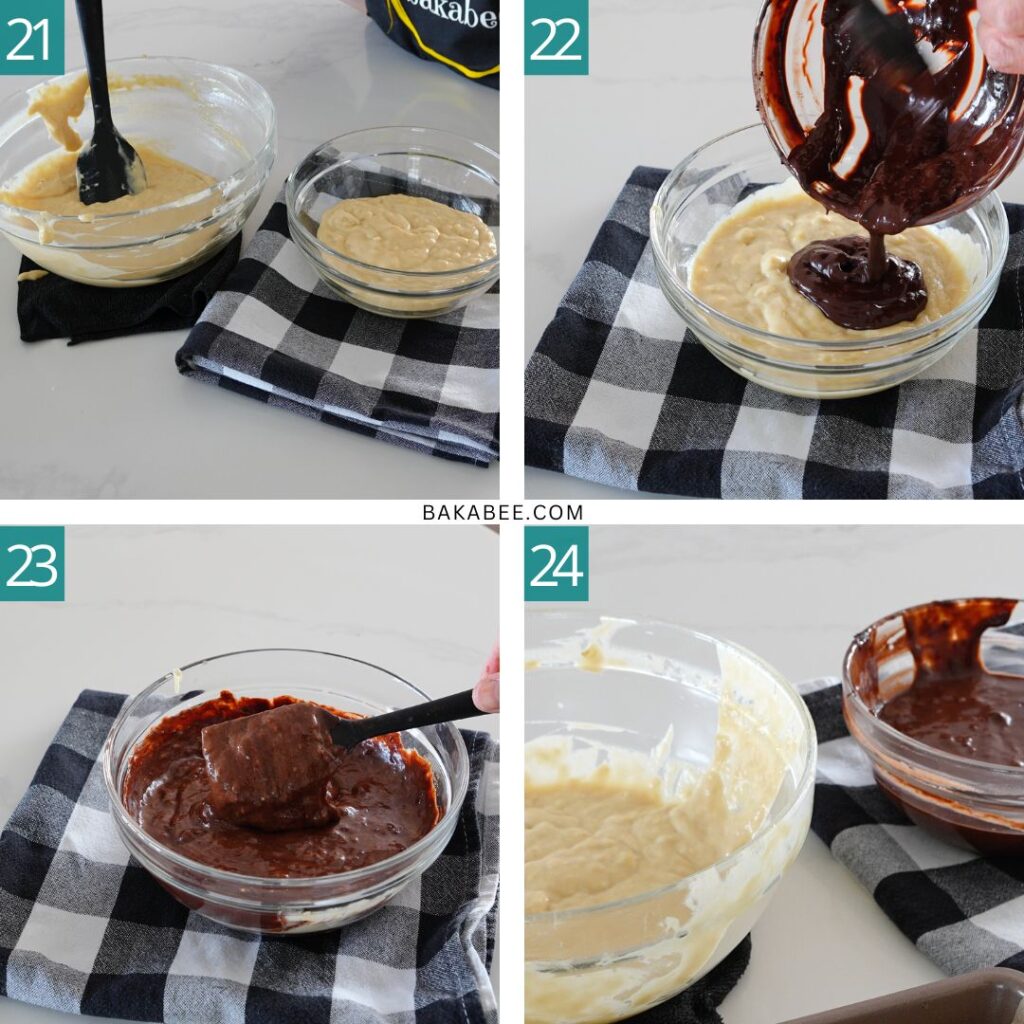
- Roughly divide the batter into two portions. You can weigh the batter, if you prefer, to have two equal portion but I just eyeball it.
- Add the cooled cocoa mixture into one portion of the batter.
- Mix well until fully incoporated.
- You now have two flavours of batter.
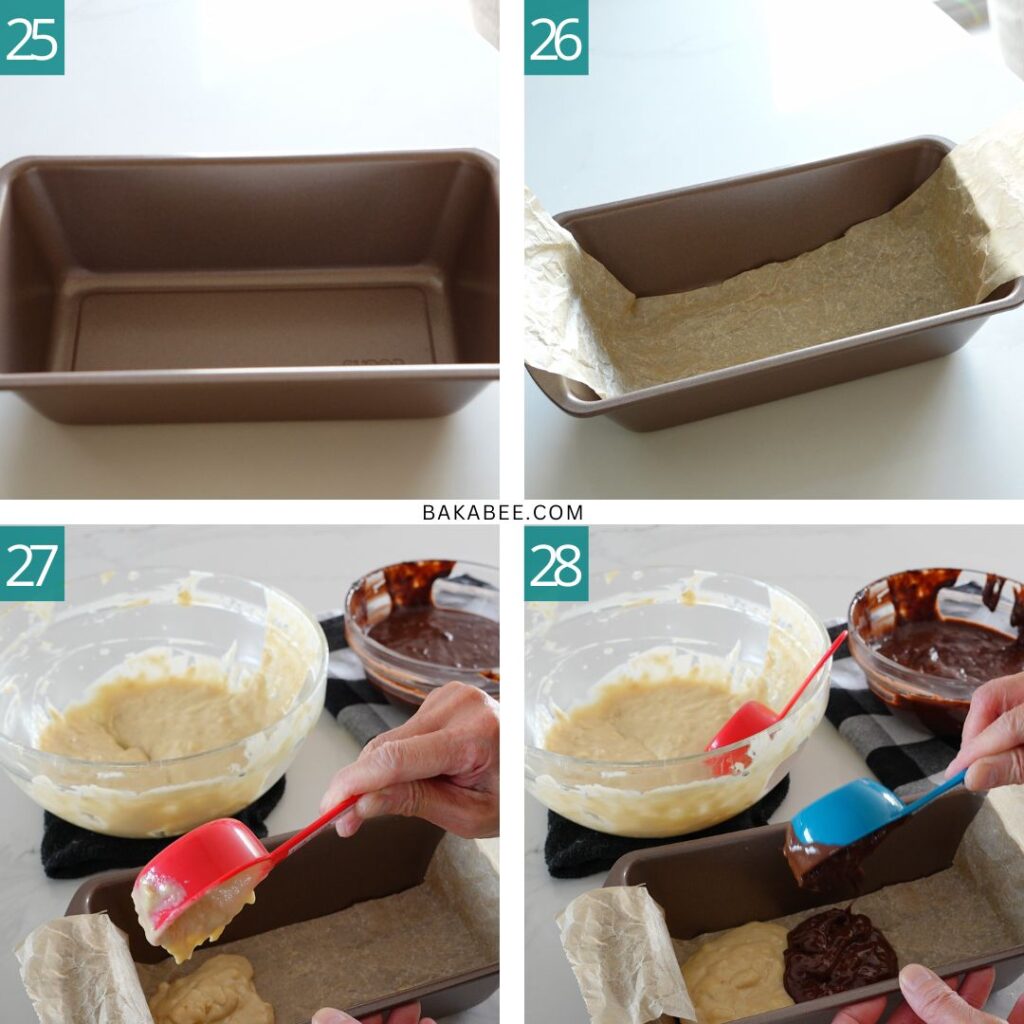
- In this recipe, I use a non-stick loaf tin. If you need to line your tin (without a non-stick coating), just make sure the parchment is long enough so you don’t have to flip the tin upside down.
- Here is how I prepare my tin. I line the bottom with a strip of parchment paper without any grease, leaving some overhang on both sides. This makes it easy to remove the cake from the tin by just lifting the parchment paper.
- Start layering the batter by scooping the two batters alternately into the loaf tin to create the marble effect. Start by scooping the vanilla bananas batter.
- Then one scoop of chocolate banana batter.
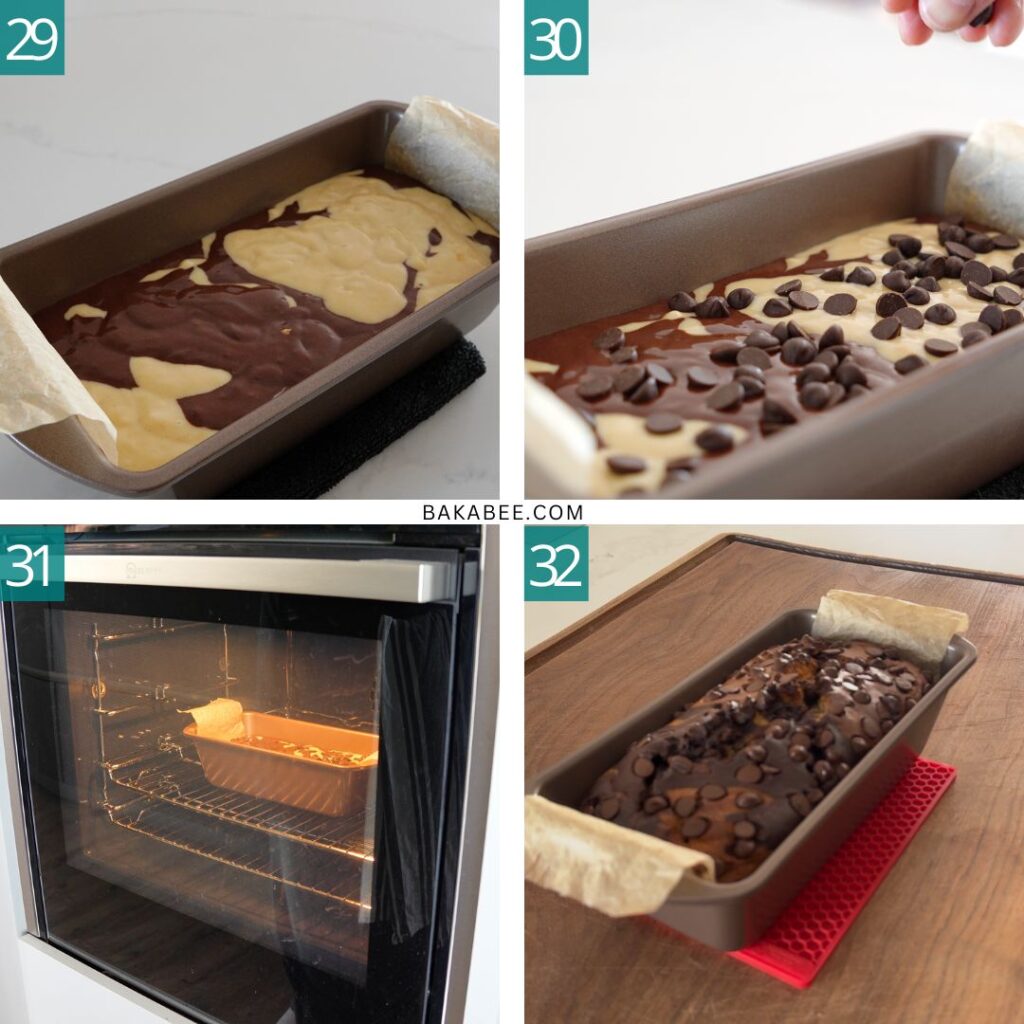
- Keep going until all the batter is used up.
- Once you’re done layering, sprinkle some chocolate chips on top. This is optional if you prefer a plain chocolate marbled banana loaf.
- Bake the loaf in a preheated oven at 175°C fan (350°F) for about 48 to 53 minutes. For your reference, mine took 50 minutes.
- Once it’s done let’s the cake sit in the pan for about 15 mins.
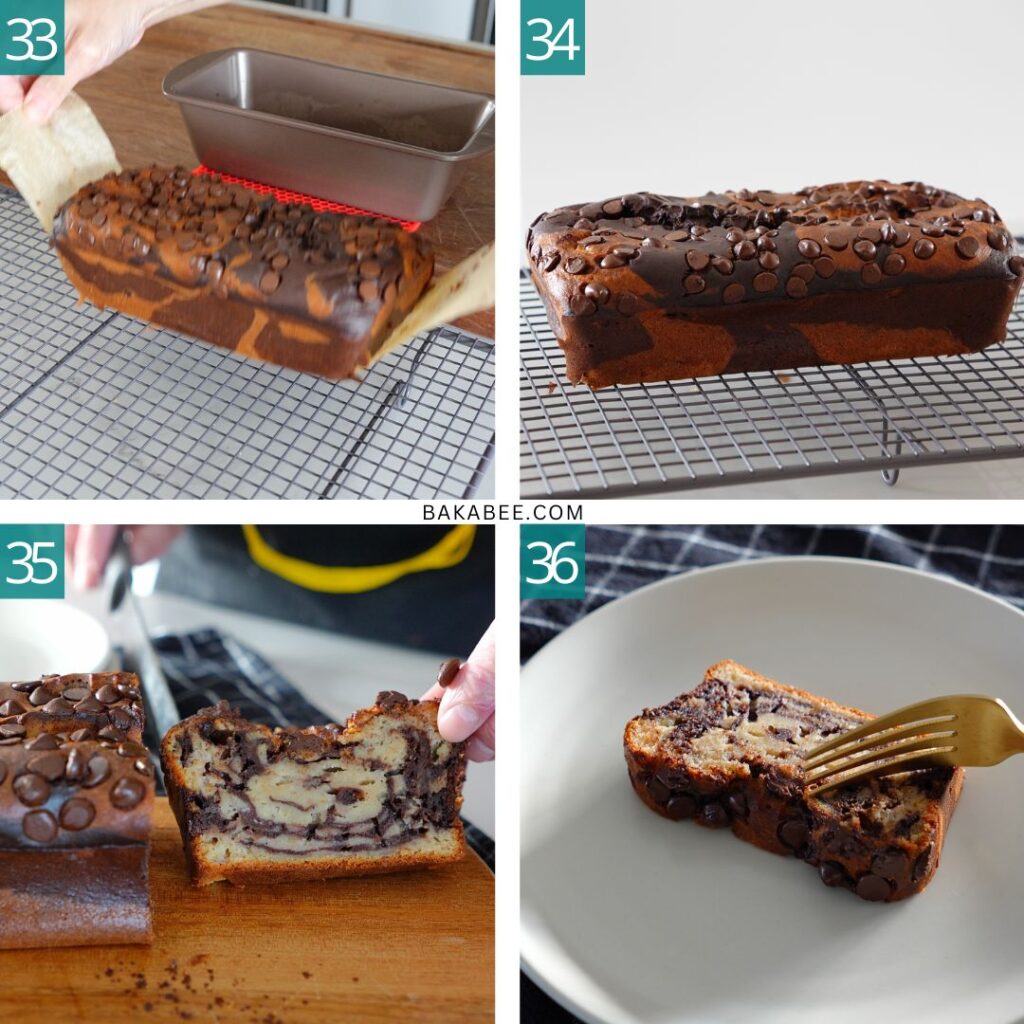
- Once it’s cool enough to handle, lift the cake out of the pan using the parchment overhang.
- Let it cool on a wire rack for another 15 minutes. You might notice the cake shrinks slightly as it cools—this is totally normal! It’s just the steam escaping and the structure settling a bit, especially in a moist loaf like this one.
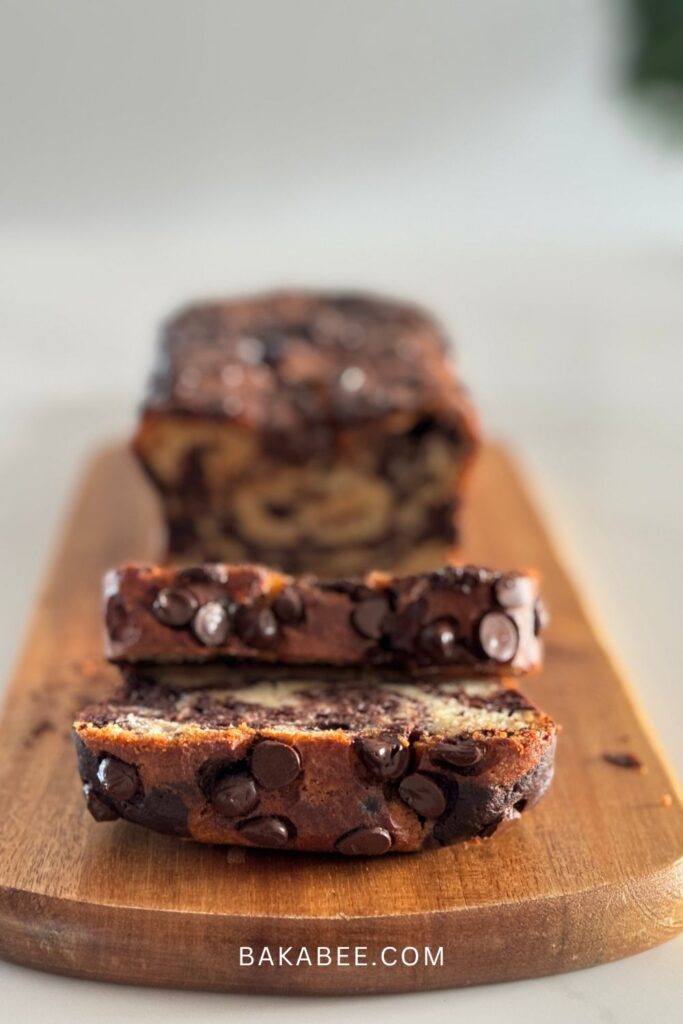
- After 15 minutes, slice it if you want to enjoy it warm, or leave it cool completely. Enjoy it warm or cool, both are equally delicious.
- Enjoy! You deserve it!
Tips for making the BEST chocolate marbled banana loaf
- Choose Ripe Bananas: The riper the bananas, the sweeter and more flavourful your loaf will be. Look for bananas with plenty of brown spots.
- Mash, But Don’t Over mash: Leave a few small lumps for a better texture in the loaf. Over mashing can make the batter too watery.
- Dissolve Cocoa Powder Properly: Mix the cocoa powder with hot milk until completely smooth. This intensifies the chocolate flavour and ensures a lump-free marbled effect.
- Don’t Over mix the Batter: When combining wet and dry ingredients, use a silicone spatula and fold gently. Over mixing can lead to a dense loaf.
- Adjust Sweetness if Needed: If your bananas are extremely ripe, you can slightly reduce the brown sugar for a balanced flavour.
How to serve this chocolate marbled banana loaf
- Warm with Coffee or Tea: Serve slightly warm for a cozy treat, paired with your favourite cup of coffee or tea.
- Toasted with Butter: Lightly toast a slice and spread with a little butter for an extra indulgent experience.
- Drizzle with Melted Chocolate: For a special touch, drizzle melted chocolate over each slice just before serving.
- Add a Scoop of Ice Cream: Turn it into a dessert by serving with a scoop of vanilla ice cream.
- Dust with Powdered Sugar: A light dusting of powdered sugar can make it look more elegant for serving guests.
How to store this chocolate marbled banana loaf
- At Room Temperature: Wrap the loaf tightly in plastic wrap or store in an airtight container for up to 3 days.
- In the Refrigerator: If you live in a warm, humid climate, keep the loaf in an airtight container in the fridge for up to 5 days. Allow it to come to room temperature or warm it slightly before serving.
- In the Freezer: For longer storage, wrap individual slices in plastic wrap, then place them in a freezer-safe bag. Freeze for up to 3 months. To enjoy, thaw at room temperature or microwave for a few seconds for a warm treat.
Frequently Asked Questions
Yes, but Greek yoghurt is thicker and creamier, which helps keep the loaf moist. If using regular yogurt, slightly reduce the amount to avoid making the batter too runny.
Yes, but the texture will be denser. For a lighter texture, you can use a mix of half whole wheat flour and half all-purpose flour.
Absolutely! You can make a plain banana loaf by skipping the cocoa mixture.
Yes! Feel free to fold in chopped nuts, dried fruits, or even a handful of extra chocolate chips for a custom flavour.
More loaf cake recipes you might like
Did you make this recipe?
Let me know if you try out this recipe – I love seeing your creations! Tag me on Instagram @bakabeecom and be sure to leave me a comment / ⭐️⭐️⭐️⭐️⭐️ rating below!
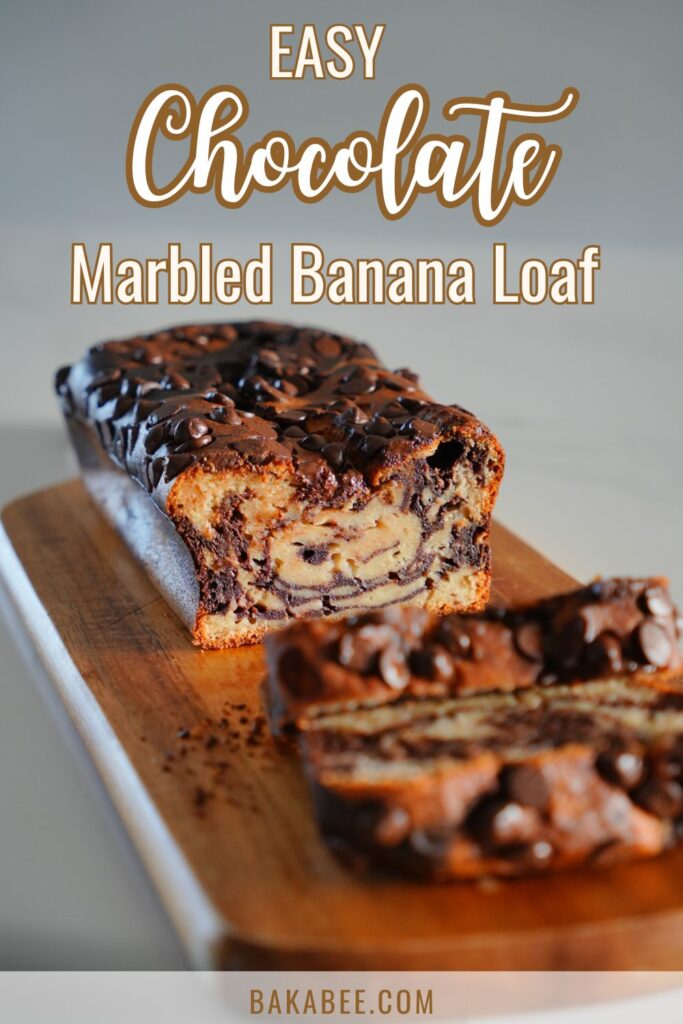

Chocolate Marbled Banana Loaf
- Author: Bakabee
- Prep Time: 20 mins
- Cook Time: 50
- Total Time: 1 hour 10 minutes
- Yield: 1 loaf 1x
- Category: cake, desserts, afternoon tea
- Method: Bake
- Cuisine: Western
Description
Got a couple of overripe bananas sitting in your fruit bowl? Don’t toss them! Turn them into this Chocolate Marbled Banana Loaf—a moist, rich treat that combines the sweetness of bananas with a swirl of chocolate. Perfect for a cozy coffee break or an afternoon snack, and the marbled effect is easier than you think!
Ingredients
- 175 g all purpose flour
- 60 ml vegetable oil
- 60 g light brown sugar
- 30 g cocoa powder
- 2 eggs
- 1 tsp baking powder
- 1/4 tsp salt
- 1/4 tsp baking soda
- 130 g Greek yoghurt
- 65 ml milk (hot)
- 2 tsp vanilla extract
- 2 large bananas (overripe, mashed)
- 30 g dark chocolate chips
Instructions
- Preheat your oven to 175°C (350°F). Line a non-stick loaf tin with a strip of parchment paper, leaving some overhang on the ends for easy lifting. Otherwise, grease and line your pan with parchment paper.
- In a small bowl, mix the cocoa powder with hot milk until smooth and lump-free. Set aside to cool.
- Peel the bananas (from the bottom for easier peeling), then mash them until mostly smooth, leaving a few small lumps for texture.
- In a large mixing bowl, combine the brown sugar and vegetable oil, stirring until well combined. Add the Greek yoghurt, mashed bananas, and vanilla extract, mixing until smooth.
- Add the eggs, one at a time, whisking well after each addition until fully incorporated.
- Sift in the flour, baking powder, baking soda, and salt. Use a silicone spatula to gently fold the dry ingredients into the wet, scraping down the sides and bottom as you go. Be careful not to overmix – just mix until you no longer see dry flour.
- Divide the batter into two portions. Mix the cooled cocoa mixture into one portion until well combined.
- Scoop the plain and chocolate batters alternately into the prepared loaf tin. Use a skewer or knife to gently swirl for a marbled effect.
- Sprinkle chocolate chips on top for extra chocolatey goodness (optional).
- Bake in the preheated oven for 48 – 53 minutes or until a skewer inserted into the centre comes out clean.
- Let the cake sit in the pan for about 15 minutes. Once cool enough to handle, lift it out using the parchment paper and transfer to a wire rack. Cool for another 15 minutes if you want to enjoy it warm, or completely before slicing.
- Slice and enjoy your rich, chocolatey, and perfectly moist marbled banana loaf!
Equipment
 Buy Now →
 Notes
- Watch my video tutorial here to see how easy it is to make.
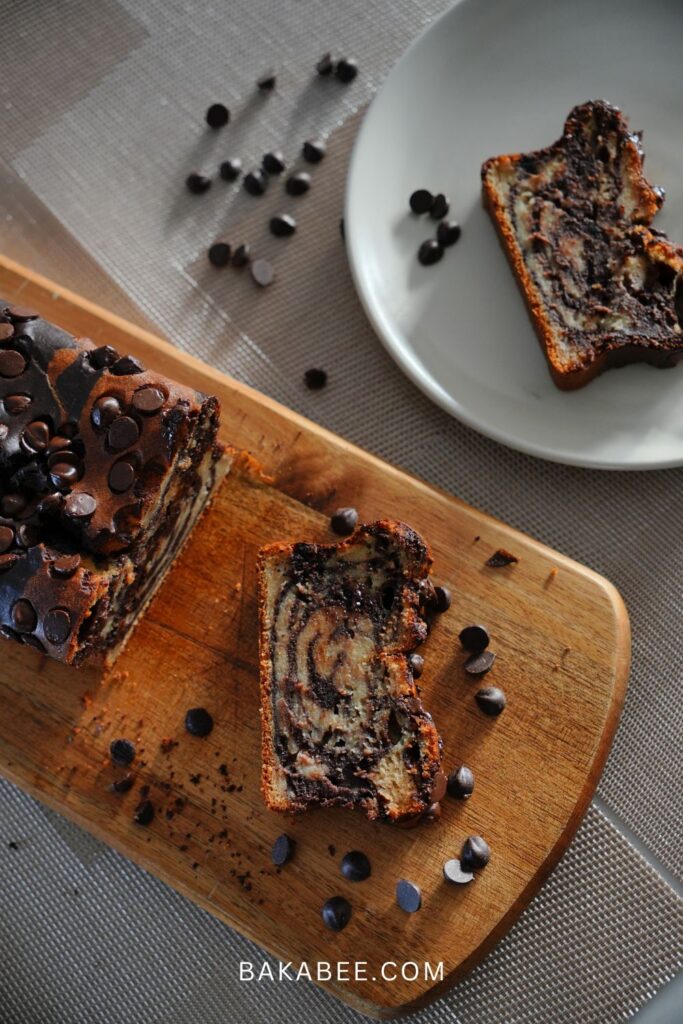
Thanks for joining me in the kitchen today. Hope you’ll love this! Enjoy and keep baking! 💛
Share this!

