Share this!
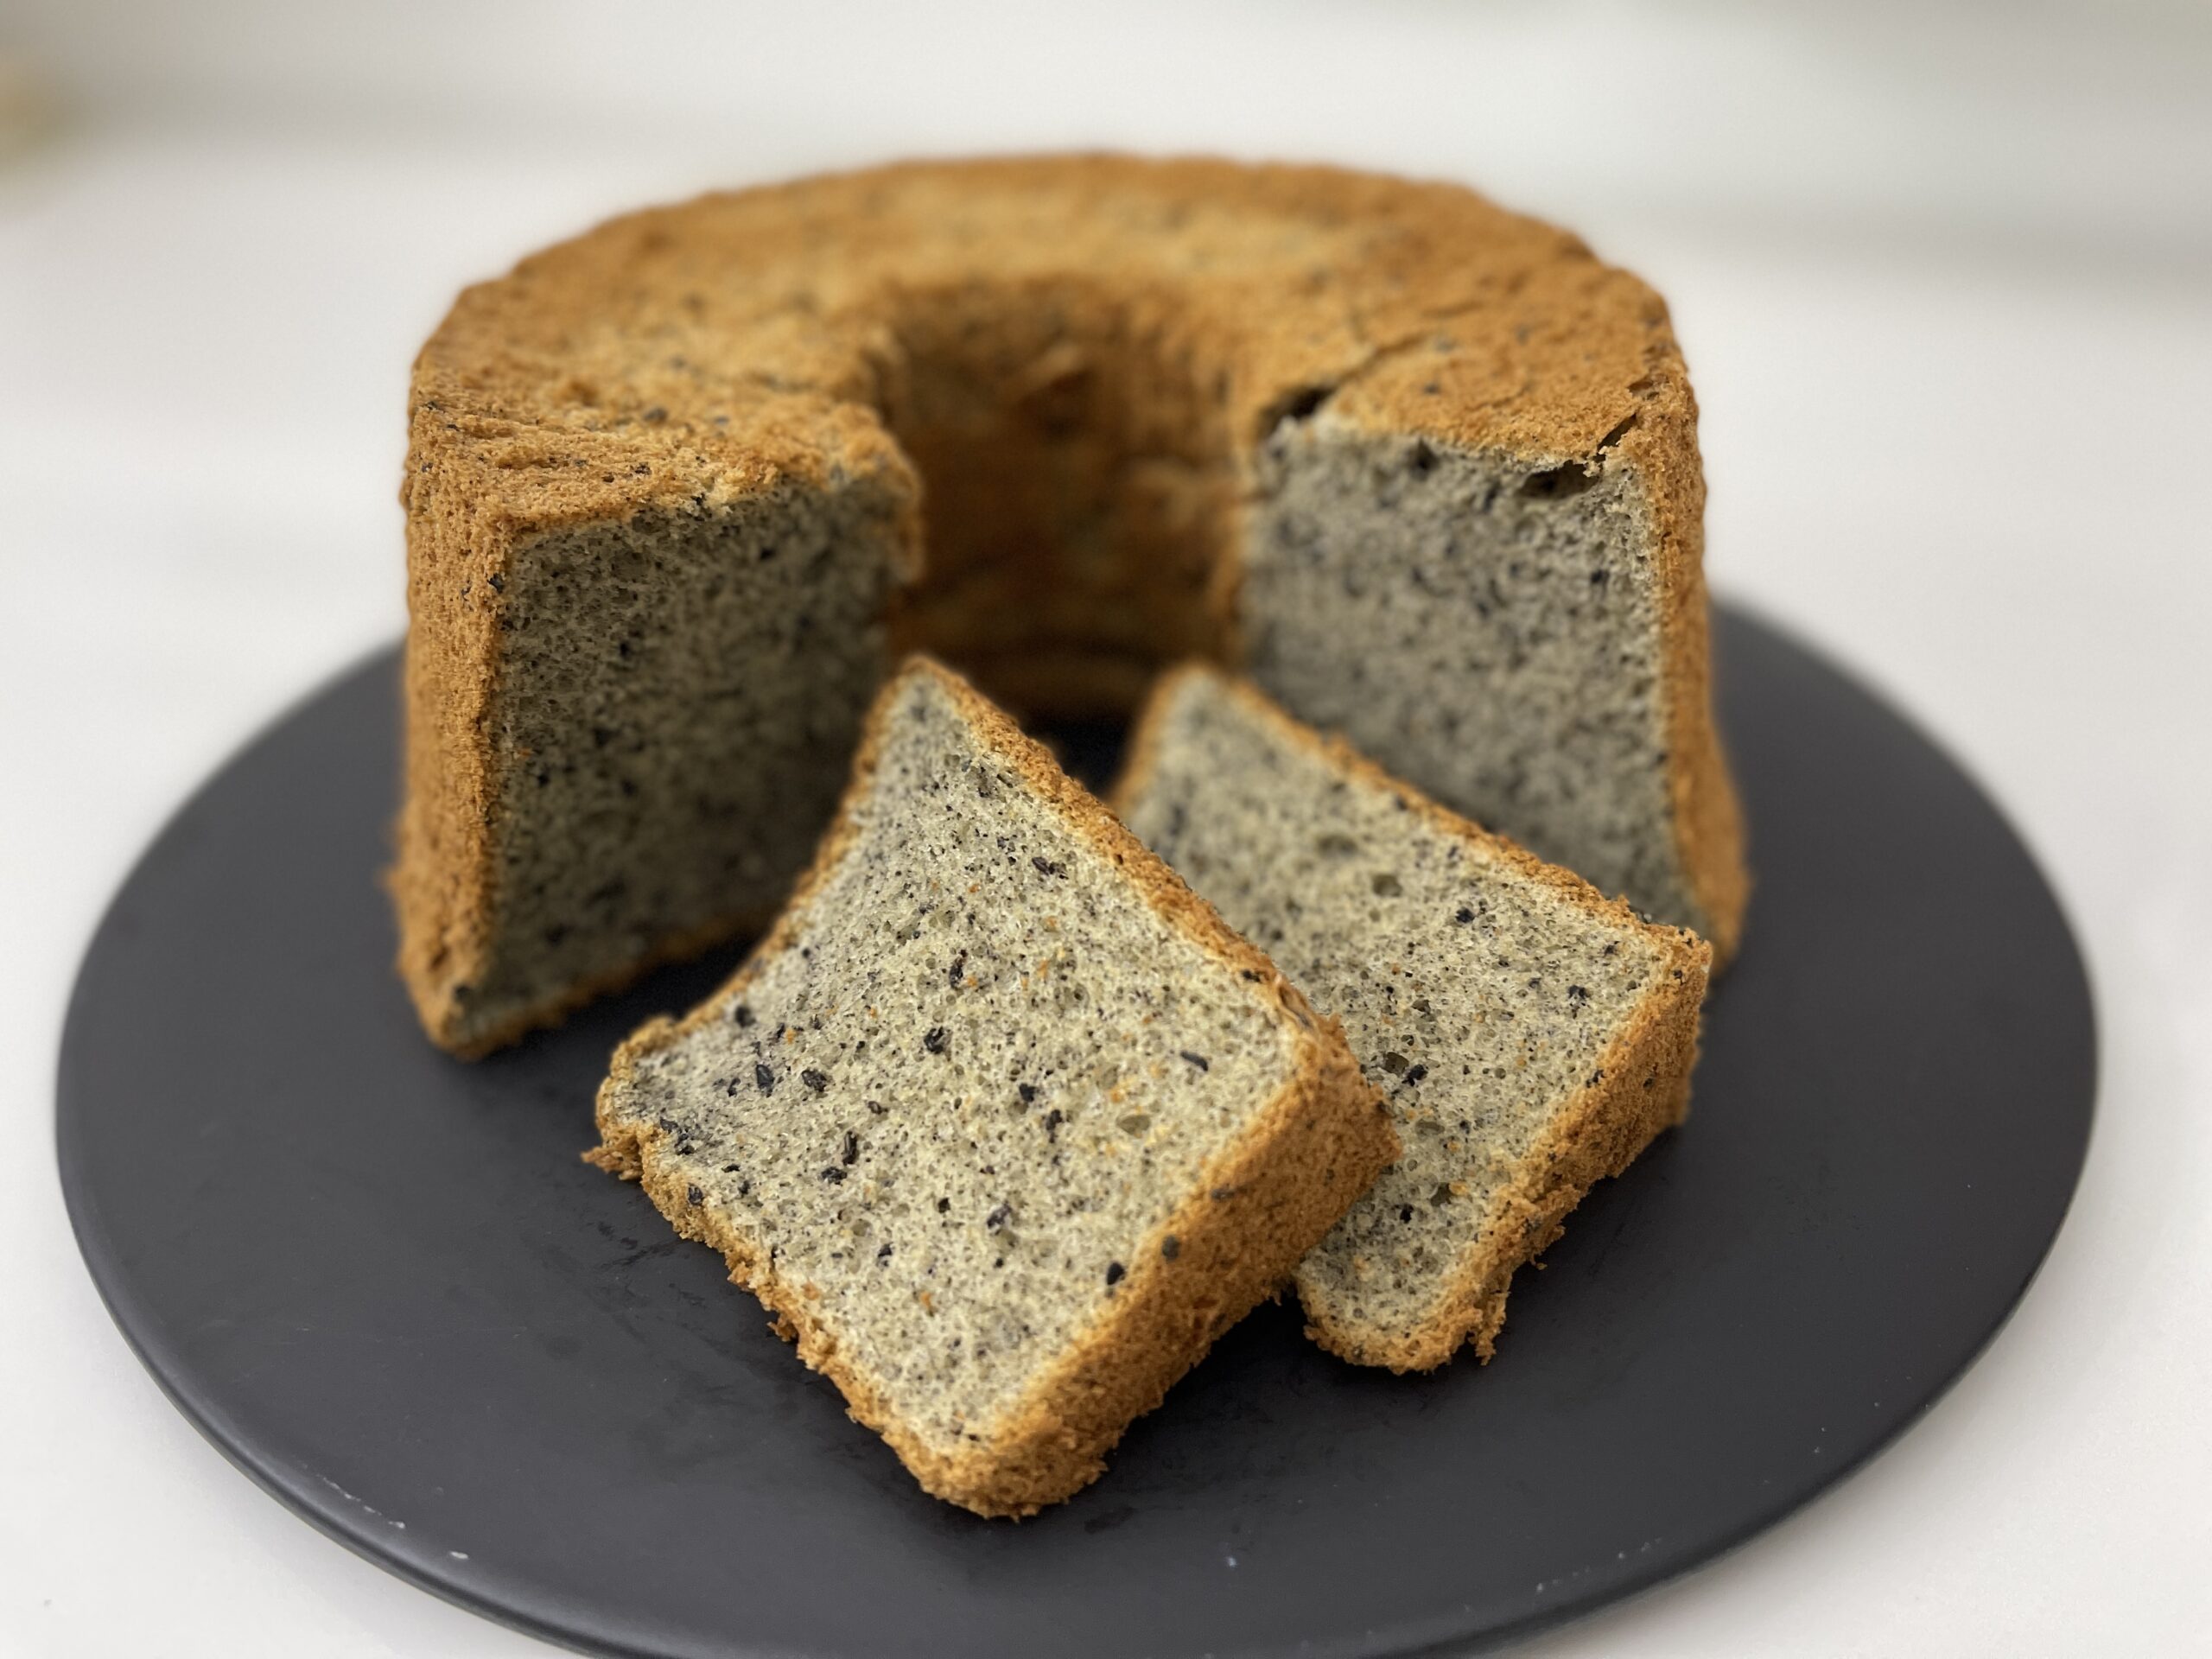
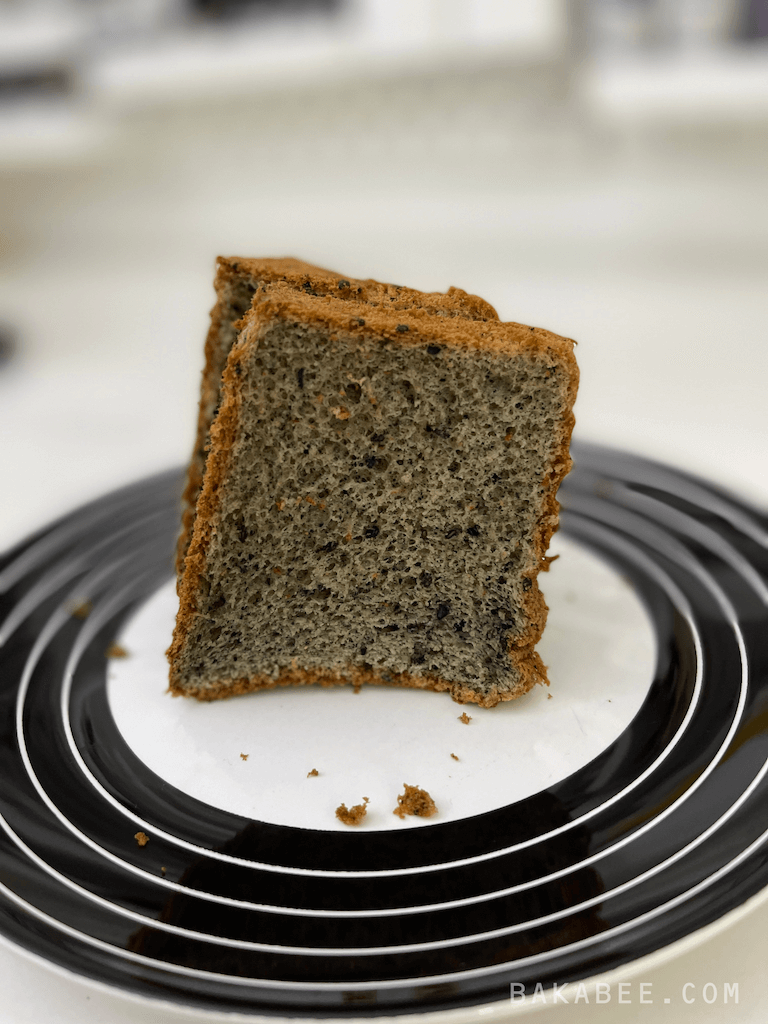
Chiffon cake is one of my absolute favourite cakes to bake. The texture is so light, airy and spongy. A classic chiffon cake recipe, adding a homemade black sesame paste, creates a unique nutty flavour. This cake is unbelievably moist and delicious; you can easily finish it without blinking and wonder where it went!
I like using black sesame in my bakes, pastries and cakes. They make these bakes scrumptiously delicious and are perfect for any occasion. Family parties and seasonal gatherings are coming soon, check these recipes out, they won’t let you down:
- Black Sesame Swiss Roll (video tutorial)
- Black Sesame Pastry Sticks (video tutorial)
- Choux Pastry with Black Sesame Pastry Cream (video tutorial)
You can bake this ultra light and airy black sesame chiffon cake as the centrepiece in your party. It’s so delicious on its own or topped with fresh whipped cream and sprinkled with more black sesame seeds.
The benefits of consuming black sesame seeds
Black sesame seeds are full of nutrients. They are rich in healthy omega 3 fatty acids, fibre, protein, zinc, iron and antioxidants.
They can help to improve blood pressure, promote healthy growth of hair and maintain supple skin. Also, they have the potential to protect the digestive system.
This makes me think … having a treat while benefiting your body, why not? One stone hits two birds, good deal!
Before we look at the other ingredients for this black sesame chiffon cake, let’s deal with the black sesame paste first. I don’t have a jar of black sesame paste on my shelf at home because I prefer to make my own. Making a paste?! It sounds quite challenging. Actually, I can tell you it’s a lot easier than you’d think and I love the freshness of the home made paste. Let me explain how to make it now and you can also watch my video tutorial. Why don’t you have a go?
Watch the video tutorial
Black Sesame Paste
To make the paste, you’ll need black sesame powder and honey. If you can’t find the powder in your country, you can use whole black sesame seeds instead – but you’ll need to take one more step before turning them into a paste. I’ll deal with both below.
You’ll need a food processor, ideally a small one because we are not making a large quantity.
Obviously, if you decide to use a store-bought black sesame paste, you can skip these next steps and head down to the rest of the recipe ingredients below.
How to make homemade black sesame paste in 2 simple steps
- Grind some black sesame powder in the food processor for a few seconds to remove any lumps
- Mix the powder with honey and pulse the food processor a few times until they turn into a paste (I use 1 ¾ tbsp of honey, you can adjust the amount of honey according to your personal tastes).
That’s it! Paste is made!
OR
If you use black sesame seeds instead of powder, the steps are …
- Toast the black sesame seeds in a dry pan until they are toasted. You can judge this when you can smell the fragrance releasing and see the seeds start to release their natural oil.
Pro Tip: Place some white sesame seeds in the pan and toast them together with the black sesame seeds. When you see the white sesame seeds turn light brown, that means the black sesame seeds are toasted too! Clever, huh!
- Grind the toasted black sesame seeds in the food processor or grinder as finely as you can.
- Mix the powder with honey, as above, and pulse the food processor a few times until they turn into a paste.
So now you have your paste, what else is in this fabulous black sesame chiffon cake?
Recipe Ingredients
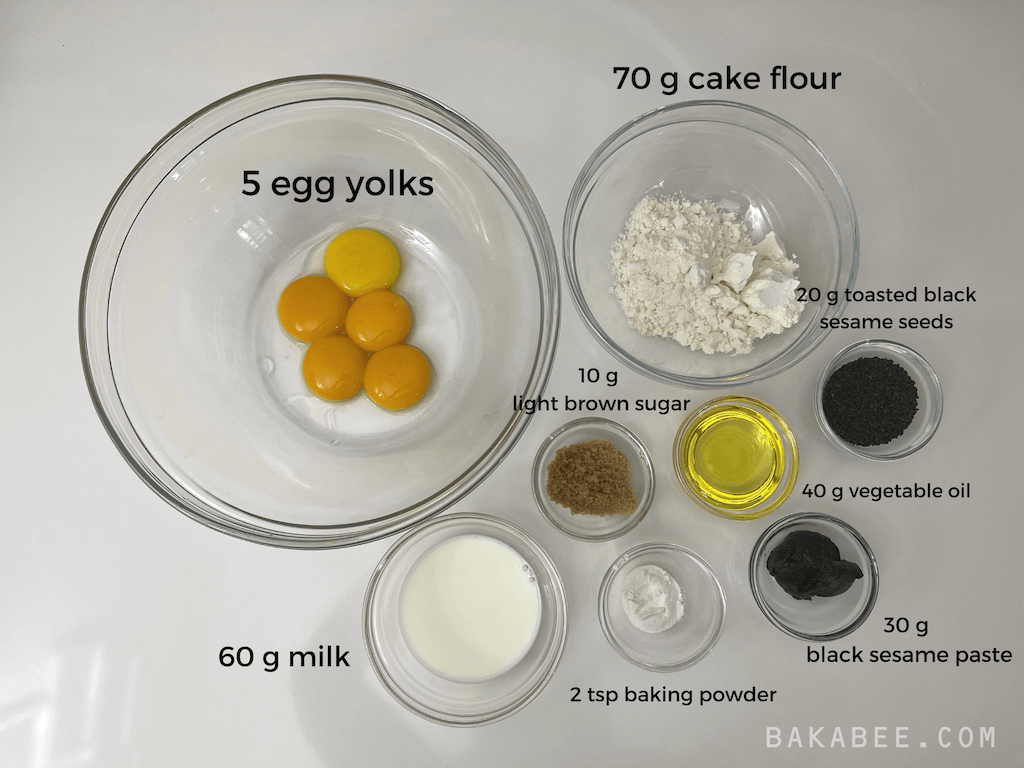
The Chiffon Cake
- Black sesame paste (homemade or store-bought) – please adjust the amount of brown sugar according to the taste of your paste if you use the store-bought one
- Cake flour – helps create a fine and tender texture
- Egg yolks – I use large eggs, each one is around 50 grams without the shell
- Vegetable oil – you can substitute any neutral flavoured oil
- Black sesame seeds (optional) – preferably toasted to enhance the nutty flavour
- Baking powder – to help lift the cake
- Light brown sugar – the caramel flavour compliments the nutty flavour beautifully
- Milk – I use semi-skimmed milk and warm it up in the microwave for 10 to 15 seconds until lukewarm
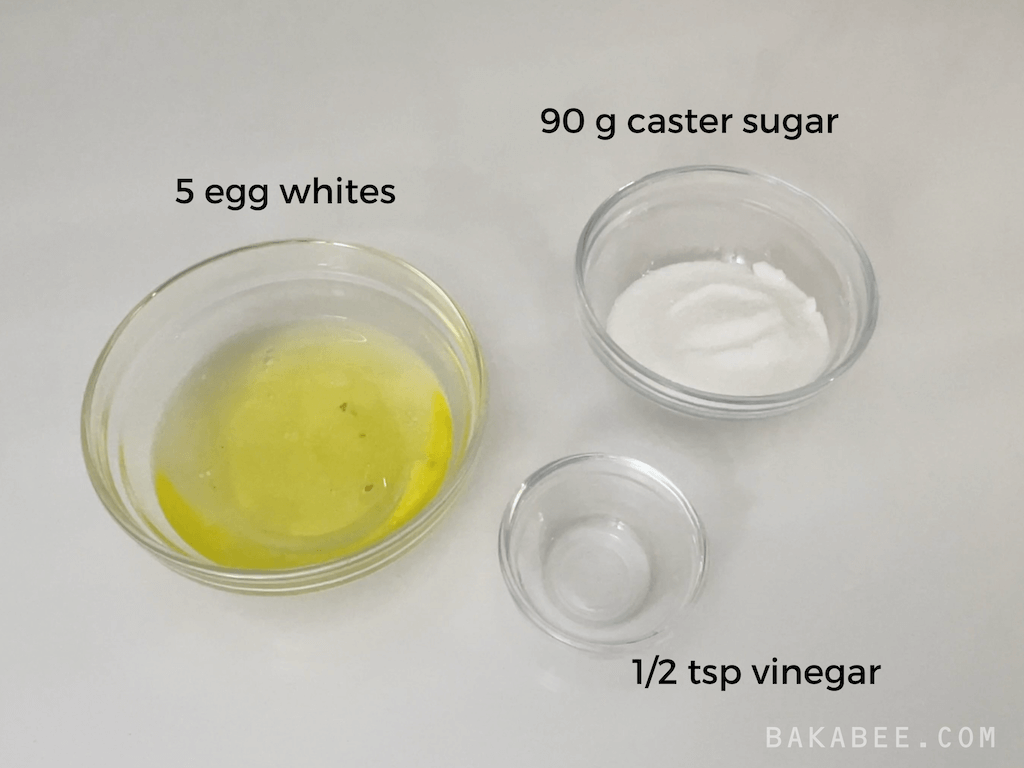
The Meringue (added into the cake mix)
- Egg whites
- Caster sugar
- white vinegar
Ingredients ready, now let me show you, step-by-step, how to make this fabulous black sesame chiffon cake.
Making the Cake
Step 1: Preparing the cake batter
The airiest and lightest texture starts from the cake batter. We need to incorporate as much air into it as we can.
How do we achieve it?
My secret tool is a hand-held whisk (if you don’t have one I’d recommend a stand mixer as second choice. You can whisk manually but it’s very hard work!).
- Whisk the yolks and the brown sugar in a large mixing bowl. Whisk them at medium speed using your hand-held mixer with a whisk attachment until the yolk mixture turns a bit pale in colour and thicker in texture.
- Mix in the black sesame paste and continue to whisk until they are all well blended.
- Add the milk and oil into the mixture and whisk until everything is well mixed.
- Sift in the dry ingredients, flour and baking powder and continue to whisk at medium speed until you can’t see any traces of the dry ingredients.
- Fold in toasted black sesame seeds (optional) to complete the cake batter. I mix them in very gently, using a spatula, to avoid knocking the air out.
Cake batter is done!
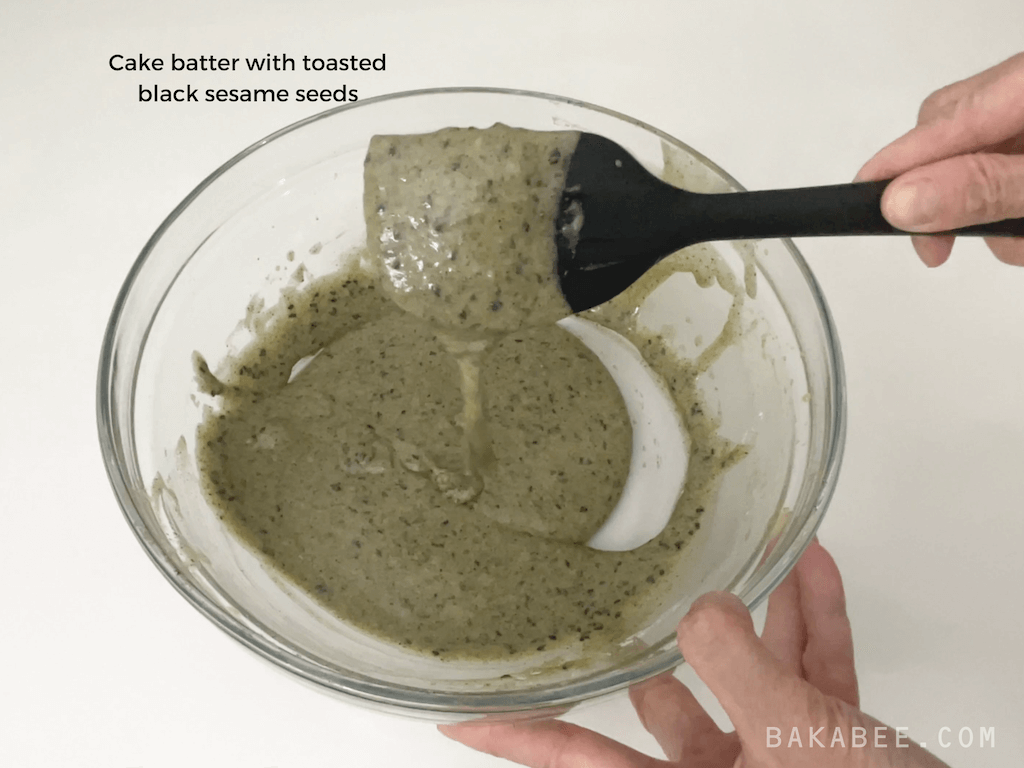
Step 2: Pre-preparation before making the meringue
Whipping the egg whites is a crucial step for creating the airiest and lightest chiffon cake texture. We want the chiffon cake to turn out tall and straight when it comes out from the pan. In order to achieve 100% success whipping the egg whites, you need to have grease-free tools.
To show you how to be certain that your tools are grease-free, I explained key tips in my post Black Sesame Swiss Roll, please check it out, this really is important for success. Any fat accidentally introduced into the egg whites will affect the process of successful whipping of the meringue.
Step 3: Preparing the meringue
- Whip the egg whites in the grease-free mixing bowl using a stand mixer with a whisk attachment at medium-low speed until they become foamy.
- Add the vinegar to help stabilise the egg whites so that they retain their volume and don’t collapse.
- When a thicker layer of foam starts to form, begin adding the sugar in three portions. Give time for each portion to dissolve – around 1 minute – before adding the next portion.
- Turn on the mixer to medium high speed after all the sugar is added and continue to whip the egg whites until you can see some whipping patterns are forming on the surface.
- Whip them until they form stiff peaks. Test this by using the whisk itself to draw out the meringue; if the peak is firmly formed and stands up on its own it is done.
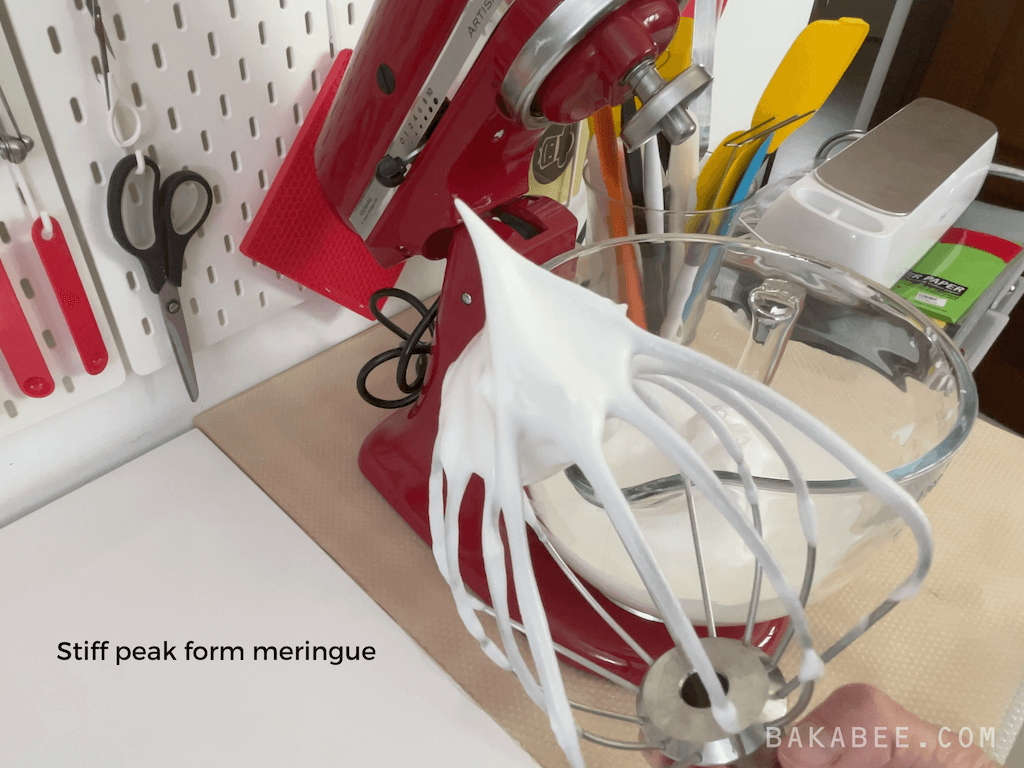
Step 4: Mixing the meringue into the cake batter
- Take a spatula and scoop a small amount of meringue. Add it to the cake batter and mix it in using a manual hand held whisk. This loosens the thick texture of the cake batter for easier mixing.
- Scoop around ⅓ of meringue into the batter and continue to mix it in using the hand whisk until you can’t see any whites. Keep your movements very gentle and in the same direction.
- Continue to scoop in the remaining portions of meringue until everything is well mixed. As you see in the image, the batter should be light and airy.
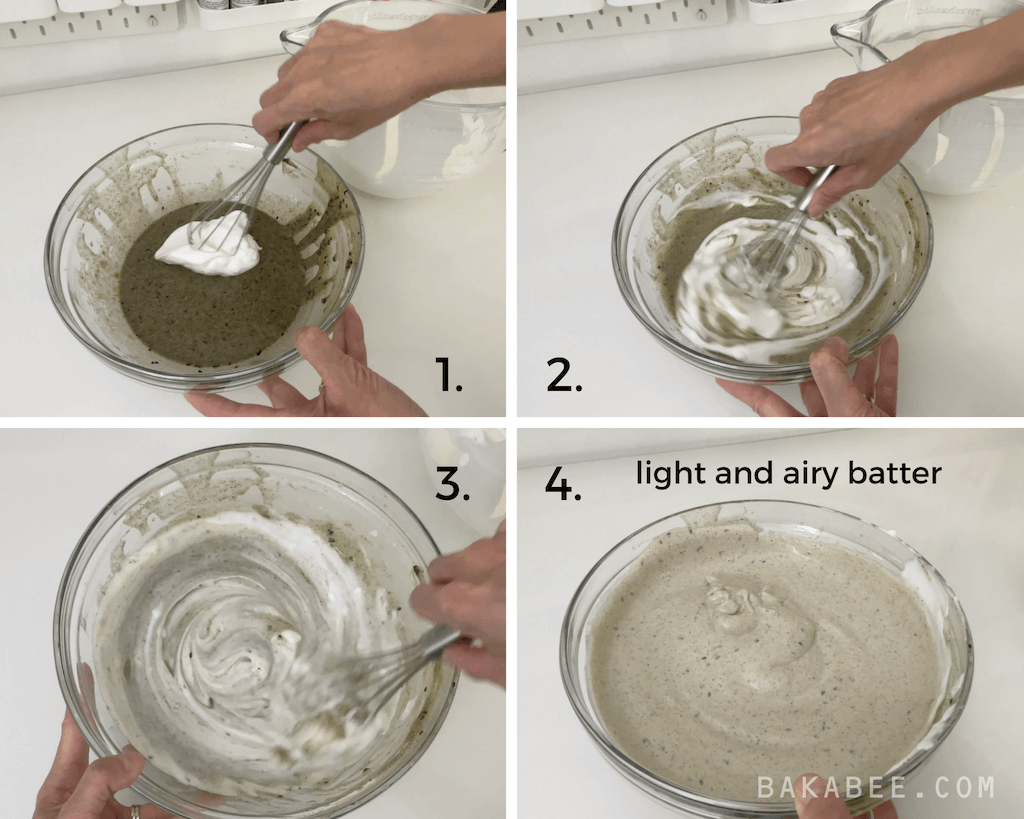
Step 5: Pouring the batter into the cake tin
- Prepare an aluminium loose-based chiffon tube tin; DO NOT grease it because the cake needs to cling to the sides and centre of the tin for support as it rises.
- Hold the mixing bowl tight and pour the batter in, all at once, at the same spot.
- Scrape the remaining batter using a spatula, also try to scrape it down to the same place in the cake tin.
- Shake the tin gently to distribute the batter evenly.
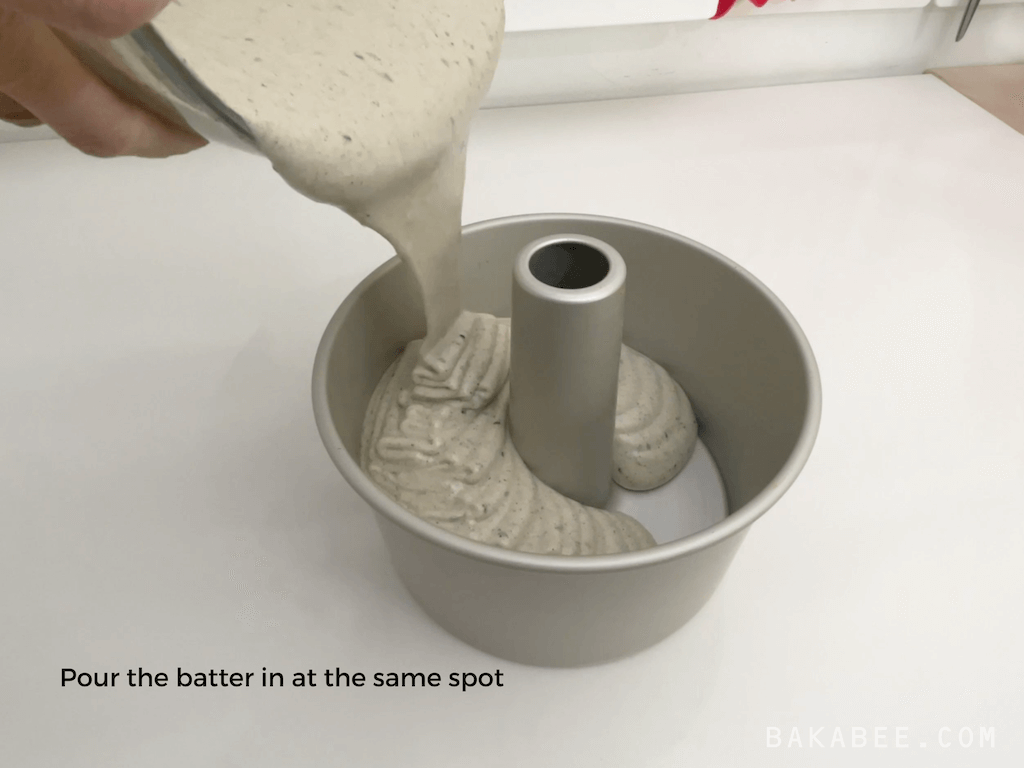
Step 6: Two simple tricks to avoid large air bubbles getting trapped in the batter
- Drop the pan against the work surface a few times from the height of a few centimetres.
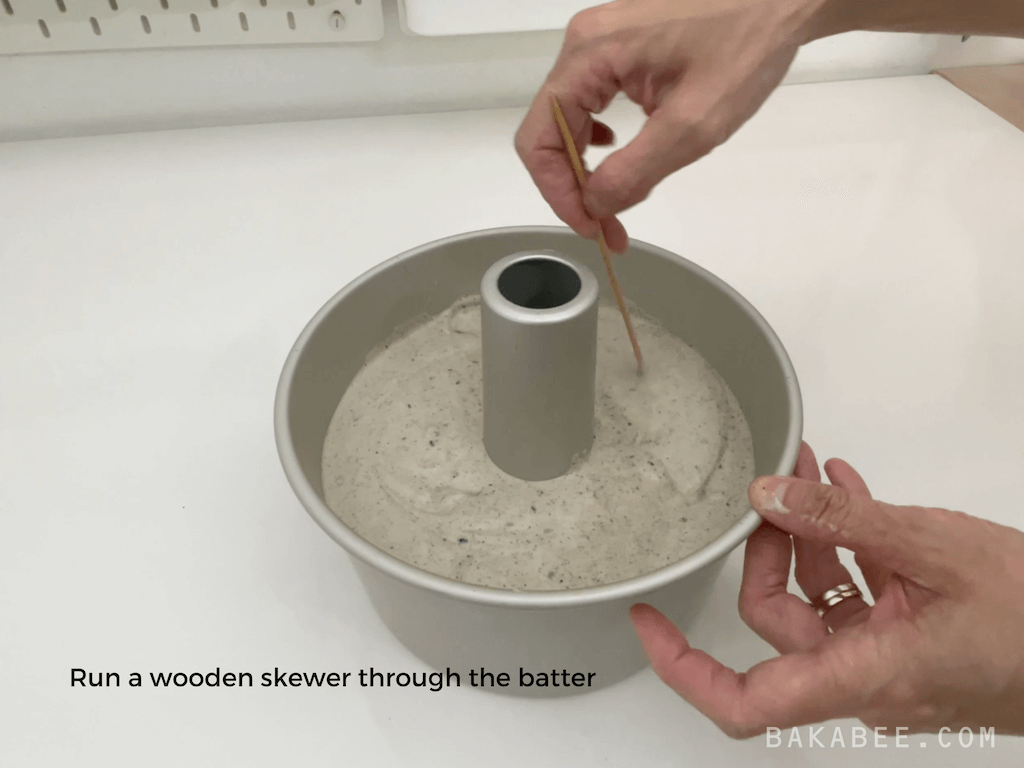
- Gently run a wooden skewer through the batter a few times.
Step 7: Baking the cake
Before you put the cake in the oven, make sure it has reached the desired temperature. Chiffon cake is very sensitive to heat. If it’s too low, the cake will not rise to its ideal height; too high, and the cake may burn on the top.
Not every oven displays the actual temperature, so I have three pieces of advice that can help (learned from bitter experience!)
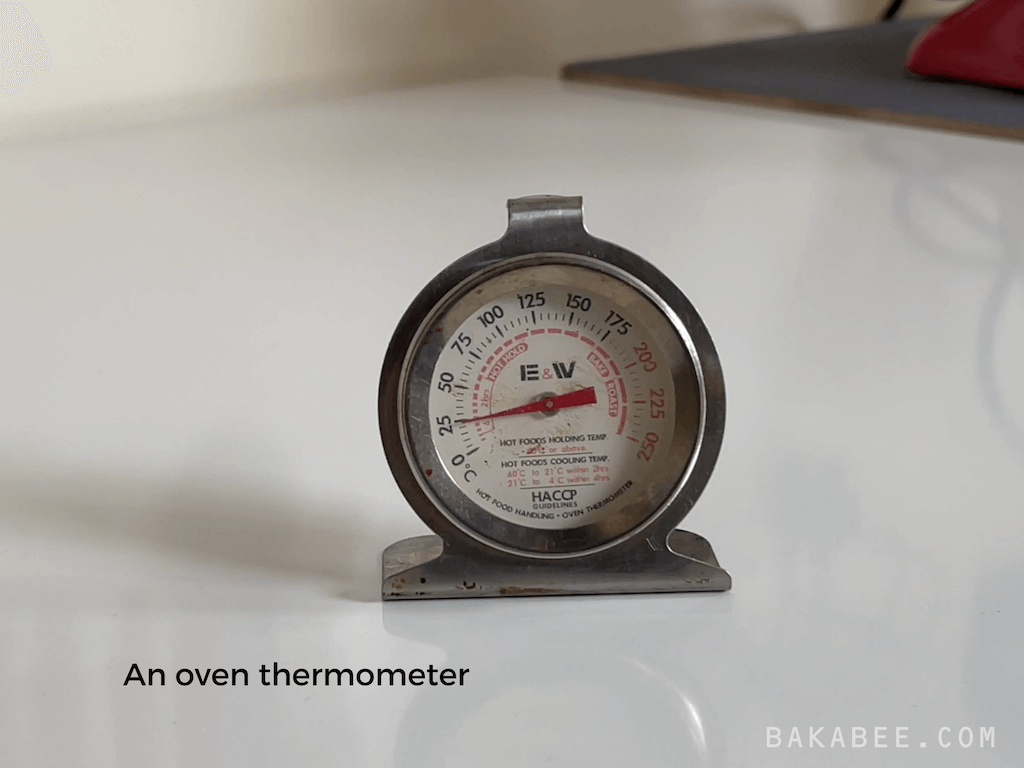
Advice #1 – get an oven thermometer and place it in the oven so that you can be sure the oven reaches the desired temperature before inserting the cake.
Advice #2 – DO NOT open the oven door during the baking process. As I mentioned, chiffon cake is very sensitive to temperature. Even if the door is opened for a few seconds, the temperature dropping suddenly may affect the cake and stop it from rising properly.
Advice #3 – Place the cake pan on a lower rack in the oven because the cake needs more heat from the bottom to help it rise to its ideal height while we don’t want the surface of the cake to get brown too quickly.
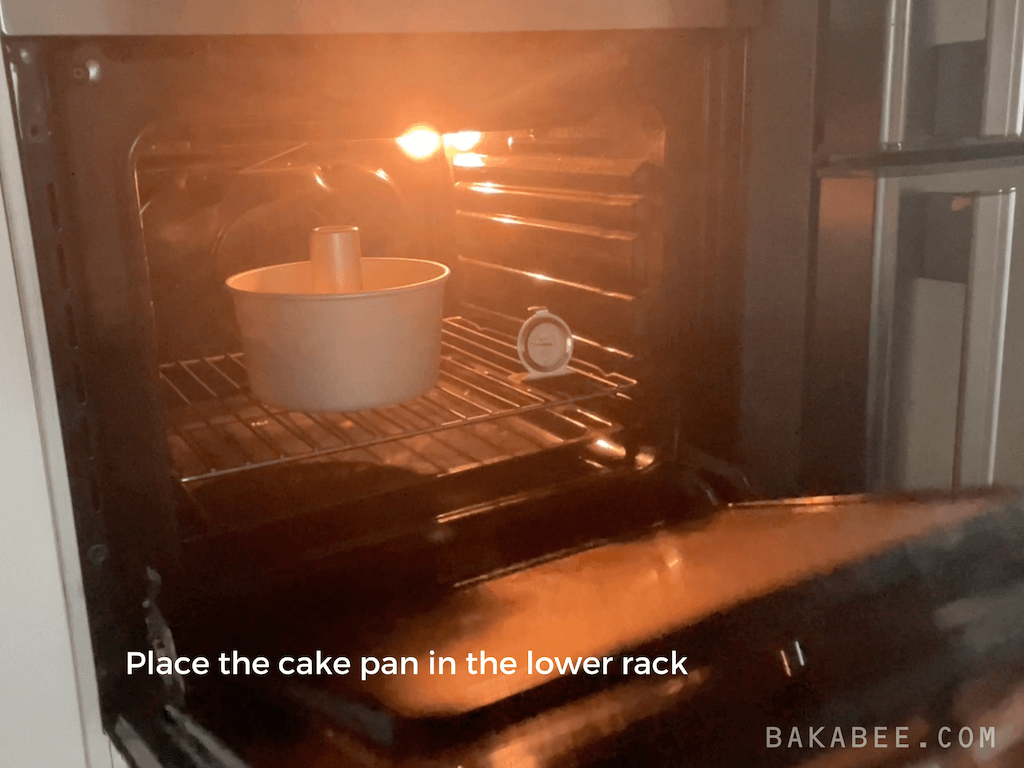
Bake the cake for about 40 to 45 mins. During the baking process, you will see the cake rising gradually, not rapidly. It means the inner structure of your chiffon cake is forming in a stable manner and it’s quite unlikely it will shrink when it cools.
You may open the oven door 5 mins before the end of the baking time and test the cake by inserting a skewer; if it comes out clean, that means the cake is done. If it’s not clean, leave the cake in for the full time.
Step 8: Inverting the cake to cool it down
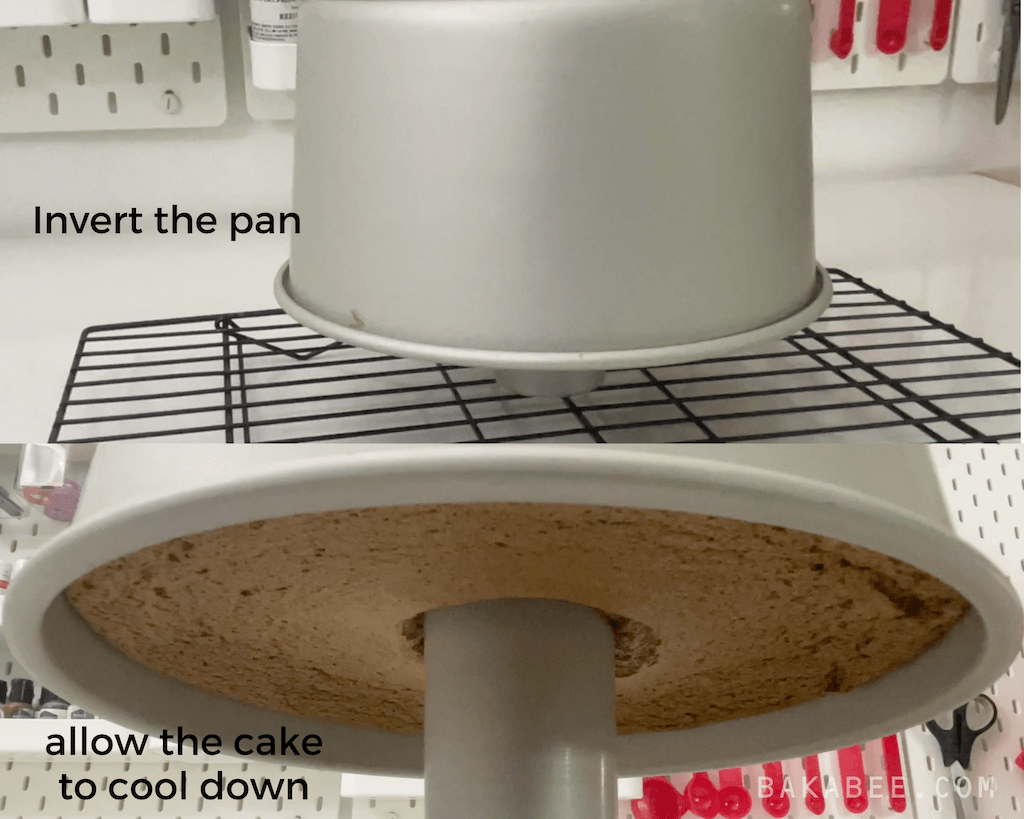
Inverting the cake is an essential step for success. Once the cake comes out from the oven, invert the pan and place it on a wire rack or even an inverted bowl, whatever you have to hand. Allow the cake to cool down completely. DO NOT try to do anything with the cake before this step is done! Doing this allows the cake to stay tall and straight as it cools and prevents it from collapsing once the cake pan has been removed.
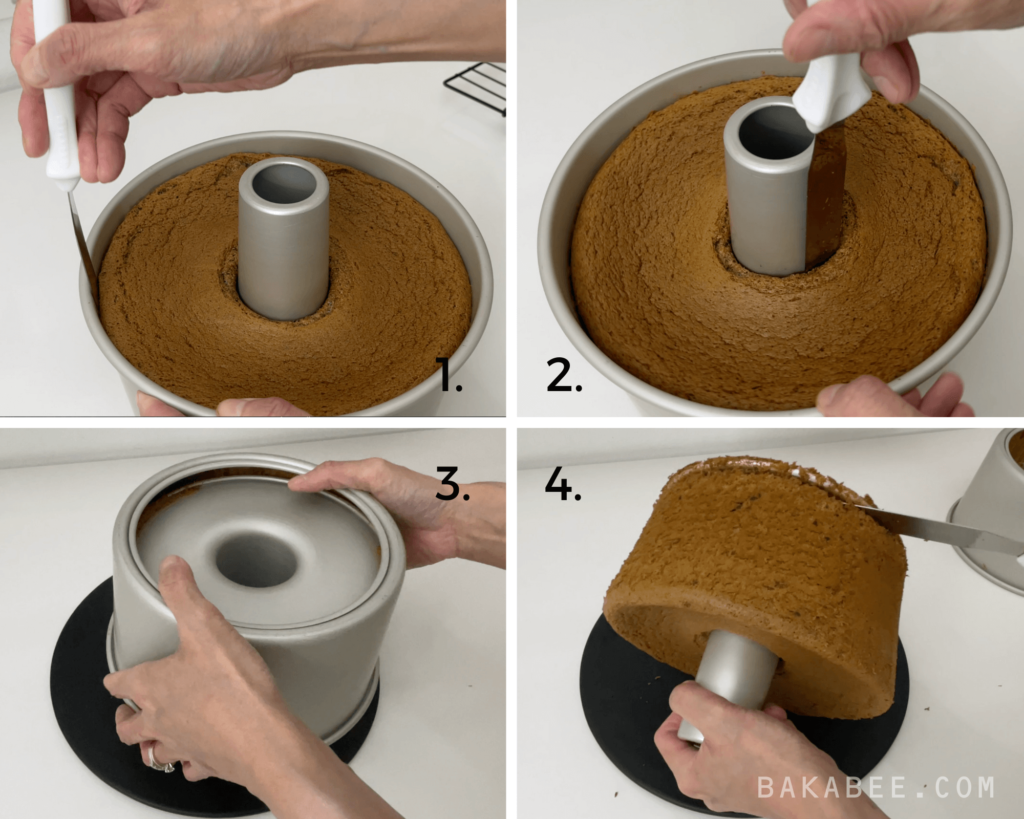
Step 9: Removing the cake from the pan
Yeah! It comes to the final step. We definitely don’t want to mess up or break this delicate cake at this point.
Some bakers like to remove the cake from the pan by gently pressing the cake down and away from the edge of the pan. You can try that but personally I prefer to use an icing spatula or a sharp knife to achieve a neat finish and a clean exit.
- Gently run the spatula around the edge of the pan to loosen the cake.
- Don’t forget to do the same thing around the funnel as well.
- Prepare a serving plate on a flat surface and invert the pan facing the plate. Press down the bottom of the pan using the thumbs and remove the cake.
- Gently … yes very gently … press the edges down to release the cake
- Run the icing spatula around the bottom of the cake. It should come out easily.
Feel proud of yourself!
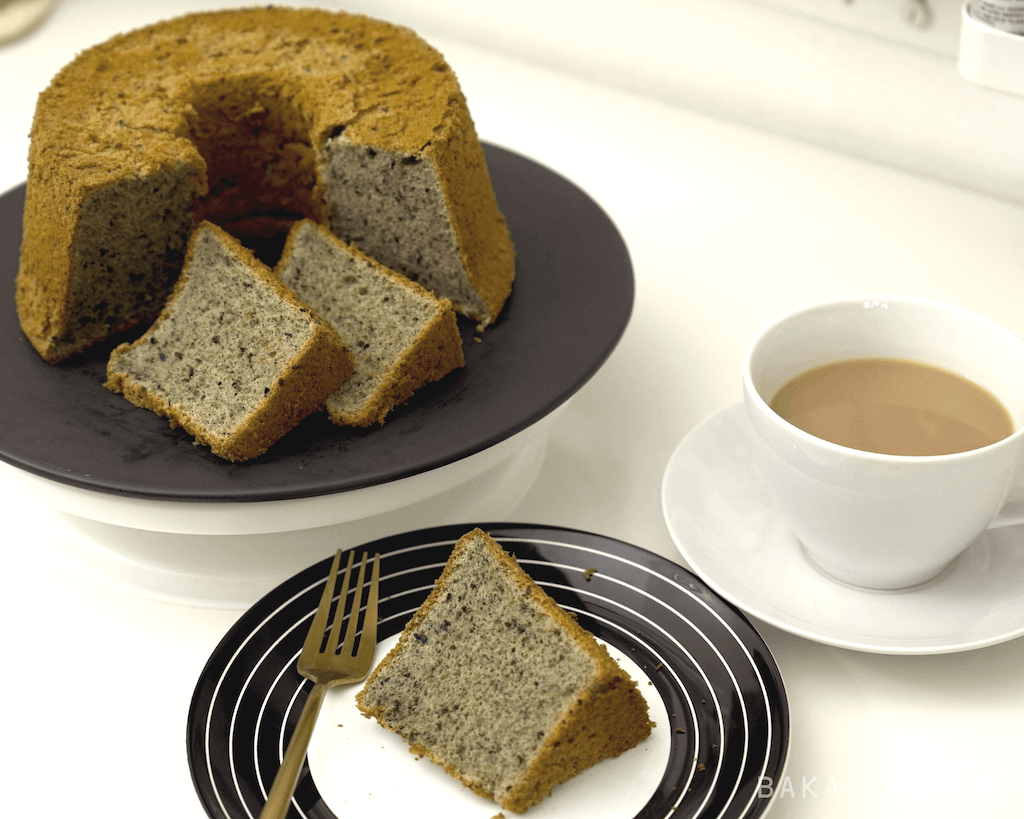
Now sit back and enjoy this lightest and fluffiest black sesame chiffon cake with a cup of your favourite coffee or tea! You deserve it.
Save it to Pinterest for later
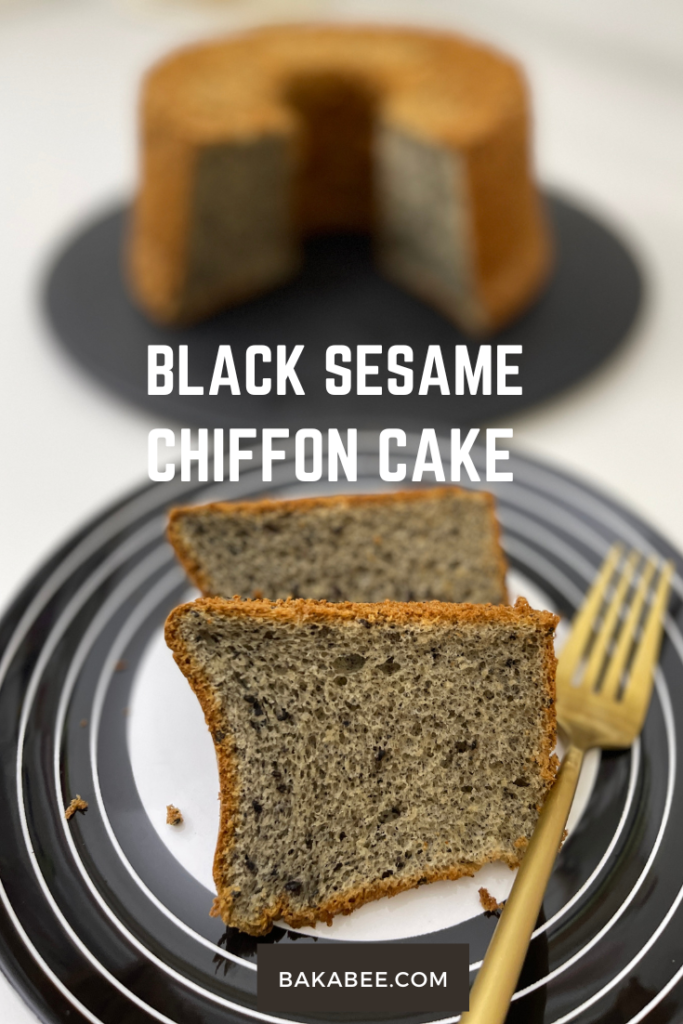
Black Sesame Chiffon Cake
- Prep Time: 45 minutes
- Cook Time: 45 minutes
- Total Time: 3 hours 30 minutes
- Yield: 12 slices 1x
- Category: afternoon tea, cakes, desserts, snacks
- Cuisine: American, Asian, Japanese
Description
The unique nutty flavour from toasted black sesame seeds infused into a light, airy and fluffy chiffon cake. This is a perfect cake for all black sesame seed and chiffon cake lovers. What a combination!
Ingredients
Black Sesame Paste
- 1/2 cup black sesame powder
- 1 3/4 tbsp honey
Cake
- 5 egg yolks
- 70 g cake flour (sifted)
- 10 g light brown sugar
- 60 g milk (lukewarm)
- 40 g vegetable oil
- 1 tsp baking powder
- 30 g black sesame paste
- 20 g black sesame seeds (toasted)
Meringue
- 5 egg whites
- 90 g caster sugar
- 1/2 tsp vinegar
Instructions
Prepare the black sesame paste
- Grind the black sesame powder in the food processor for a few seconds to remove any lumps.
- Mix the powder with honey and pulse the food processor a few times until mixture turn into a paste.
Prepare the cake batter
- Preheat the oven to 160°C.
- Combine egg yolks and brown sugar in a large mixing bowl, whisk them at medium low speed using a hand-held mixer until the mixture thickens and turns pale in colour.
- Add sesame paste and continue to whisk until well combined. Stop the mixer once or twice to scrape the sides and the bottom of the bowl to make sure the paste is well mixed.
- Add milk and oil into the mixture and whisk together until well blended.
- Sift in the flour and baking powder. whisk the mixture at medium speed until the batter is well mixed.
- Fold in the toasted black sesame seeds using a spatula. Be very gentle to avoid knocking the air out. Set it aside.
Prepare the meringue
- Pour the egg whites in a mixing bowl of a stand mixer with a whisk attachment. Start to whip them at medium low speed until a layer of foam is formed.
- Add in the vinegar and continue to whisk until a thicker layer of foam is forms.
- Add the caster sugar in the egg whites in three portions. Give each portion around 1 minute to dissolve before adding the next portion.
- After adding all the sugar, turn the mixer to medium high speed and continue to whisk the meringue reaches its stiff peak form. You can check it by drawing the egg whites out using the whisk. If a firm peak is formed, it’s done.
Fold the meringue into the cake batter
- Take a spatula and scoop a small amount of meringue. Add it to the cake batter and mix it in, using a manual whisk. This helps to loosen the thick texture for easier mixing.
- Scoop ⅓ of the meringue into the batter and continue to mix it in using the manual whisk until you can’t see any white patches. Keep your movements very gentle and mix always in the same direction.
- Continue to scoop in the remaining portions of meringue until everything is well mixed.
Bake and cool the cake
- Prepare a tube pan. DO NOT grease it.
- Pour the cake batter into the pan at the same spot.
- Shake the pan a few times to evenly distribute the batter inside the pan.
- Hold the pan a few centimetres off the work surface and then drop it to get rid of any big air pockets trapped in the batter.
- Run a skewer in the batter in a swirling motion, again to remove any remaining air pockets.
- Place the pan on the lower rack in the preheated oven and bake it for around 40 to 45 minutes. Mine took 42 minutes. DO NOT attempt to open the oven door while the cake is baking.
- To check the cake is done, no sooner than 35 minutes into the baking time, insert a skewer in the centre of the cake and if it comes out clean, it means the cake is done.
- Take the cake pan out and invert the pan on a wire rack immediately. Allow it to cool down completely.
Un-mould the cake
- Prepare a serving plate.
- Run an icing palette knife along the edges and the funnel of the pan.
- Invert the pan and use your thumbs to push the bottom of the pan down.
- Then run the palette knife along the bottom of the pan. The cake should come out nicely.
- Serve it on its own with a cup of coffee or topped it with fresh whipped cream and sprinkle with more black sesame seeds! Enjoy!
Notes
- place an oven thermometer in the oven temperature to make sure it reaches the desired temperature before you start to bake the cake
- do not open the oven door during the baking process
- read the blog post to see how to prepare the homemade black sesame paste and the details of each step
- store it in an air-tight container and recommend to consume it within 2 days (normally gone in 2 hours …)
- watch my video tutorial to see the steps visually
Nutrition
- Calories: 129
- Sugar: 11.1
- Sodium: 28
- Fat: 6.1
- Saturated Fat: 1.4
- Carbohydrates: 15.9
- Fiber: 0.4
- Protein: 3.4
- Cholesterol: 69
More delicious chiffon cake ideas for your next bake
- Coffee chiffon cake – a cake for everyone who loves coffee
- Pandan chiffon cake – an exotic flavour that you will love at the first bite
Leave me comments if you have any questions, I would love to chat with you!
Happy baking!
Share this!

