Here I share my 10 baking organizing tips for the baking supplies, tools or anything related to baking. These tips are not only help me create a stress-free baking environment but also save me a ton of time to look for the things or tools I need.
I LOVE baking and I always dreamed about having a baking studio or even just a cozy dedicated baking area that was only for baking. I think this is probably a dream for all home bakers, am I right?
I’ve been baking for quite a few years now, I started around seven years ago, without much experience prior to that. During these years, I have collected a bunch of baking supplies, pans, tools, piping tips, cutters and moulds. On top of the tools, there are also a lot of ingredients that take up storage space; different kinds of flour (for non-bakers, it’s all just white powder!); flavouring, food colouring …everything comes in different shapes and sizes. Organising can be a nightmare and a messy kitchen is not a good place to be creative or efficient.
Initially, I was a bit stressed as the stuff began to grow because I needed to get all the tools, pans and ingredients before I started baking. As I baked more and more, I found I didn’t like looking for things during the process – It disturbed my baking flow and sometimes when timing is critical, it can mess up your bake. So, I started thinking, are there any ways that I can make my baking more efficient, more fun, less stressful? If yes, how do I get started?
“For every minute spent in organising, an hour is earned.”
Watch this video tutorial
What kind of baker are you?
A great question to ask yourself is, ‘What kind of baker am I? Organised? Messy? Visual? Spontaneous?’
I do regard myself as an organised person but sometimes when it comes to baking supplies, it really is a bit overwhelming. Something like baking pans, for example, every single one has a unique shape and size. It’s tricky to organise them in a functional and efficient way and I don’t mean in a fancy way, using a very expensive organiser to store them. In my view, that is an unnecessary waste of money. There are better, cheaper solutions. When I want a particular pan, I want to find it where I can easily grab it and go without sorting through other pans to find it. That’s the ideal for all of us, isn’t it?
Also, I’m very visual, I like seeing things instead of remembering where they are. That means I need spaces to display them all…that means I need to use space wisely.
My own baking organizing tips
Over the years, I’ve experimented with different ways to organise my baking supplies and as I became more organised, I realised that it has allowed me to stay focused and keep in the creative zone as I bake. I have been searching a perfect way to organize the baking supplies, but soon I realized there is no such a ‘perfect’ way. Therefore, I worked it out myself and organize my baking supplies in my own way. I hope these organizing tips for baking also works out for you.
So if you share the same issue: the need to control your kitchen, you’ve come to the right place! Here, I’m sharing with you my 10 organizing tips for baking supplies that may help or inspire you how you can organise and stay organised. I did it – you can do it! Bakabee believes!
Tip One: Store things vertically
This tip can apply to anything which is thin and in different sizes or in awkward shapes, such as baking pans, muffin tins, saucepan lids, chopping boards, cake boards, or cake boxes (before being folded into a box).

For storing things vertically, you need an organising tool – a dish or plate organiser. The one in the picture, I bought in IKEA and it wasn’t expensive. From my experience, this type can be used to organise things which are not heavy, such as cake boards, or saucepan lids.
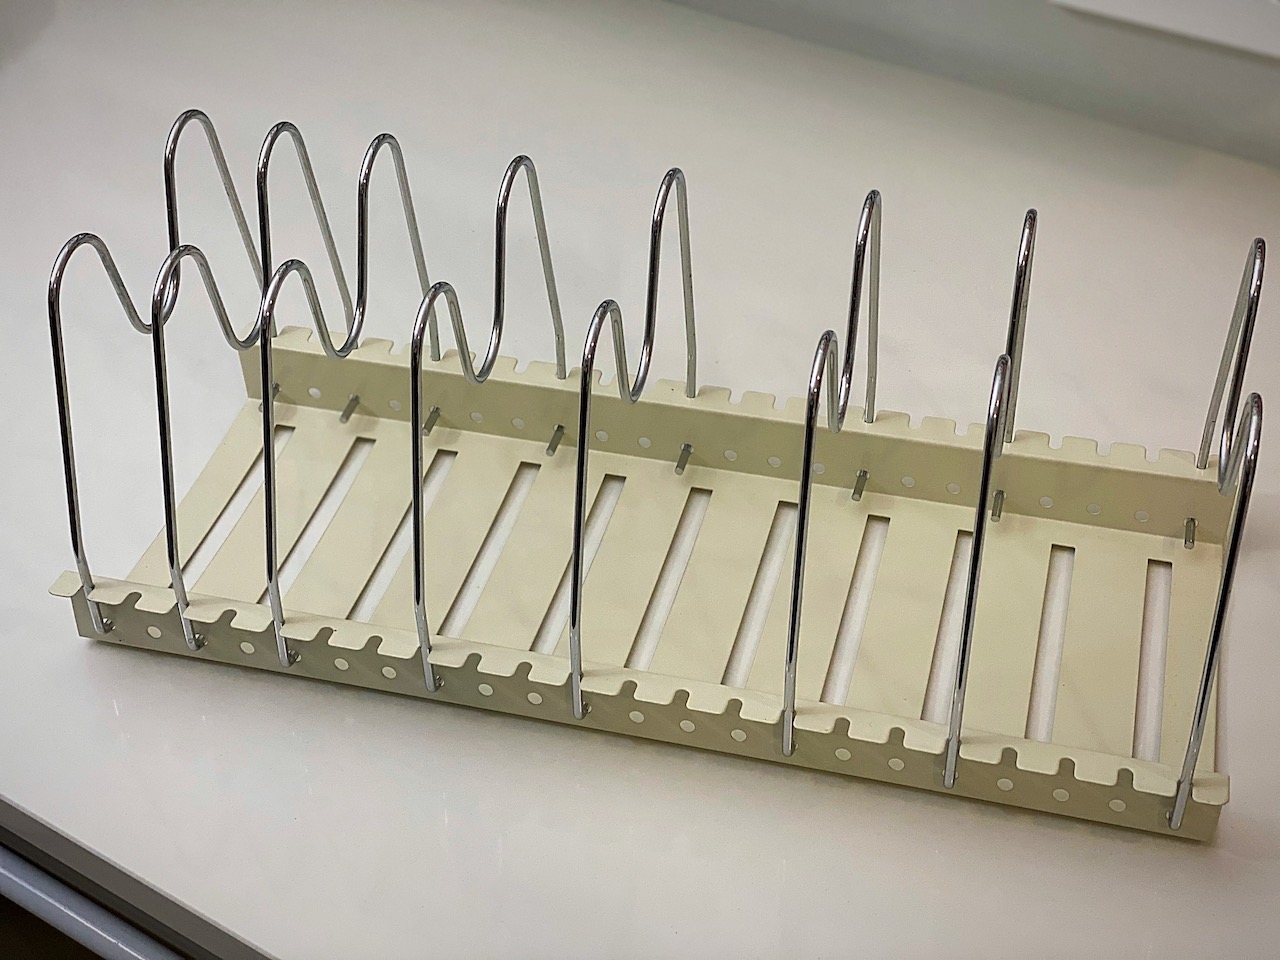
For baking pans, we need a more sturdy pan organiser, just like the one in the picture, which is made of metal. The good thing about this organiser is that the dividers are adjustable, so that I can alter the width of each section, depending on the size of the pans. This has been a huge space saver.
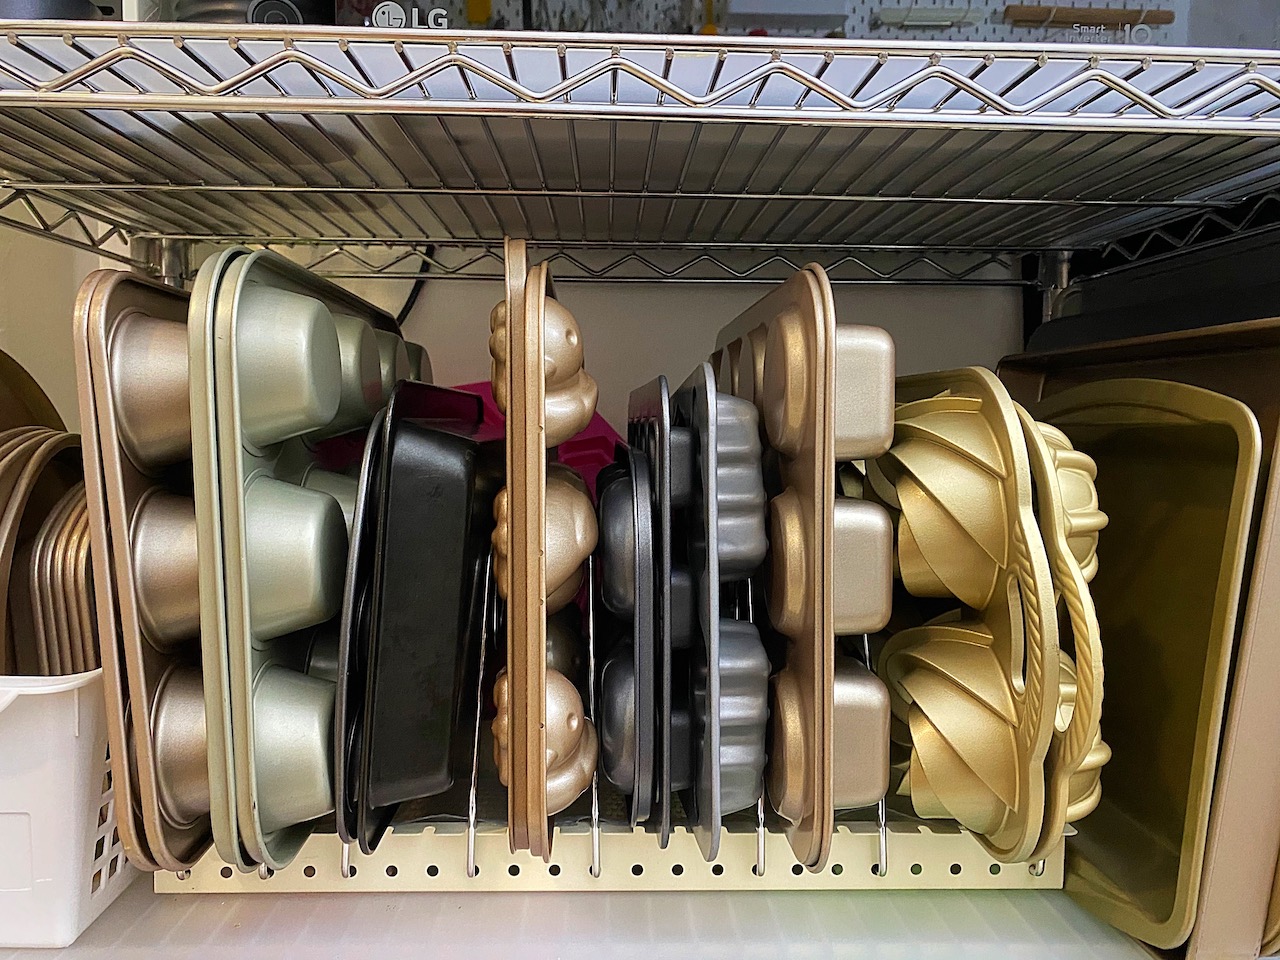
There are a number of reasons for storing things vertically. Reason # 1 is OBVIOUS: you can see them all clearly without a hassle, so that you know what you have and it saves you a ton of time looking for the very bottom one.
Reason #2: is when the stuff is organised in separate sections, it is incredibly easy to get what you need WITHOUT needing to move the others out of the way. You take the one that you need and the others are still in the same place. That means when you finish using it, it is also super easy to put them back (or to make your husband do it). It makes the whole process a hundred times easier and more efficient.
Tip Two: Use containers
Use as many containers as you can to store your ingredients. Why? There are advantages of using containers instead of keeping the ingredients in the package. It’s a better and safer way of preserving food and it’s much easier to use. Scooping the flour from a big container is a LOT easier than from the package. Also, most of the containers are stackable, or at least uniform sizes, so that it will certainly save you space.
Warning: after you put your ingredients in a container, don’t forget to label them. Otherwise, woops… you will never know what flour it is in that container. That’s an easy rookie error! One quick way is to cut the name of the contents off the empty packet and stick it on the outside of the container but I’ll talk more about labelling in tip #4.

Organised containers on the shelves or in cupboards look so satisfyingly uniform and pretty. That means it makes you look and feel more business-like and organised. An organised baker isn’t always a good baker, but a good baker is always organised.
Tip Three: Easily accessible
You need to think about how your space works for you because every room has a different layout. When I did my research on the ‘BEST’ way for organising, I found that it all worked beautifully for the people who were working in that particular space…but not every idea is transferable and no solutions work for everybody. We each need to figure out how our own space works for us and the best solutions are flexible and adaptable.
These are some of the arrangements in my space that work for me, I hope they might work for you too:
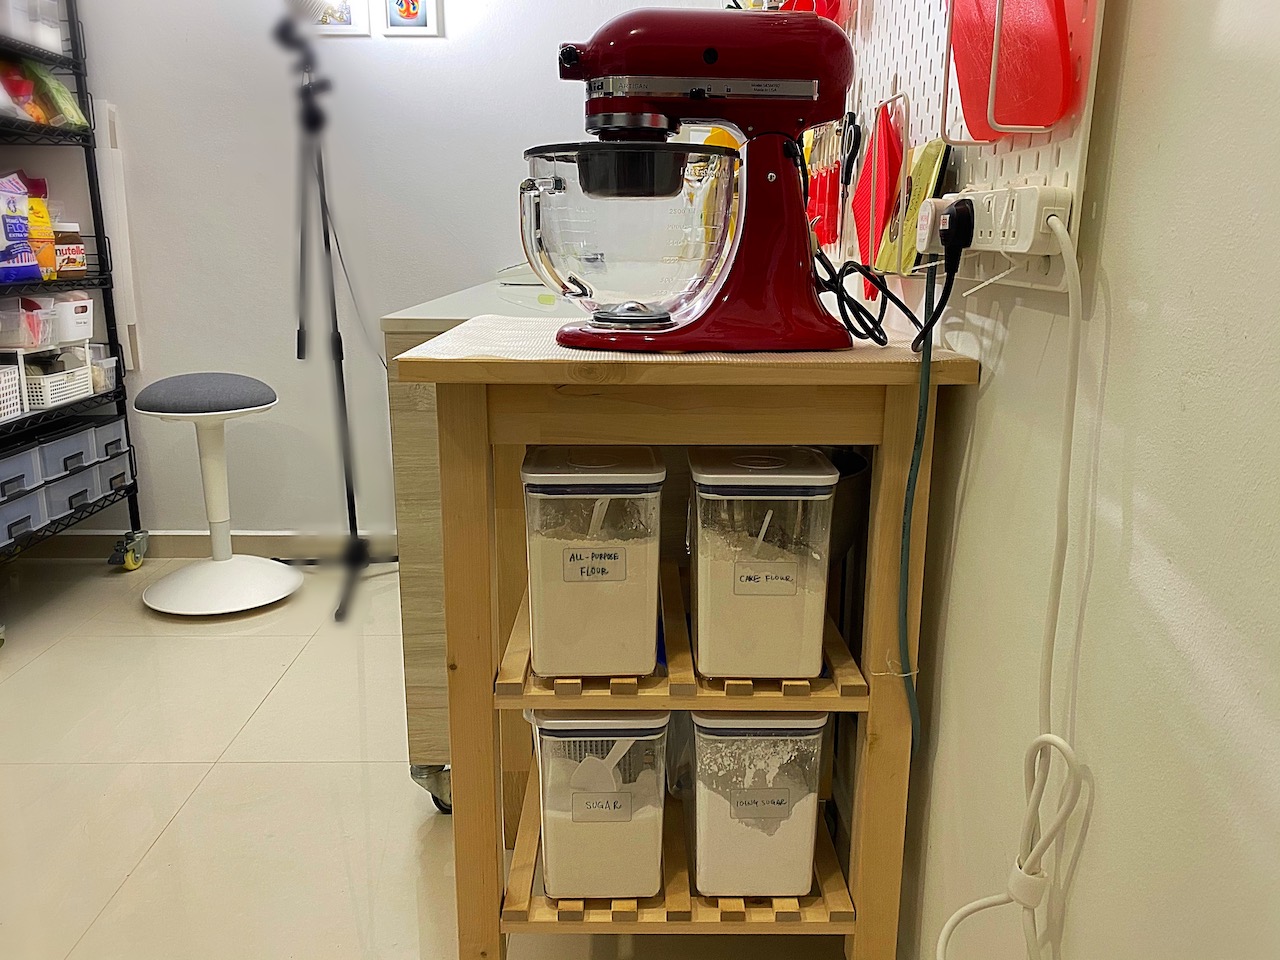
- I store my flour close to the stand mixer so that I can scoop it straight into the mixing bowl – saves time and a lot of flour spillage!
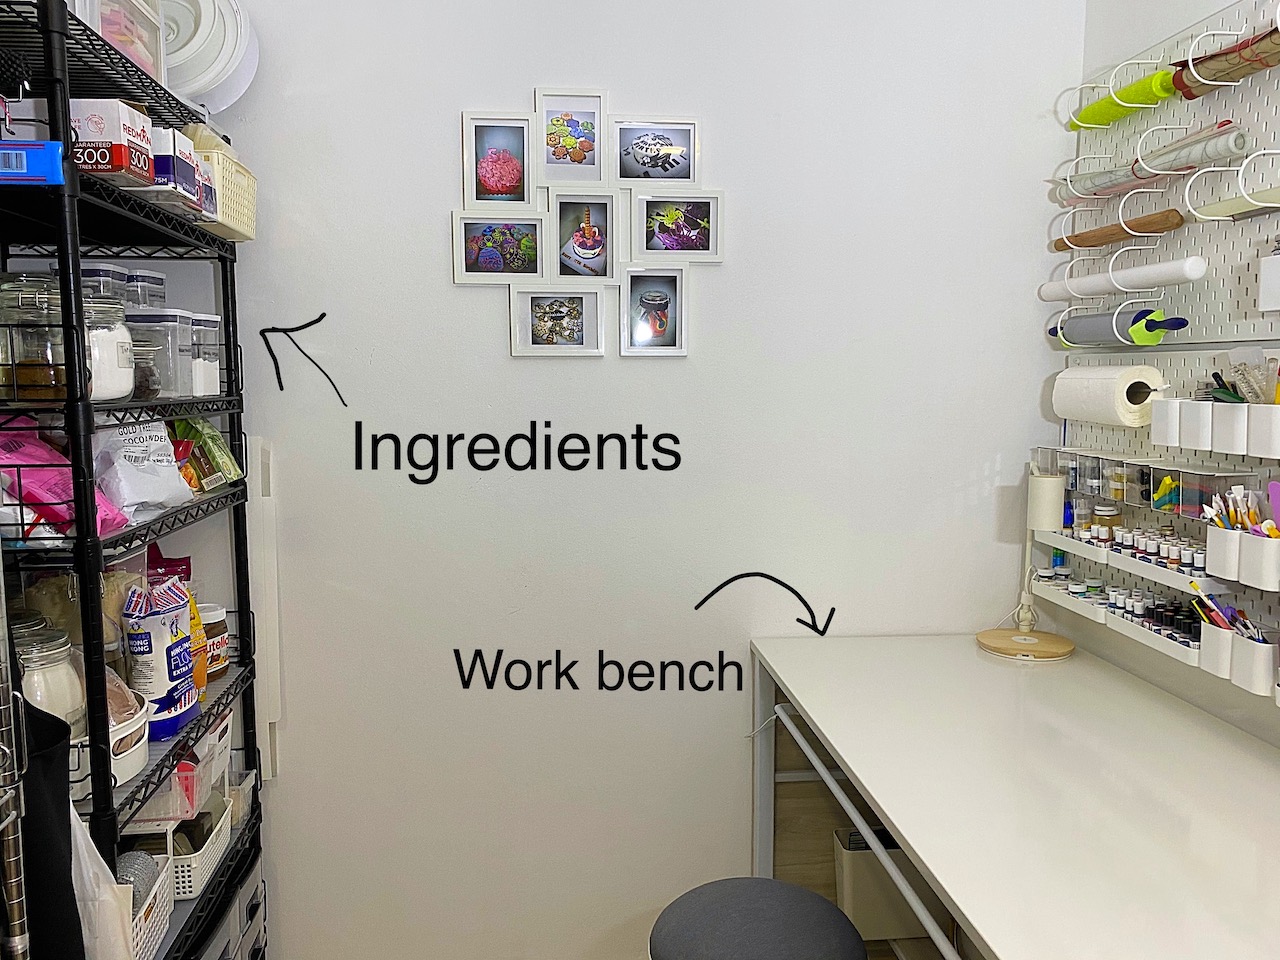
2. I store other ingredients, such as baking powder, on the shelves opposite my workbench so that I just need to turn around then I can get it easily – I’m a musician and sometimes this gives me the same feeling I used to get conducting an orchestra!
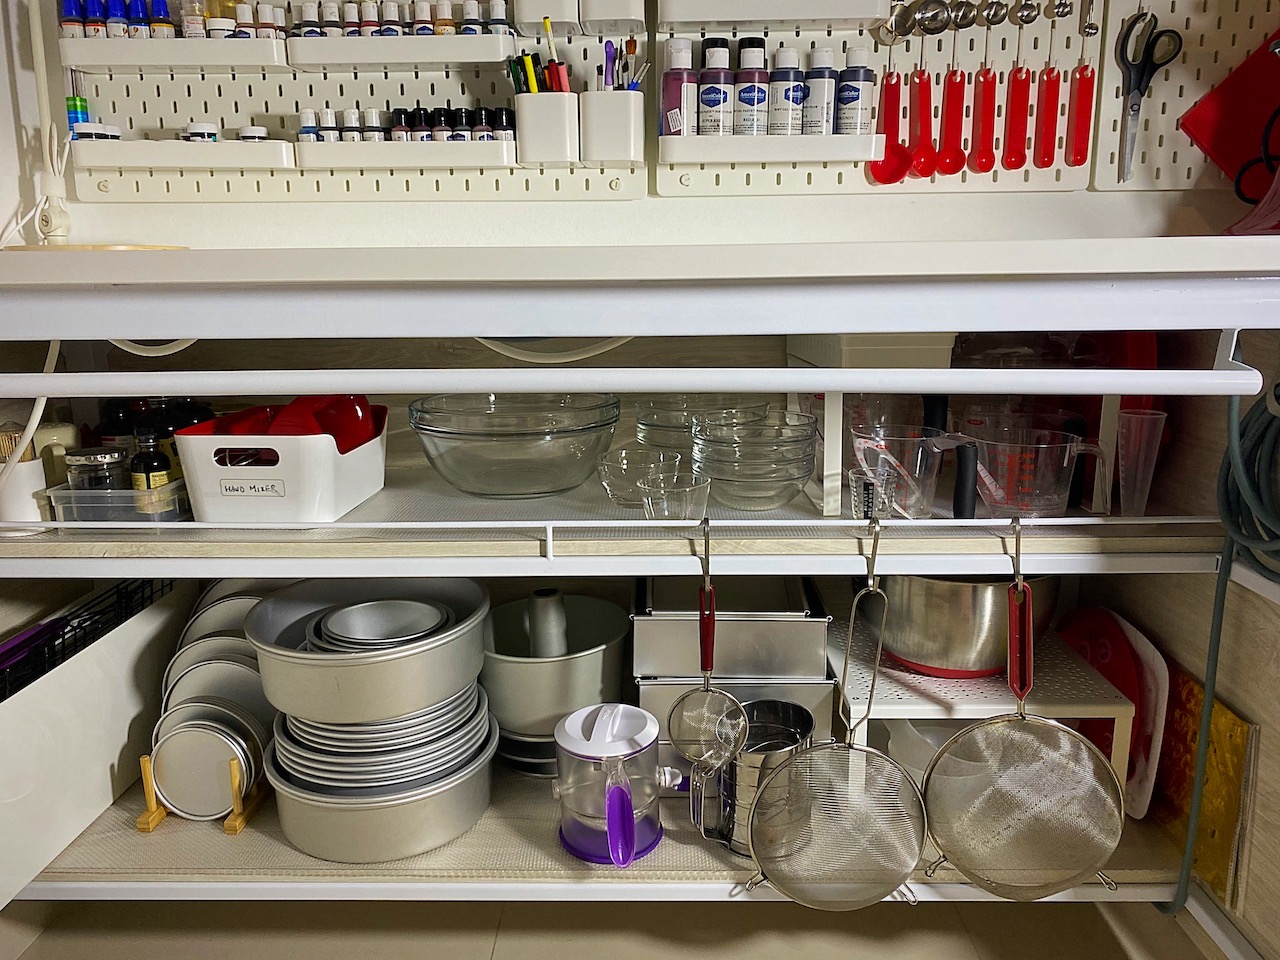
3. I organize my mixing bowls, measuring cups, sifts under my workbench so that I can easily grab them when I need them, without having to go search.
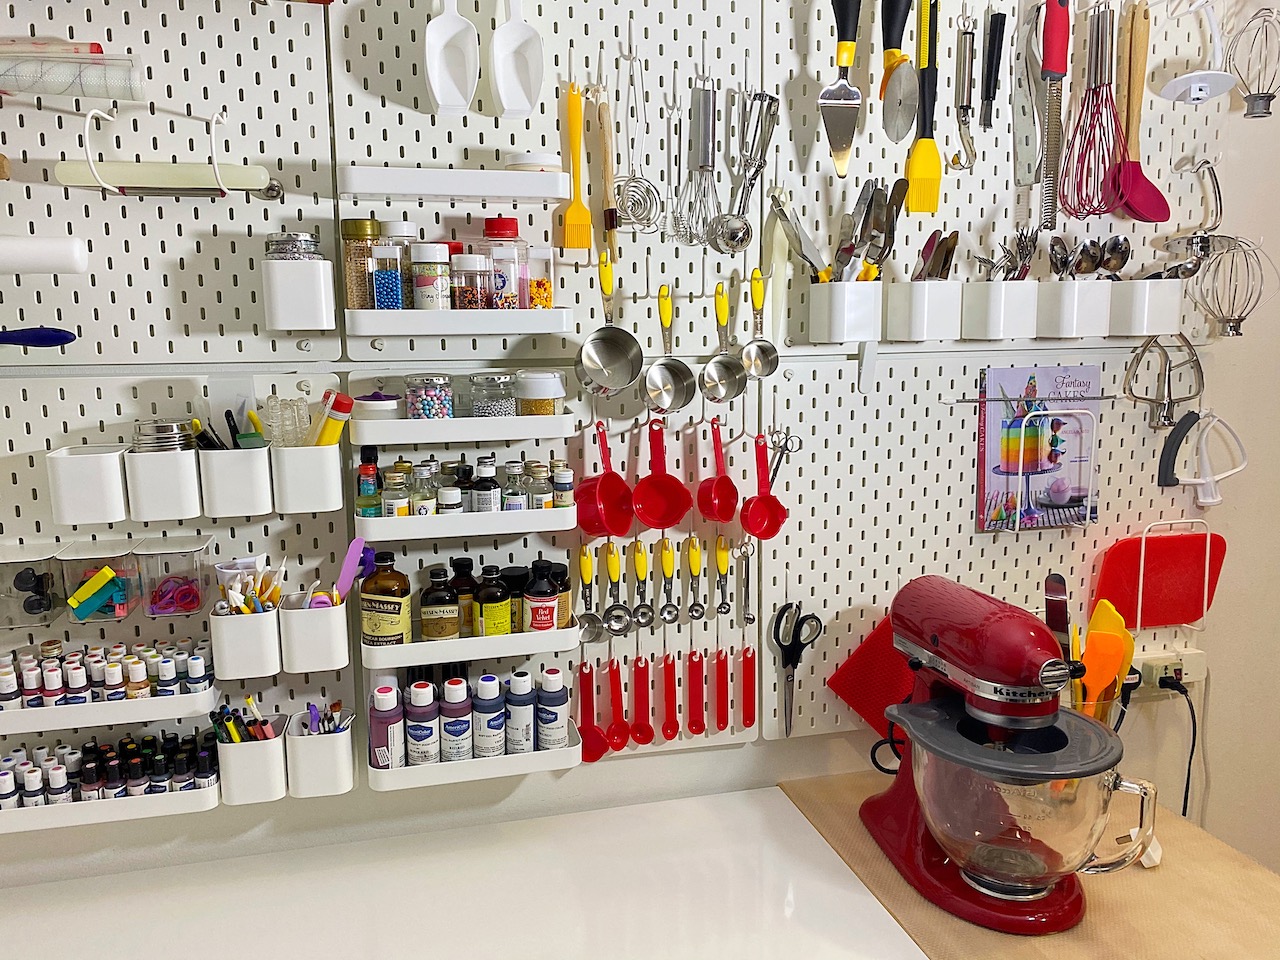
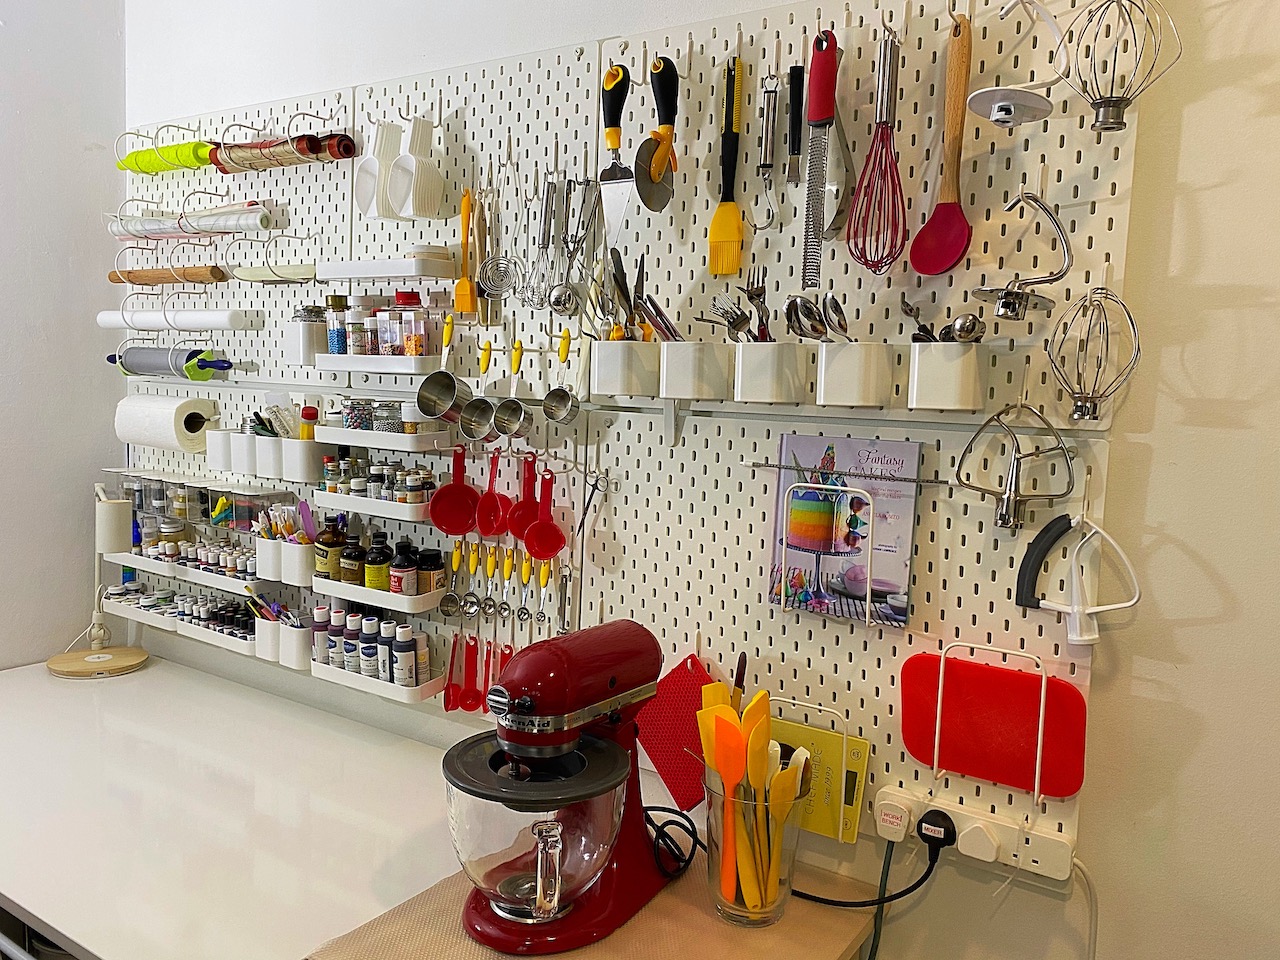
4. I hang all my tools on the pegboard in front of my mixing desk so that I can easily grab the tools that I need without any hassle looking through drawers. This is a huge stress reliever – and they look cute!
These are just a few examples. The principle is about designing your space around your workflow. In this way, it saves you time and makes the whole baking process hassle free and stress free. That means more fun … hahaha …and the orchestra of ingredients make beautiful music.
Tip Four: Labelling
Labelling is very important when it comes to organizing the baking supplies. It helps you clarify where things are and allows you to store systematically or thematically. Do this and you know where to get something and where to put it back. Big time saver! There are many ways to do this. I often use a label maker for my ‘longer term’ labels.
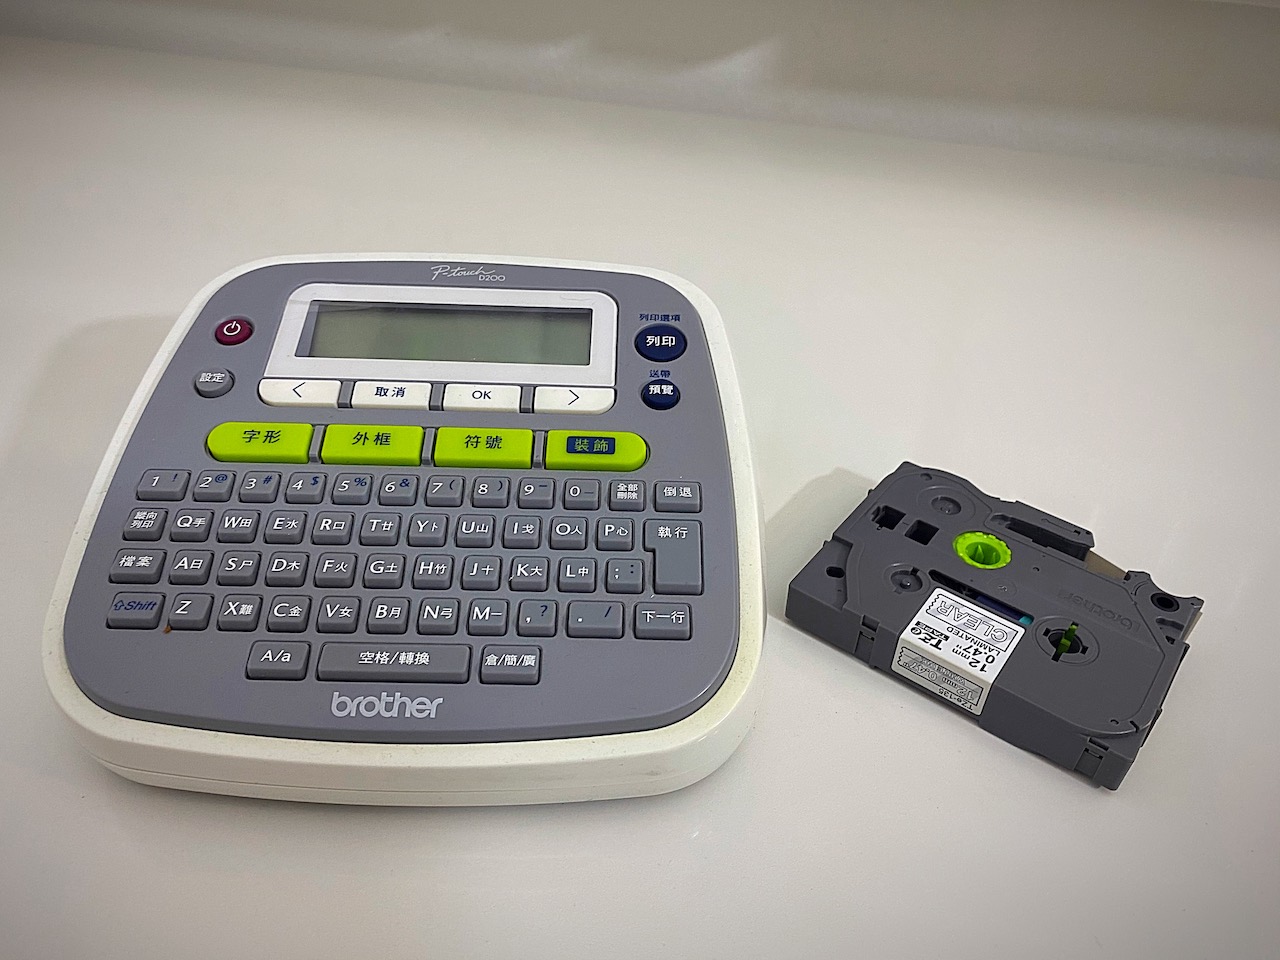
It’s so easy to use … you type what you want on your label, press a button and there it is. Just stick it straight onto containers or anything you want. Labels stick very firmly, even after washing and if you are OCD like me, you can buy a whole lot of different coloured tapes to make for even more visible colour coding. A smart set up in your cupboards makes you feel like a baker and adds confidence to your work. I believe it!

Another even quicker way to achieve labelling is the one that I showed in my video. Using stickers from IKEA, just hand write what you want to label onto the stickers with a pen and stick it onto the containers or storage bins. It’s fast and easy and involves no equipment at all…helps if you have nice hand-writing (I never let my husband do it for this reason).
The downside of using this method is that the name can easily wipe off and it is not a long term solution or sustainable for regularly washed containers but great for one of single usage storage. So it’s really about picking the right tool for the right job, I’d love to hear if you have other ideas.
Tip Five: Use storage bins
Storing miscellaneous things in storage bins is a great way to help you stay organised. Storage bins can keep all the small items together. Don’t let them lying around on shelves or in the cupboard. These items get in your way every time you want something. Of course, you do need to label the storage bins what actually are in the bins!

There are a lot of different sizes and styles of bin on the market. Choose carefully, try to choose the same or similar styles. You need to think about how the shape will fit into your particular context. Otherwise, your shelves or cupboards will end up not looking tidy and smart at all. Functionality and style is what we are after!
5 more organizing tips for your baking supplies
Thanks so much for stopping by! Hope you find these five organizing tips useful for your baking! You’ll find my another 5 organising tips for your baking supplies in my next post – Part two. Check it out!
If you’ve any organizing tips or tricks for baking for how to stay organised, please feel free to leave me a comment and let me know what you thought. I would love to hear them.
My other organizing tips for baking
I also share other two projects about organizing baking tools. They are piping tips and cookie cutters. I am sure every baker has a number of piping tips and cookie cutters in their collection and I am the one of them.
I have been crazily looking for a way to organize the piping tips and cookie cutters. Then, I can find them with ease. However, the organizers I found online are either expensive or not sustainable. It means there is no room for the expansion for the collection to grow.
As I like DIY projects, I decided not to wasting my time to look for the right organizer. I create my own piping tips organizer instead, which I think is an ulitimate way to organize the piping tips. Using this piping tips organizer, I am sure you will find your right tip in a second! You can see how I create my piping tip organizer in action here.
Also, I create my own budget-friendly system to organize my huge collection of cookie cutters, I mean huge is ‘huge’. I use simple stationery and very cheap boxes to organize my cookie cutters and it works! I can find my desire cutters for the project in a second. If you want to get this solution to organize your cookie cutter collection, click here.
I hope you find these organizing tips are useful.
Happy organising!

This Post Has 4 Comments
This really inspired me to get organized in the kitchen. Thanks!
Hi Heidi,
Glad to hear that you are being inspired. Always happy to share and please stay tuned for Part Two! Happy organizing!
Thank you for the organizing tips. Your space looks amazing! And I especially love the tip about storing things vertically. It looks like it’s so much easier to find things that way.
Hi Kat,
Thanks for stopping by and appreciate your kind words. Yes, it is. I store all my cooking pans and lids in the drawers vertically and it makes the cooking process so much easier as well. Stay tuned for another 5 tips! :))