A hidden gem
Portugal is one of the countries that has amazed me the most during my travels. I would say it is a MUST-GO destination for travellers. You are surprised and amazed everywhere you walk and around every corner.

An amazing place
I’m lucky enough that recently I had a chance to visit, to see the places, to experience the culture, and to taste the food. This country, I think, is one of the most gorgeous places in the world. A real hidden gem.

If you’ve been following me on Instagram, you’ll have seen images of my fantastic cycling holiday in Portugal. The whole journey started from Porto, the second-largest city, and ended in Obidos, which is the finest example of a Portuguese walled town and is one of the best tourist destinations of the Lisbon region. We cycled through 7 towns and cities and travelled a total of more than 331 kilometres. I am pretty proud of myself that I made it!!!

So you might be thinking at this point, with all that pedalling, where did I find the time to taste and then share some famous Portuguese desserts in this blog?
It’s all credit to my awesome husband, because of his thoughtful planning, at the end of our cycle trip, he arranged a luxury 5-day stay in Lisbon, the capital and largest city of Portugal. After all that physical work, we thought we deserved a relaxed wind down. I absolutely agreed with him on this point.
Normally, of course, I don’t agree with him at all…Hahaha …

Lisbon
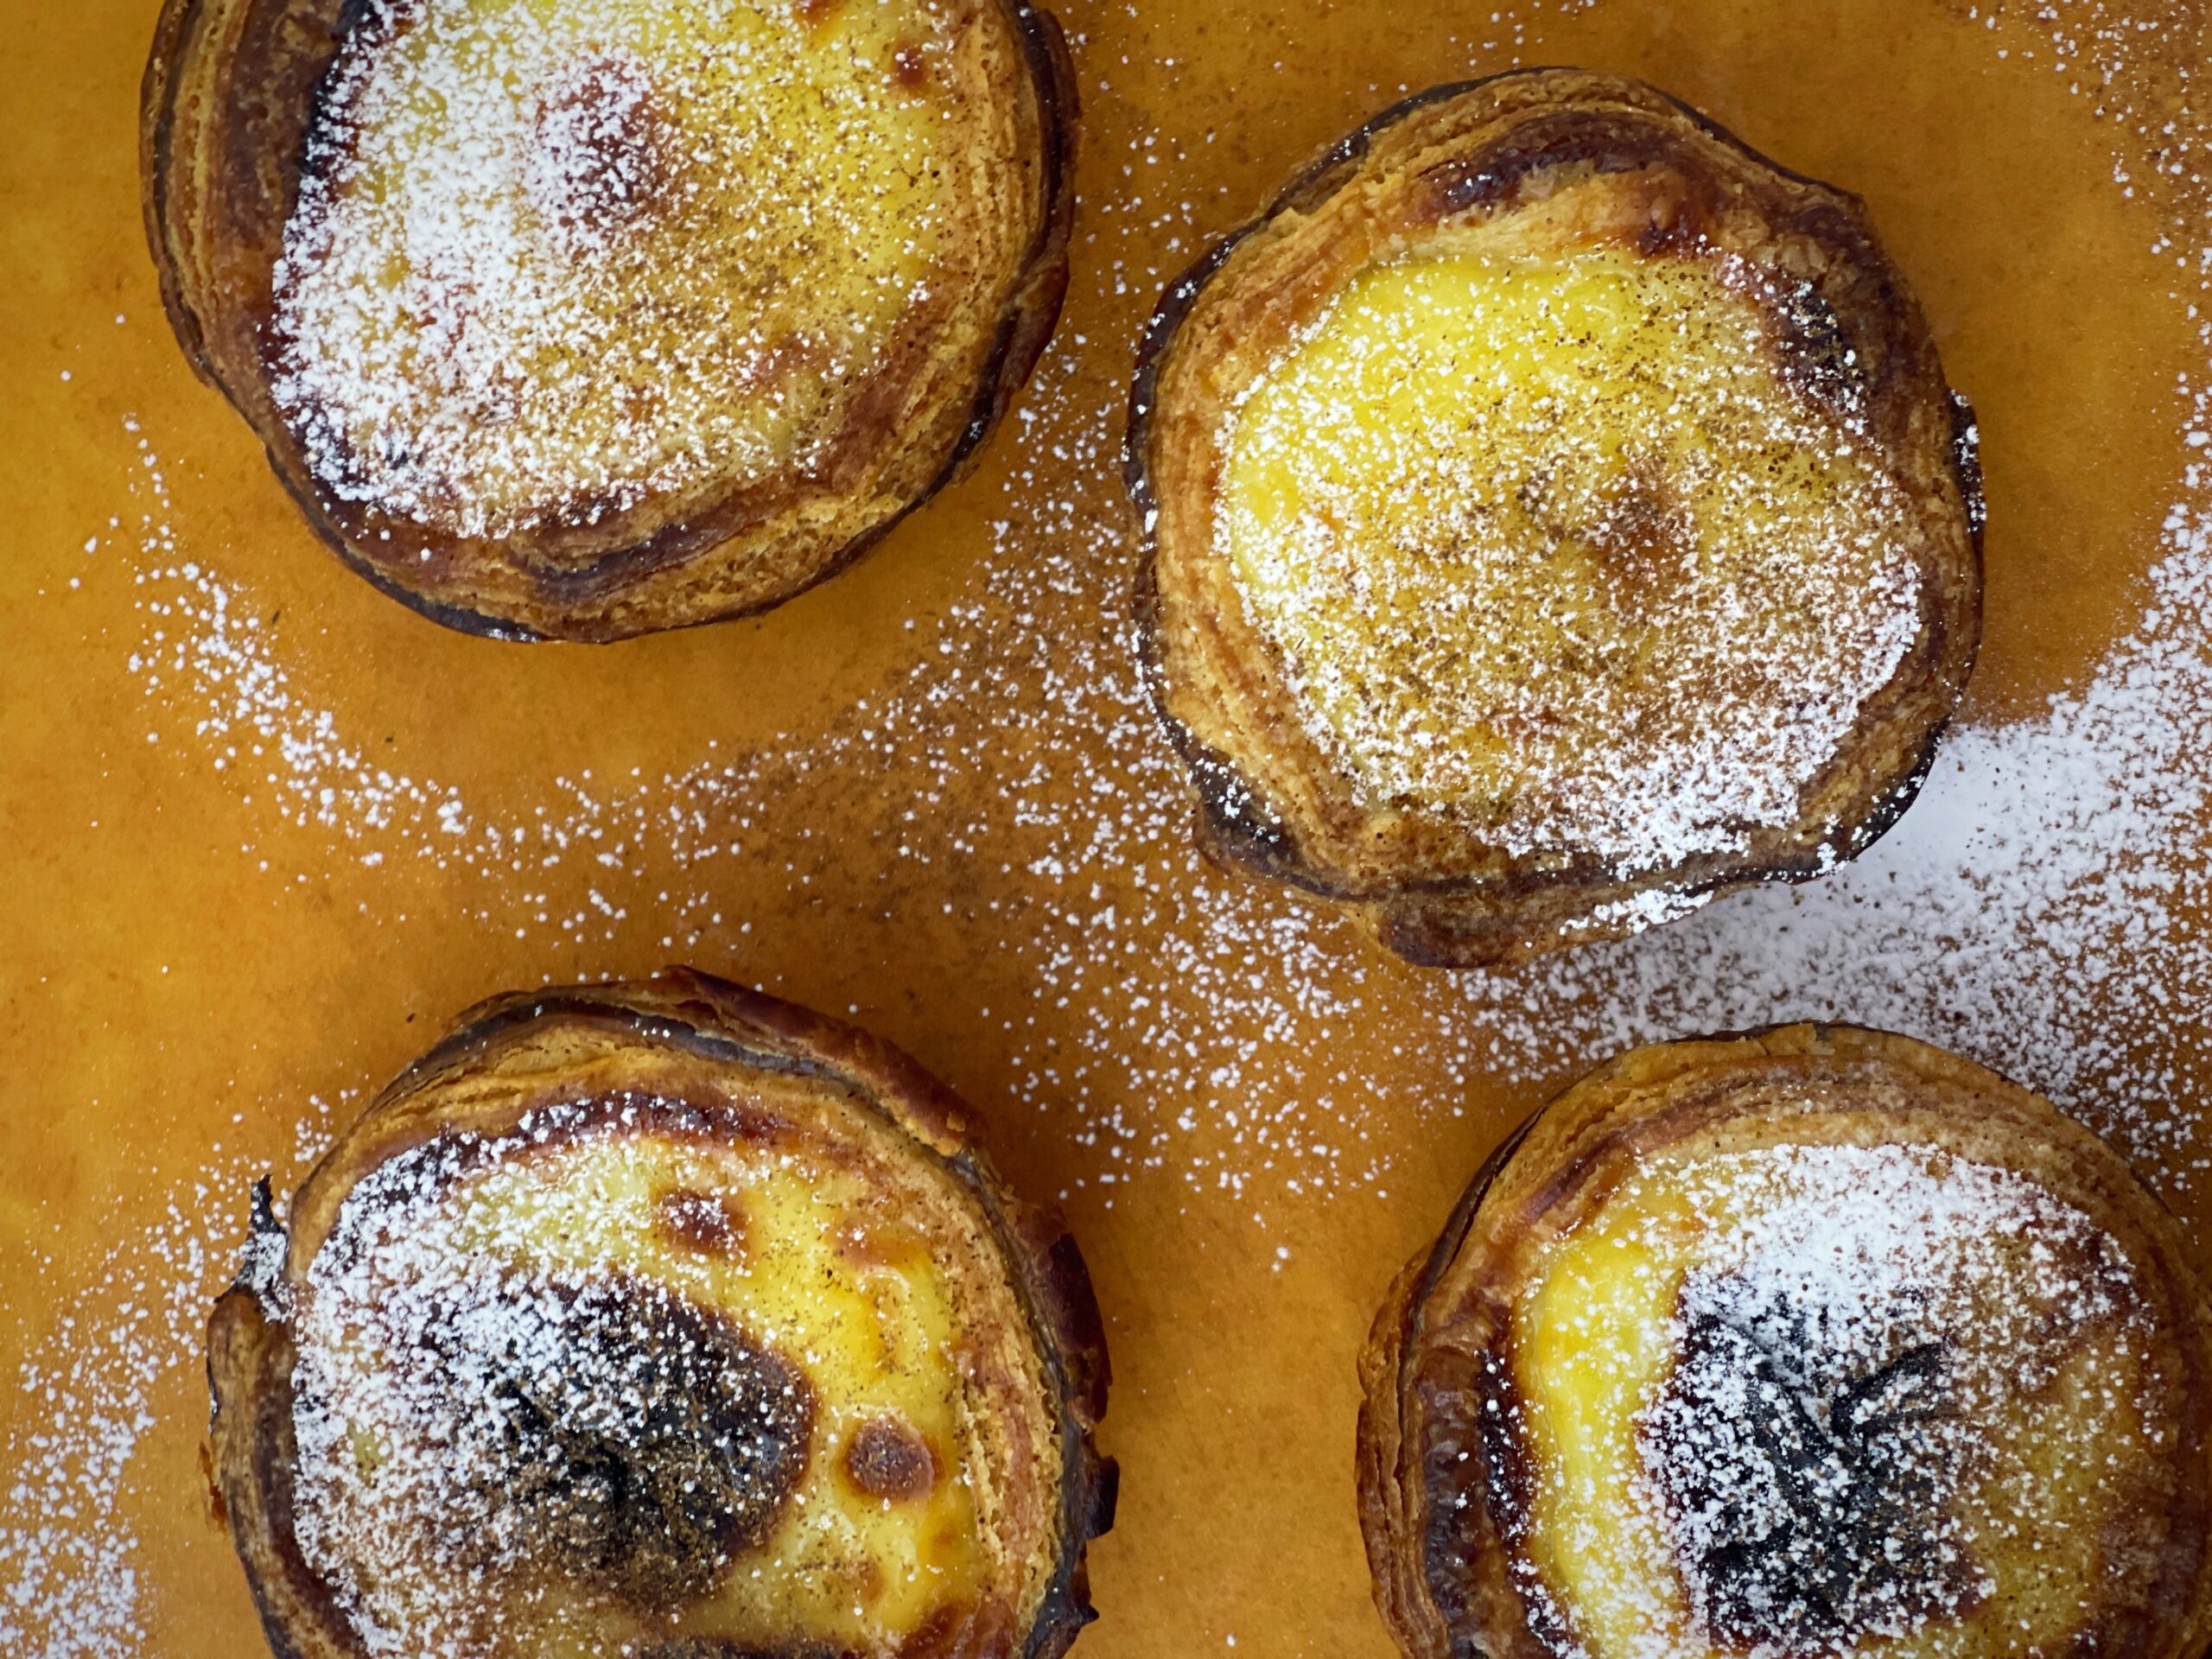
That’s how we ended up in the amazing city of Lisbon. Once we checked-in to the hotel, we were eager to get straight out and walk around the city and it didn’t let us down. It was absolutely stunning everywhere. Apart from all the breathtaking scenery, there is food everywhere – and particularly eye-catching are the shiny yellow pastry tarts, round and slightly browned on the top, which were piled high in the countless bakeries we walked past. These are the world famous and iconic Portuguese custard tarts – Pastéis de Nata ~ you literally can find them EVERYWHERE in Lisbon, I’m hardly exaggerating. . .
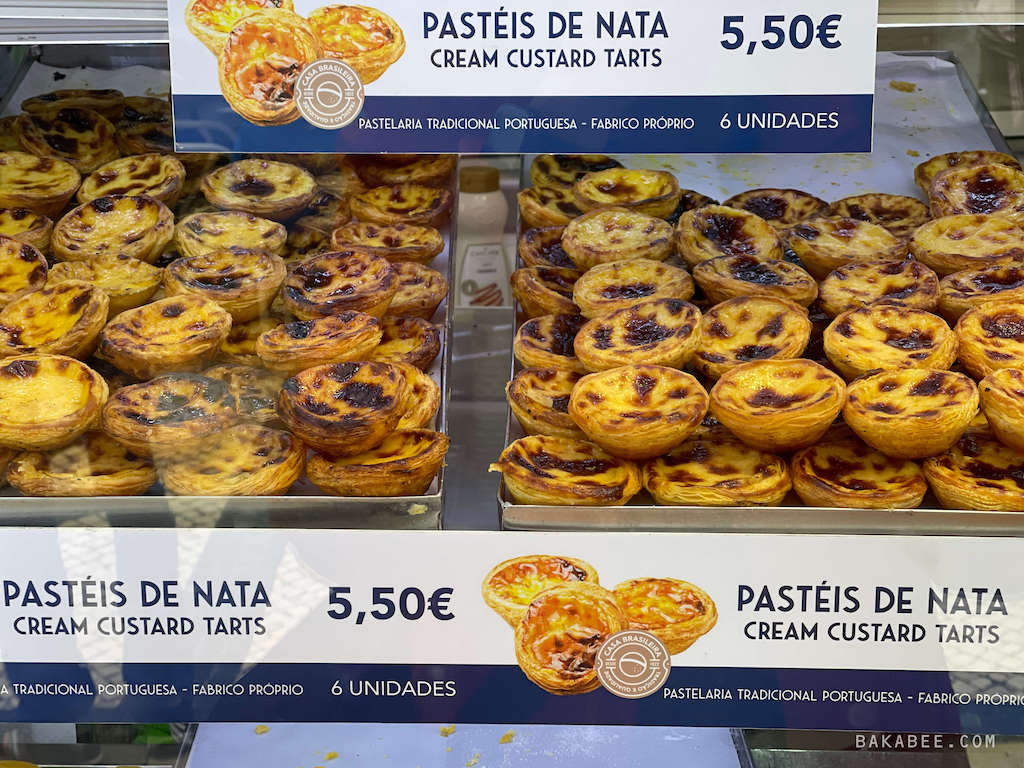
As a baker, I was intrigued by this iconic Portuguese dessert, Pastéis de Nata known to me from Hong Kong and trips to Macau. In their home country, it was impossible not to fall in love with these famous little pastries. They are Portugal in a tart. I soon realised the waistline danger that I could be eating at least one tart per day, but I was very proud that I controlled myself (mostly)! If I hadn’t, allowing for all the other amazing treats to there were to try, I think my reflection in the mirror would not have become happy viewing (thank heavens for all the cycling) … 😄

Of course, I did try a few during my stay in Lisbon to treat myself and in the interests of essential professional research (very important). I confess I had no regrets about each mouthful. The pastry is crispy, flaky and buttery with a rich and slightly runny egg-custard enhanced with a hint of cinnamon, not too sweet. Yum!
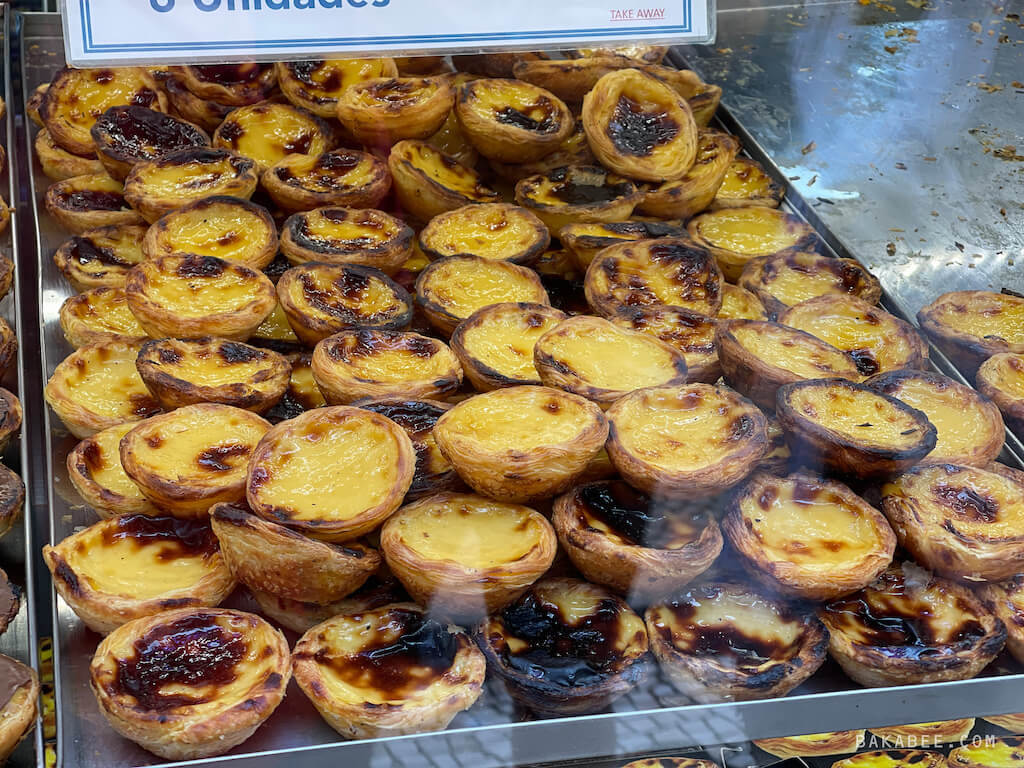
Portuguese custard tarts in Macau
I grew up in Hong Kong, the sister city of Macau. My parents often took me and my brother to Macau for holidays because it took less than an hour on the ferry (there’s actually a huge road bridge now and you can drive between the two cities). Visits to Macau were my first experiences of trying these flaky and crispy custard tarts. I loved them. Then came the grand opening of a famous Macau restaurant in the Tsim Sha Tsui district of Hong Kong. Hong Kongers flocked to it and I can remember there was always a long queue of eager tart eaters, waiting to get into the restaurant to try the authentic Macau cuisine. Of course, Pastéis de Nata (Pastel de Nata is the singular) was a must-try dessert.
Savouring the tarts in their original birthplace, definitely took me back to Macau and Hong Kong and brought up some long forgotten childhood memories. Only food can do this!
Pastéis de Nata ~ Portuguese custard tarts
Wanting to share some of my experiences and also wanting to perfect my own baking technique, I did quite a bit of research about how to make this famous dessert. There are some differing views about the ‘right’ way to make them as I’m sure, you won’t be surprised to hear. This is always true about iconic food with a cultural heritage…often it can depend on which part of the country you grew up in and what your family traditions were. There are some constants, however.
The tart, Pastel de Nata, basically has two parts, the pastry and the custard with its signature slightly caramelised top after baking. The pastry has to be buttery, crispy and flaky, while the custard should be creamy and a bit runny. The top is caramelised brown but not burnt. To achieve these outcomes, you need a good recipe and some skill!
As I always say: if I can do it, so can you!
So let’s get started!
Watch my video tutorial instead
Puff pastry
I watched over 20 videos on YouTube to see the different versions of how to make this type of puff pastry. To all those fellow bakers: I salute you! They are all incredible.
Finally, I decided to give my pastry a twist, instead of going the more traditional path. I chose to use Chinese puff pastry which I found from a cookbook called Mooncakes & Milk Bread from Kristina Cho.

In her description, the pastry tart shells become more crisp using Chinese puff pastry. More importantly for me, this pastry can also be used for Hong Kong egg tarts, curry chicken puffs and all those pastries from Hong Kong Chinese bakeries which bring back my childhood memories. For its versatility and for the very personal memories it evokes, this is the sort of pastry that I decided to bake and share with you.
The Custard
Apart from the pastry, the way you make the egg custard also determines the outcome. As I’ve said above, I tasted a few Portuguese custard tarts from different bakeries when I travelled to Lisbon; although the textures of the custard were all slightly different, I confess that I couldn’t identify major differences in taste. Maybe I was just too excited to shuffle them into my mouth – I defy anyone to eat an egg tart slowly!
Anyway, after my research, I knew that the custard should be creamy and a bit runny, with some caramelisation on top. So I decided to use the recipe from my baking idol – Cupcake Jemma. I followed exactly what she does in her video and I have to say I am very happy with how it turned out.
So let’s bake, shall we?
Prepare the pastry for Pastéis de Nata ~ Portuguese Custard Tarts
There are two parts in this Chinese puff pastry, the butter block and the flour dough.
This sounds a bit daunting, doesn’t it, but as usual, if Bakabee can do it, so can you!
Ingredients for these essential parts
Butter block:
- unsalted butter – it needs to be chilled and in cubes so that it will be easier to mix with the flour
- all purpose flour – there is no need to sift it before mixing
Flour dough:
- all purpose flour – same as in butter block, no need to sift it in advance
- the egg – around 55 g in the shell
- sea salt – for a bit of flavour
- ice water – it should be ice cold, not room temperature
Equipment you need
All you need is a food processor and a couple of silicone spatulas, if you don’t have one, a mini food chopper can also get the job done! Actually, I used mine and I was pretty amazed by its performance! You can watch my YouTube video – How I cook EASY & DELICIOUS home cook meals with my TOP 3 kitchen appliances efficiently? to get the idea.
First, let’s make the butter block. Place the two ingredients in the processor, then give it a few pulses until they turn into a dough (I told you it was easier than it sounds).
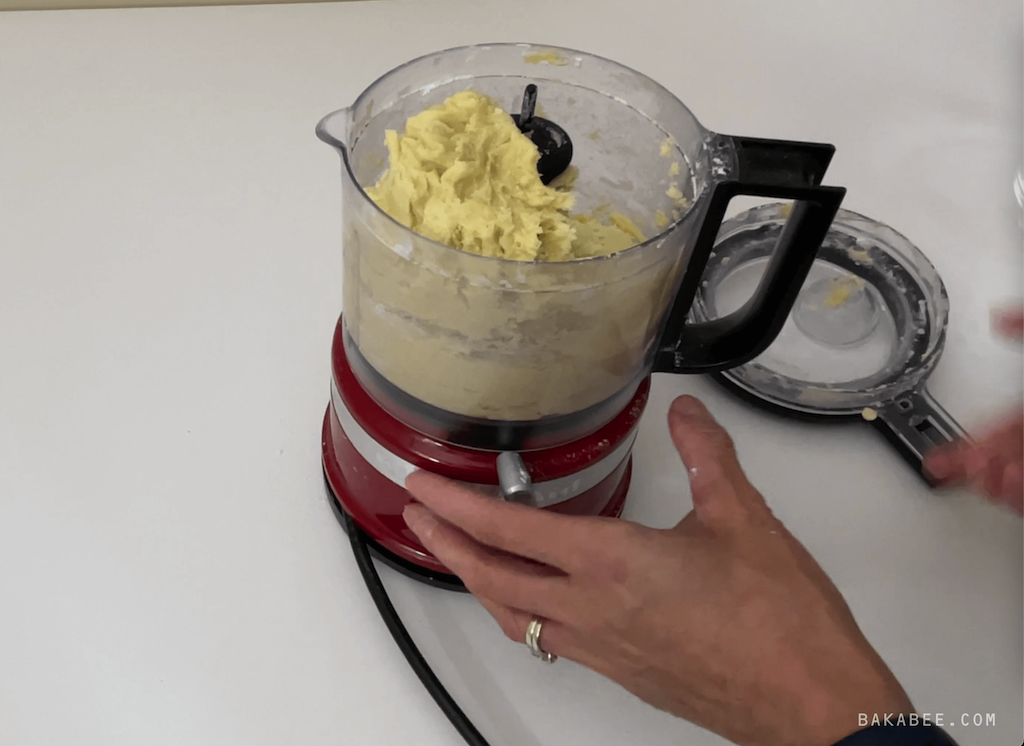
Then wrap this Butter Block well in a sheet of cling film. Use a rolling pin to roll it out to approximately 5” square.
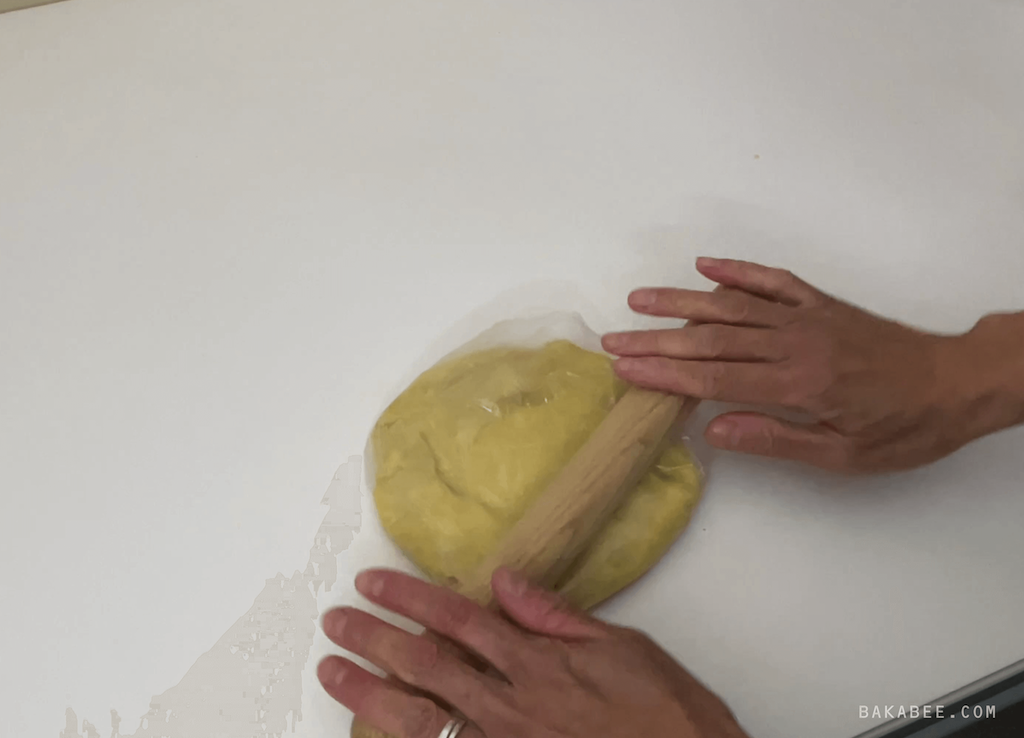
Place the Block in the refrigerator to chill until it becomes firm. Done!
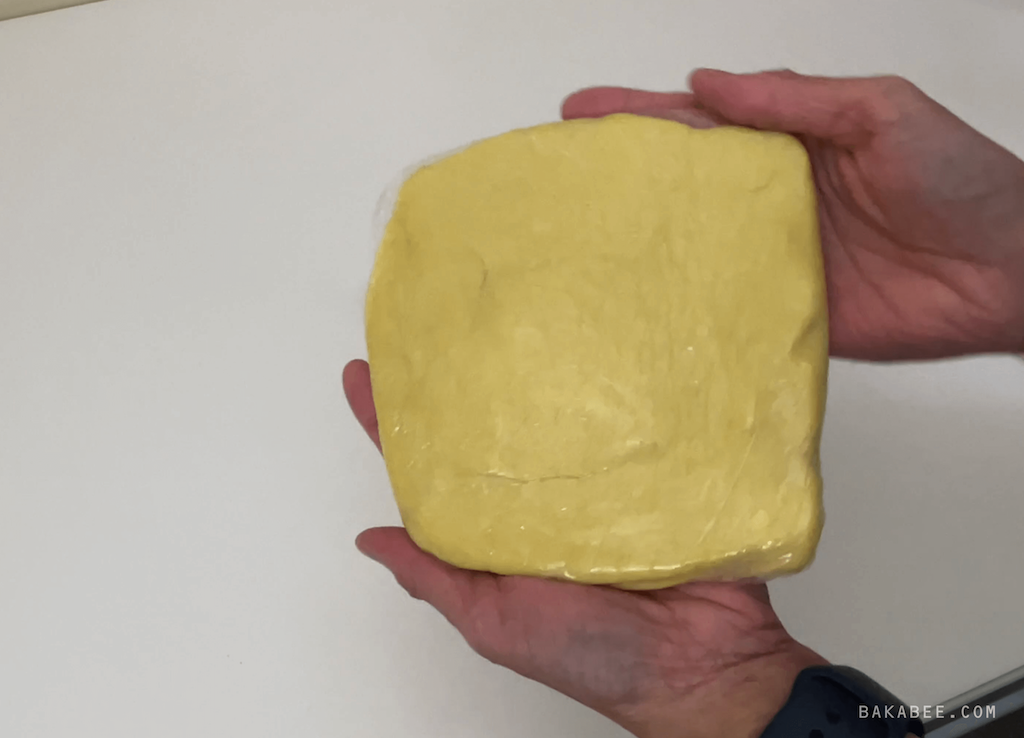
Next, the flour dough. The process is pretty much the same. Place the flour, egg, sea salt and ice water into the food processor.
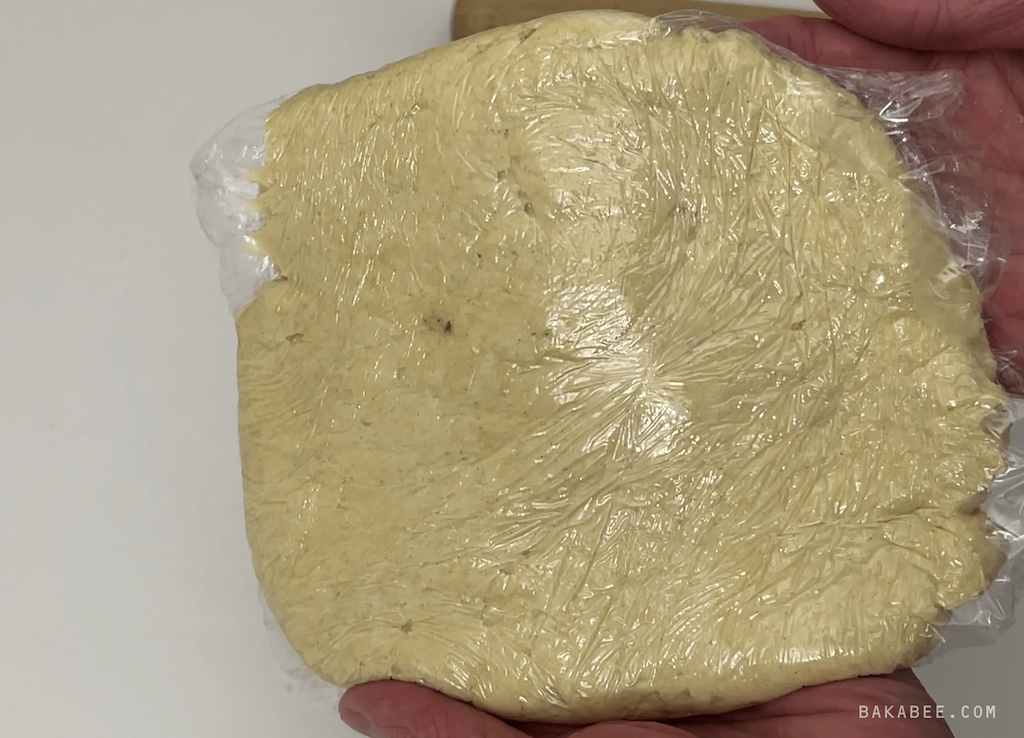
Give a few pulses to blend them into a dough. Then transfer the dough onto a sheet of cling film and wrap it well to avoid it becoming dry. Place it in the refrigerator to chill for 30 to 60 minutes until it becomes firmed as well. Done!
Lamination
Lamination is the process of folding and rolling butter into the dough, over and over again, to create super-thin layers. These layers, which alternate between butter and dough, give the pastry a signature flaky and crispy texture, and of course, a very deliciously buttery taste.
How do we do it?
Before we start this process, please MAKE SURE the butter block is sufficiently chilled: I mean a very solid block. To create layers in this puff pastry, we are going to do 3 folds. It’s not difficult, I promised!
Here are the steps:
- Roll out the flour dough into a rectangle. It should be long enough to completely wrap around the butter block.
- Place the butter block in the centre of the flour dough.
- 1st fold – Fold the edges of the flour dough and wrap the butter block inside it.
- Use a rolling pin and press it down. You may need to press quite hard at this stage as the butter block is pretty solid. DO NOT try to roll it because it may tear the flour dough.
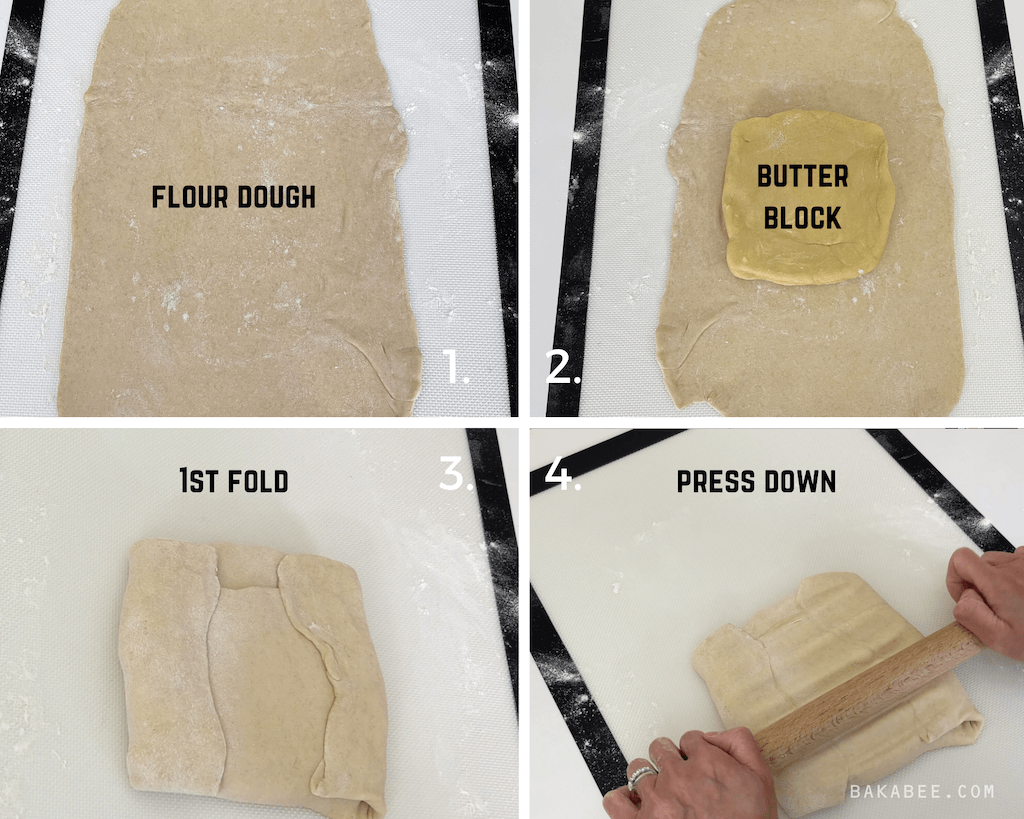
- When you finish in one direction, rotate the dough 90 degrees and continue to press it down until it becomes a rectangle again.
- 2nd Fold – fold the bottom third up and the top third down, a bit like folding a letter to go into an envelope.
- Rotate the dough 90 degrees.
- Continue to press it down until it becomes a rectangle again.
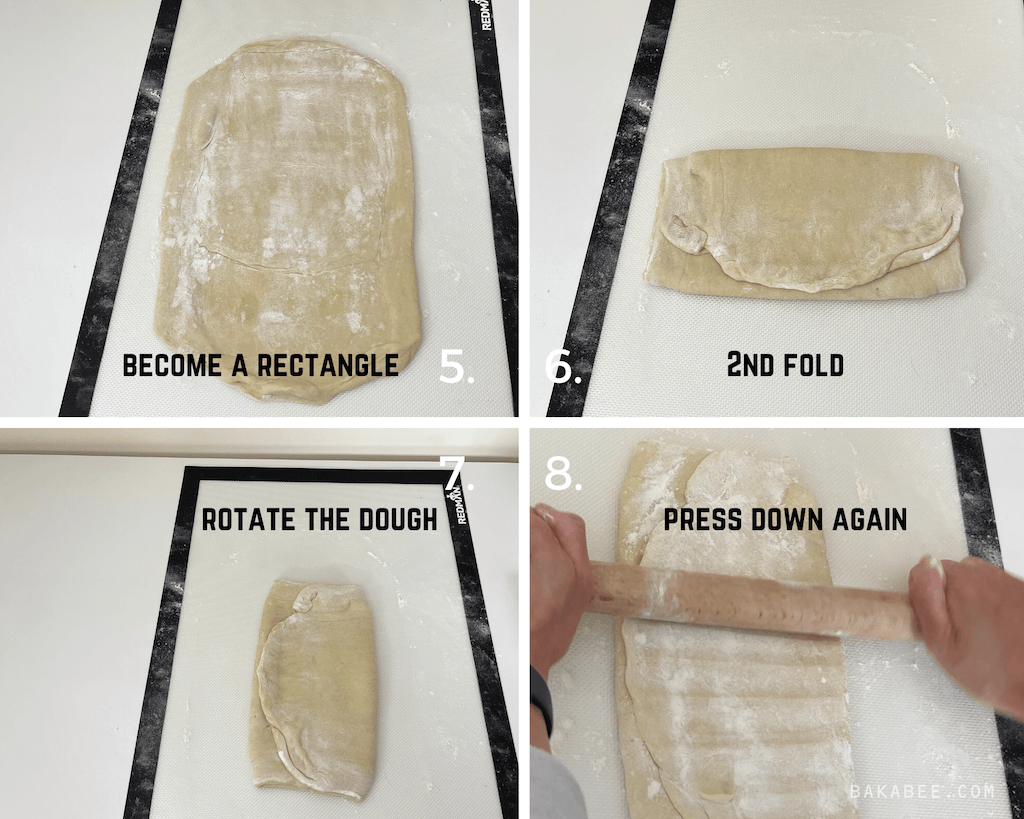
- When you finish one direction, rotate the dough 90 degrees and continue to press it down until it becomes a rectangle again.
- 3rd Fold – fold the bottom third up and the top third down, letter folding for the envelope once more.
- Rotate the dough 90 degrees.
- Continue to press it down until it becomes a 9 x 14” rectangle. Here try to roll it out as neatly as you can so it is easier to roll out the dough into an even log.
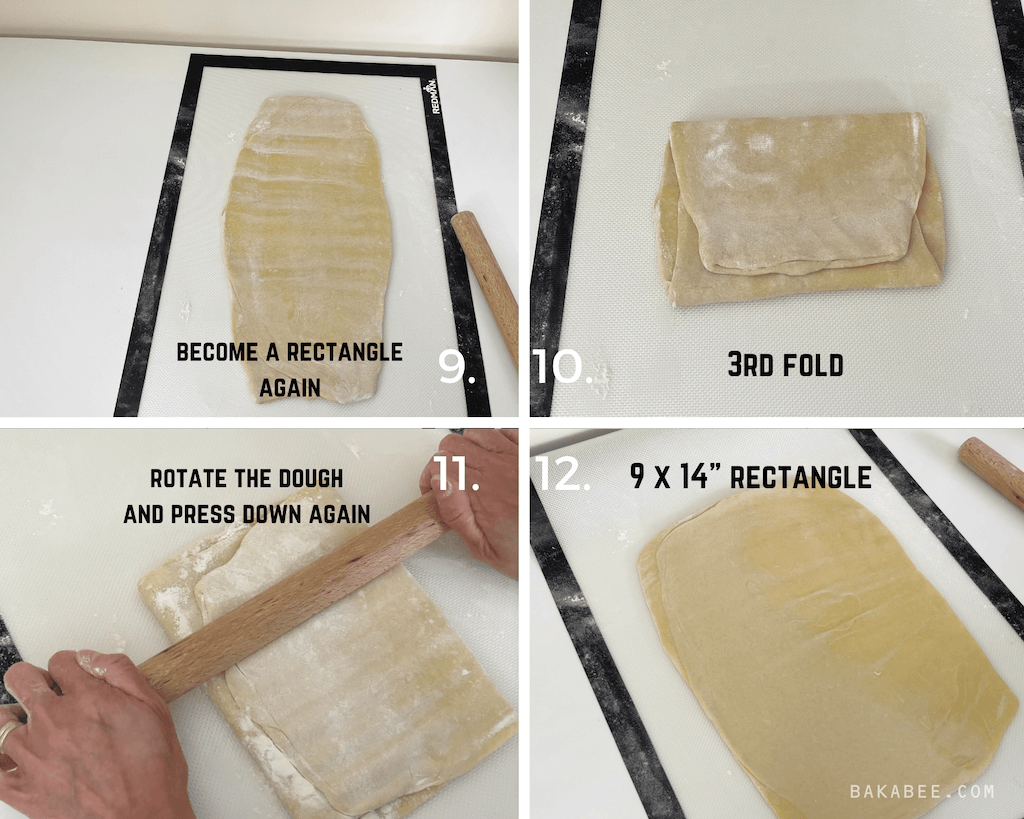
Now the lamination is done! It is not that difficult, is it? From my personal experience, it just took a bit of time and effort. But I think it is totally worth it! Because every fold and press I’ve made is creating layers and layers of pastry, once baked, they will provide the flaky, crispy and buttery texture!
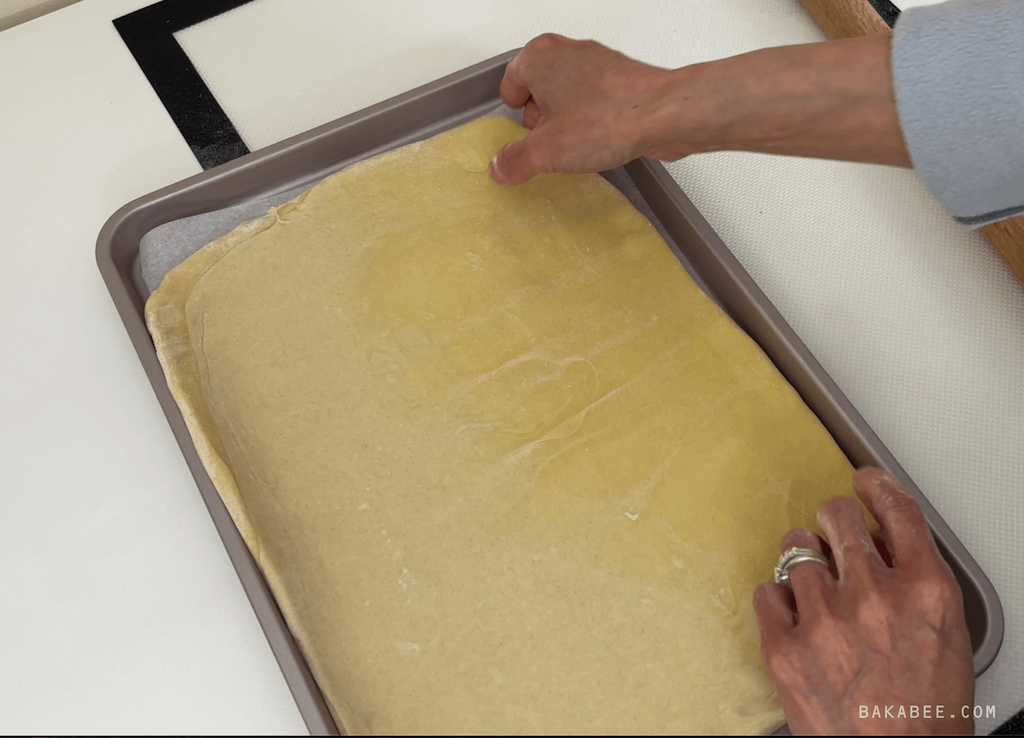
Now we need to transfer the dough onto a baking sheet and place it in the refrigerator to chill for at least 60 minutes before the next step.
Create a log
After the dough has been fully chilled, dust the work surface and place the dough onto it. Start from the long side, roll it tightly to create a log.
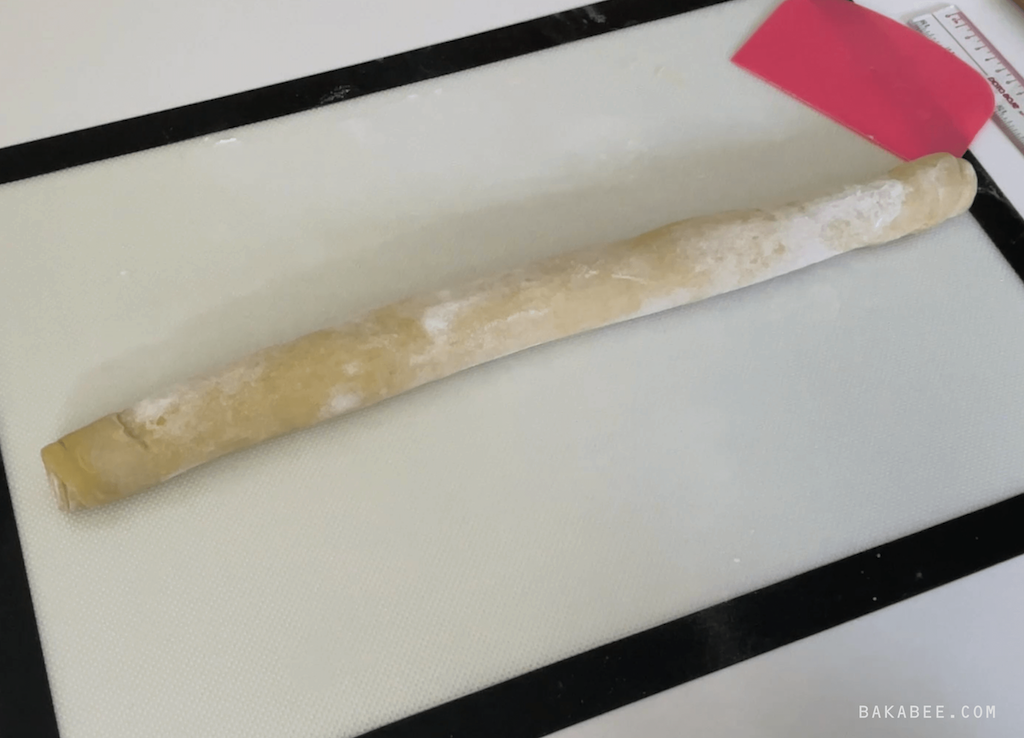
Trim both ends using a sharp knife. Cut it in half and wrap each half well in a sheet of cling film. Place them in the refrigerator to chill for at least 3 hours or even overnight before using it.
Pastry tart shell moulds
The moulds I use for making the pastry tart shells are aluminium. You DO NOT need to grease them before moulding the pastry. In the image below, you will see the shape and the size of the tray.
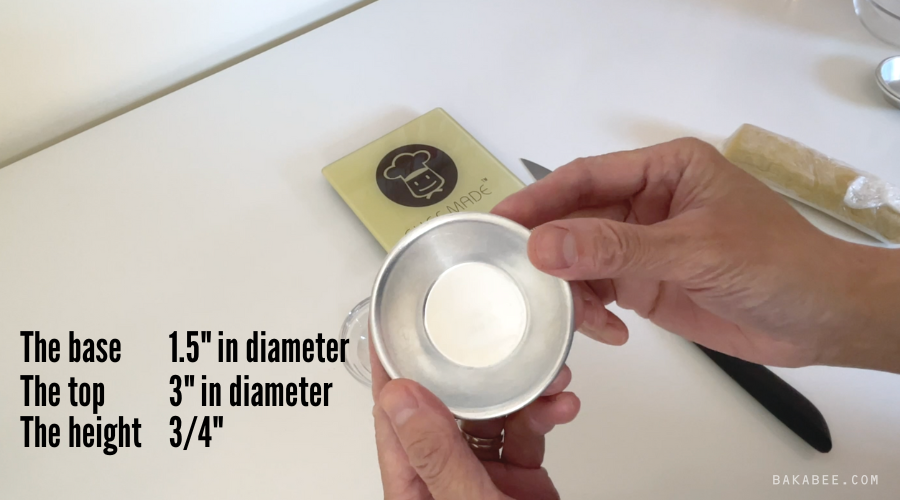
Make the pastry tart shells
What you need:
- A scale – to get the exact amount of pastry for each shell
- A sharp knife – to cut out the pastry that you need for each shell
- Some water – to wet your thumbs to mould the tart shells
How much pastry do you need for one tart shell?
I experimented with 26 g and 25 g. However, I found that they were not quite cooked after they were baked. The challenge here is if you use too much pastry for one tart shell, it may not be baked through when the custard is baked. If you keep baking the pastry until it’s well baked, the custard might then become overcooked. So you need to find the balance and it will depend a little on your oven.
Pro tip: I ended up using 24 g for each tart shell because that just suits my particular oven temperature. Experiment before you try and bake a full batch of tarts. The goal is to have a well-baked and crispy pastry tart shell with a custard that is creamy but still a bit wobbly – it should not be baked solid.
Steps
- Cut out a 24 g piece of pastry and place it at the bottom of the mould. The swirl side faces up. (watch my video tutorial for the details)
- Dip both thumbs into the water and then start pressing the dough against the bottom of the mould while turning it.
- Once the pastry covers the bottom, start pushing and stretching it along the sides. Try to stretch it as evenly as you can.
- When the pastry reaches the rim of the mould, stretch it a bit higher to create a pastry rim.
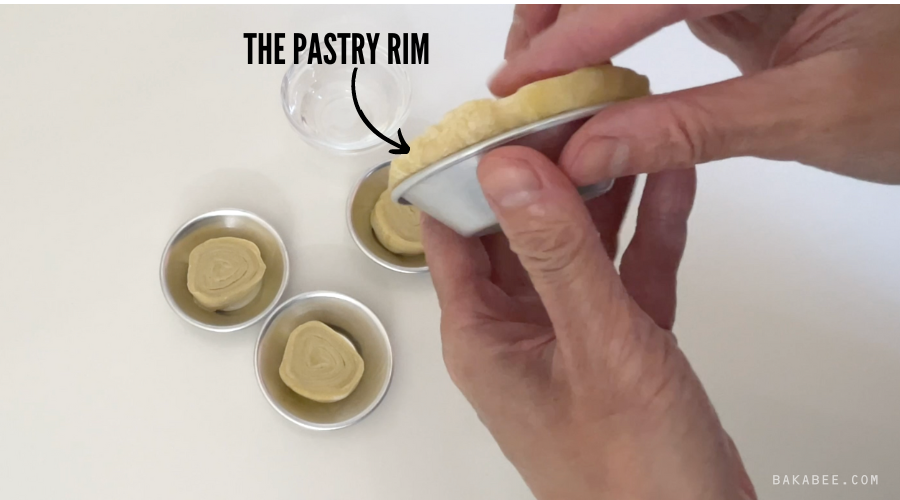
- Place the moulded tart shell on a baking sheet, continue to mould as many as you need.
- Cover them with a sheet of cling film and place them in the refrigerator or freezer for at least 20 minutes before the next step.
Make the custard
What you need:
- 165ml water – for the cinnamon syrup
- 240g caster sugar – for the cinnamon syrup
- 1 cinnamon stick – key ingredient to bring out the unique flavour
- 60 ml milk – to create the custard base
- 40 g all purpose flour – to create the custard base
- 250 ml milk – slightly boiled on stove
- 6 egg yolks – for the eggy custard flavour and texture
- ½ tsp vanilla extract -to enhance the custard flavour
Steps:
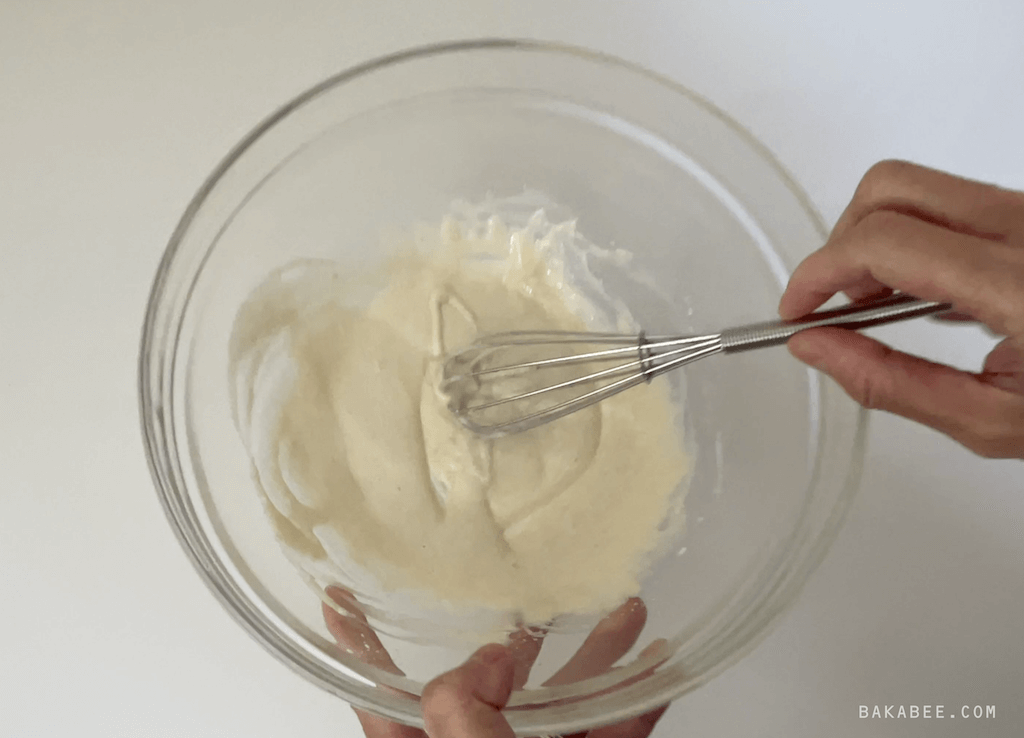
- Whisk 60 ml milk and flour in a large mixing bowl.
- Meanwhile, prepare a heavy duty saucepan, add water, sugar and the cinnamon stick into it. Turn on the medium low heat to start boiling the mix to make the cinnamon sugar syrup. DO NOT attempt to stir it. Otherwise, the sugar will crystallise.
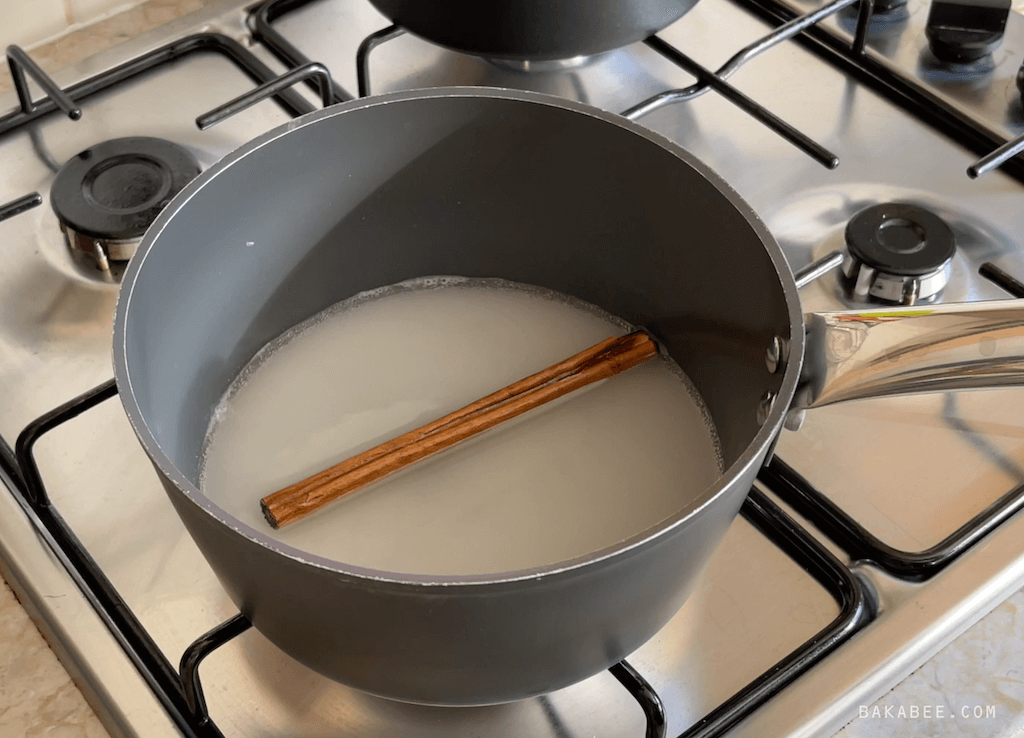
- Keep the mixture boiling until it reaches 100℃. You can shake the pan during the process to make sure the sugar is fully covered by the water. When it’s done, remove the cinnamon stick (be careful, it’s hot).
- Pour 250ml milk in a saucepan and turn on the medium low heat. When you see the bubbles forming at the sides of the pan, turn off the heat and set aside.
- Return to the flour and milk mixture (Step 1) and add the warm milk, whisking it as it mixes. Then add the vanilla extract.
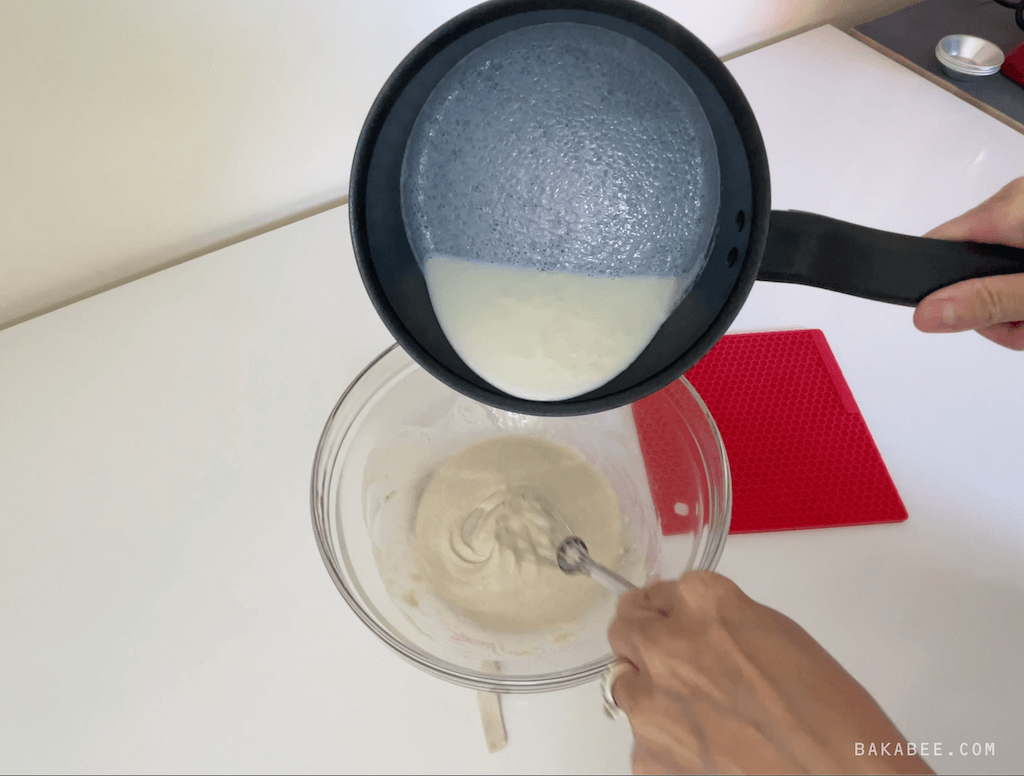
- Now pour the hot syrup into this mixture. Keep stirring it as it cools until it becomes warm but no longer hot!
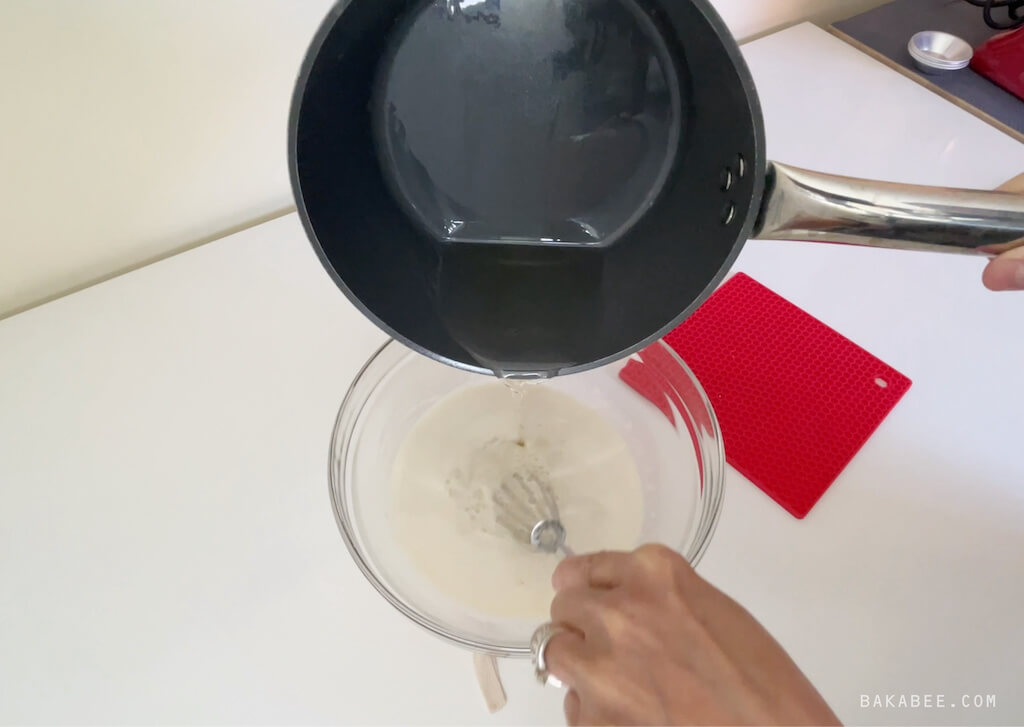
- Add the egg yolks into the warm syrup mixture. Start by breaking the yolks and then gradually mix them until everything is well combined.
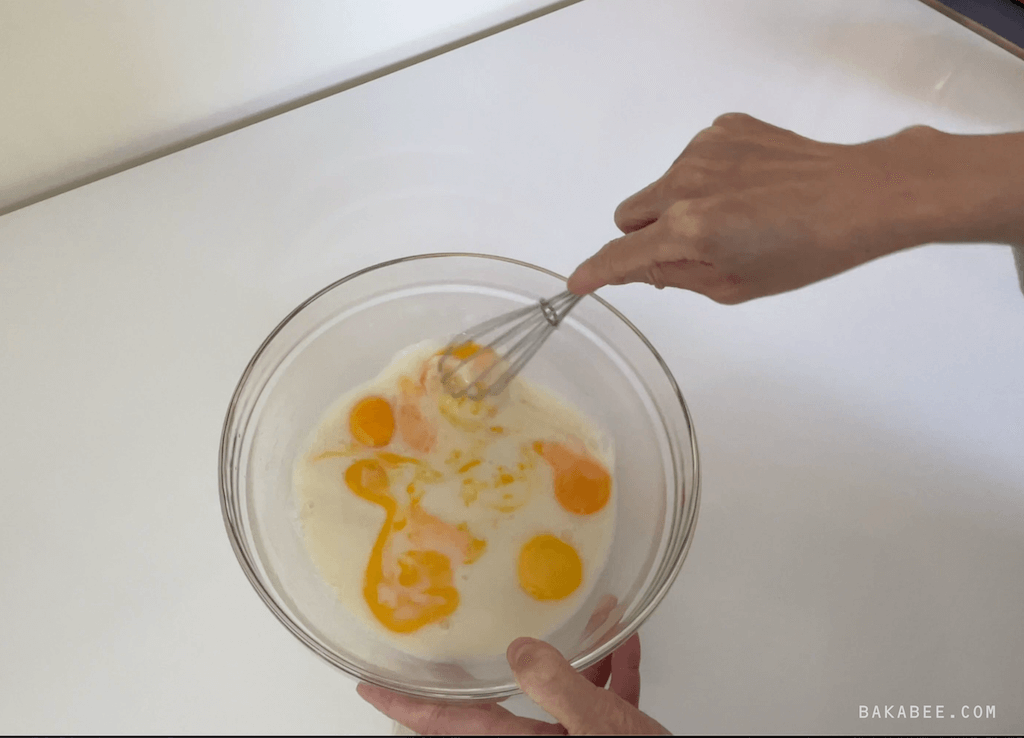
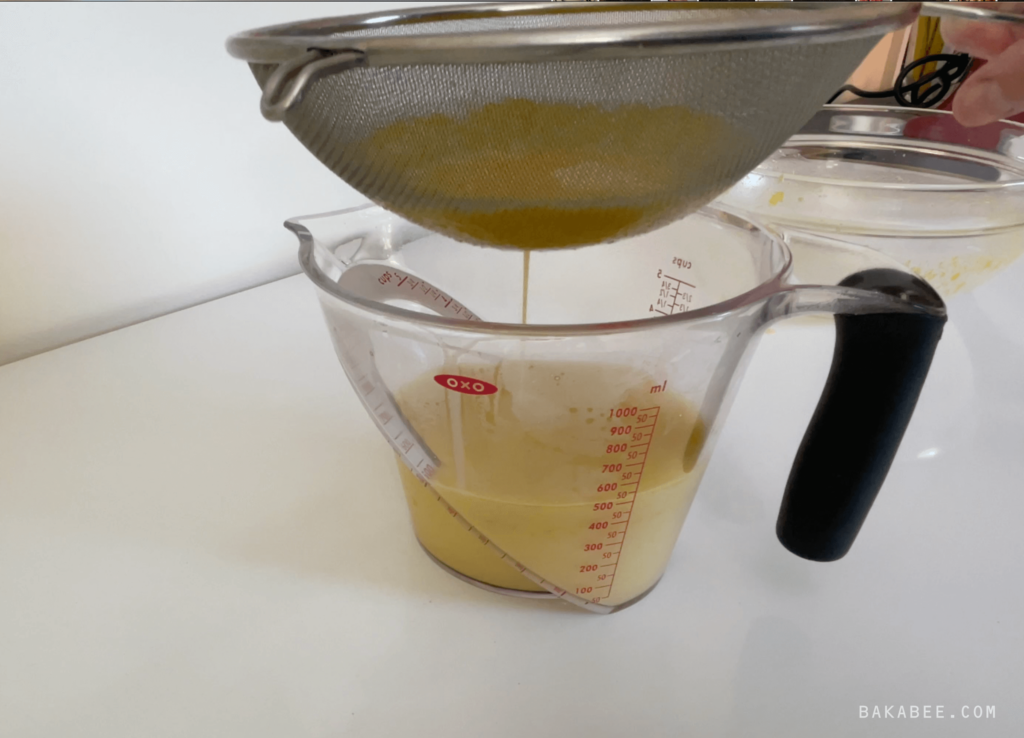
- Get a jug and sift the egg mixture once to get a silky smooth custard.
- Cover it with cling film until we start to assemble the tarts.
Oven temperature
Before we start baking, let’s preheat your oven to 240℃.
Yes, that’s pretty hot…!
Pro tip: Puff pastry needs to be baked in a very hot oven in a short period of time in order to get the puffy rise that we want. However, this also means that we need to keep a very close eye on the bakes to make sure they don’t burn. Eyes on the bakes!
Bake the Pastéis de Nata ~ Portuguese custard tarts
Now it is the exciting moment, let’s bake the tarts.
There are a few things you need to remember before baking the tarts:
- Make sure the tart shells are chilled.
- Do not over pour the custard in each tart shell. I would say maximum ¾ capacity is enough.
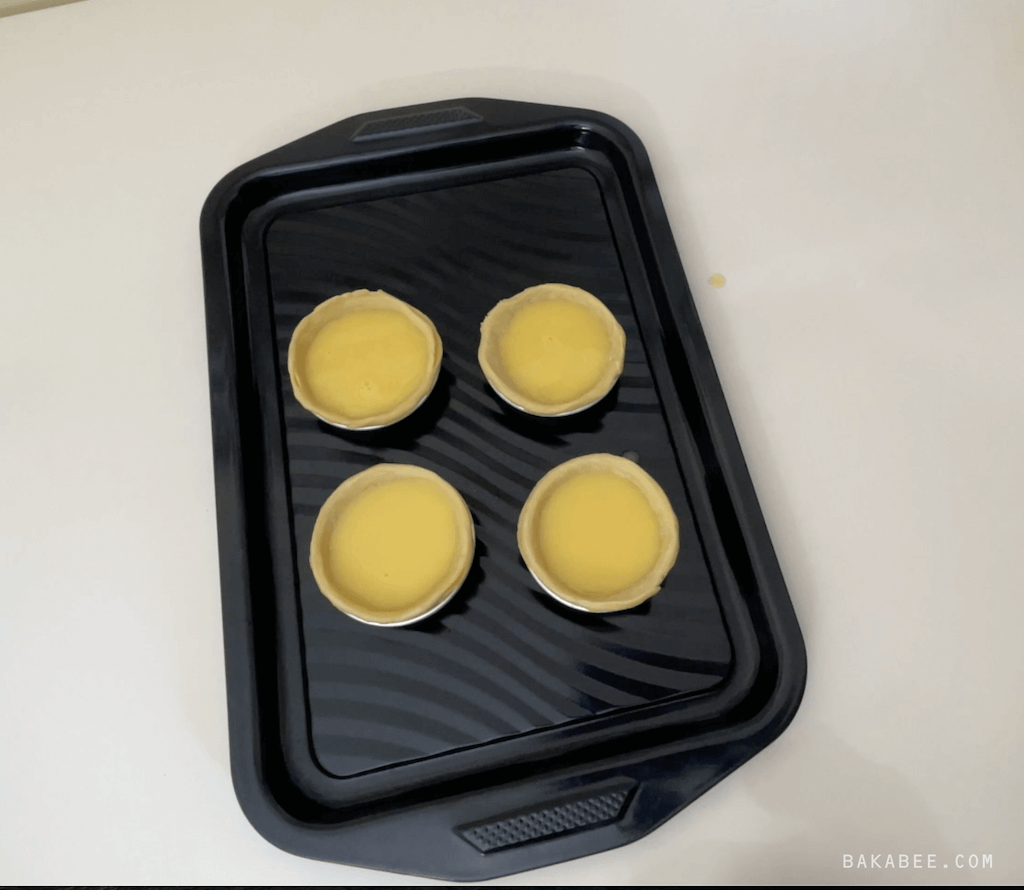
- Place the baking sheet in top ⅓ of the oven.
What we are looking for is that golden brown and crispy tart shell with a slight caramelisation on top of the custard. Keep a very close eye on your first batch because oven temperatures really do vary. We definitely don’t want to burn them at the final stage after all your hard work, right?
Bake the tarts for between 12 to 14 minutes – you’ll need to judge this by keeping an eagle eye until you perfect exactly the right time for your oven.
Once the baking process is done, take them out really carefully from the very HOT oven. They will smell in-cred-ible!!!
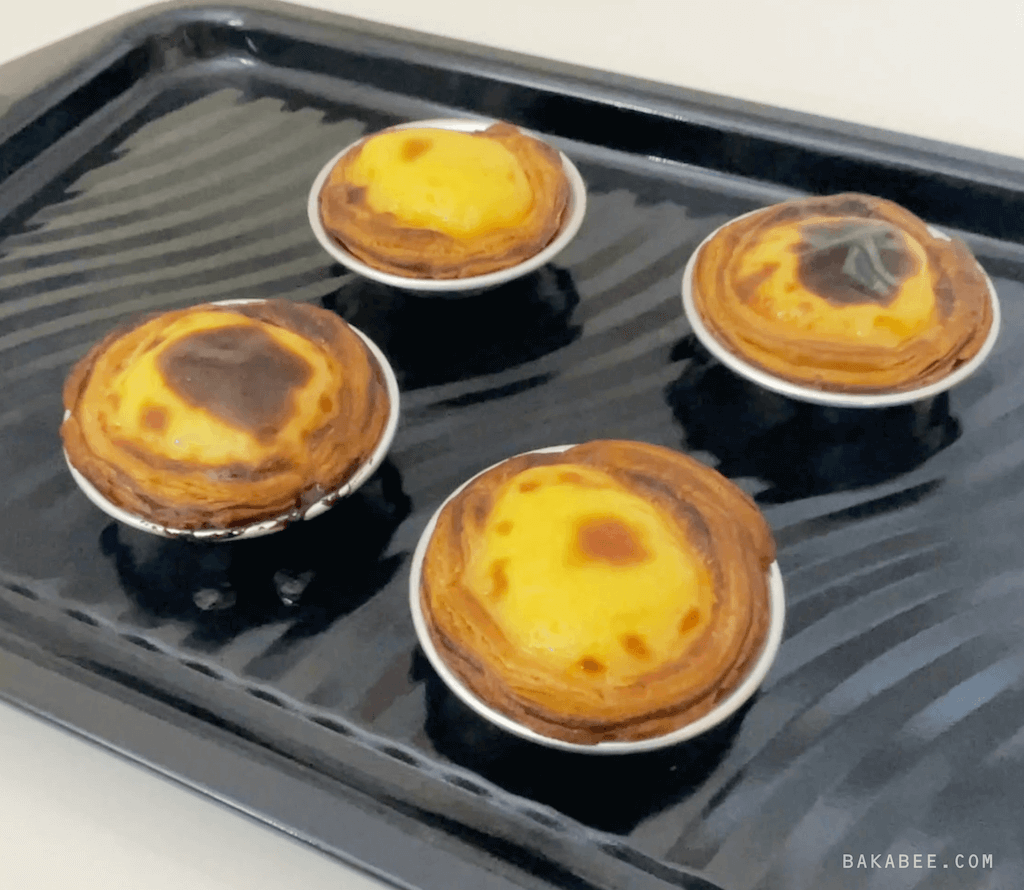
As soon as you can handle them, remove the tarts from the moulds to avoid the steam softening the crispy pastry. This is a very important step!!!
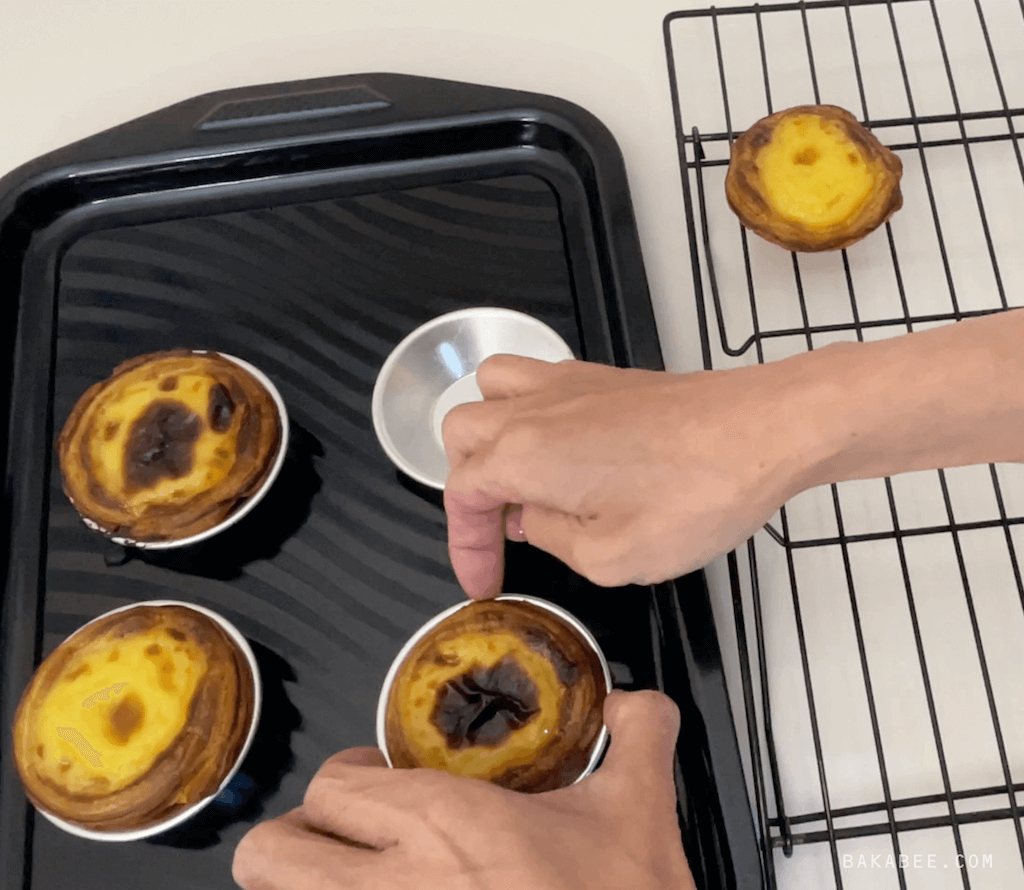
Place the tarts on a wire rack to cool down. If you can’t resist eating them at this point, BE CAREFUL, the custard is extremely hot and retains heat longer than the pastry!
If you can control yourself, wait for at least 5 minutes!
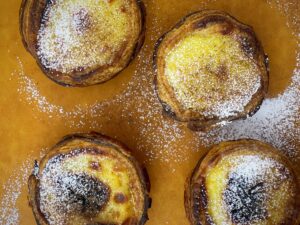
Place the irresistible Pastéis de Nata ~ Portuguese Custard Tarts on a serving board, dust a generous amount of icing and a dash of cinnamon before serving! Hmmm … yum!
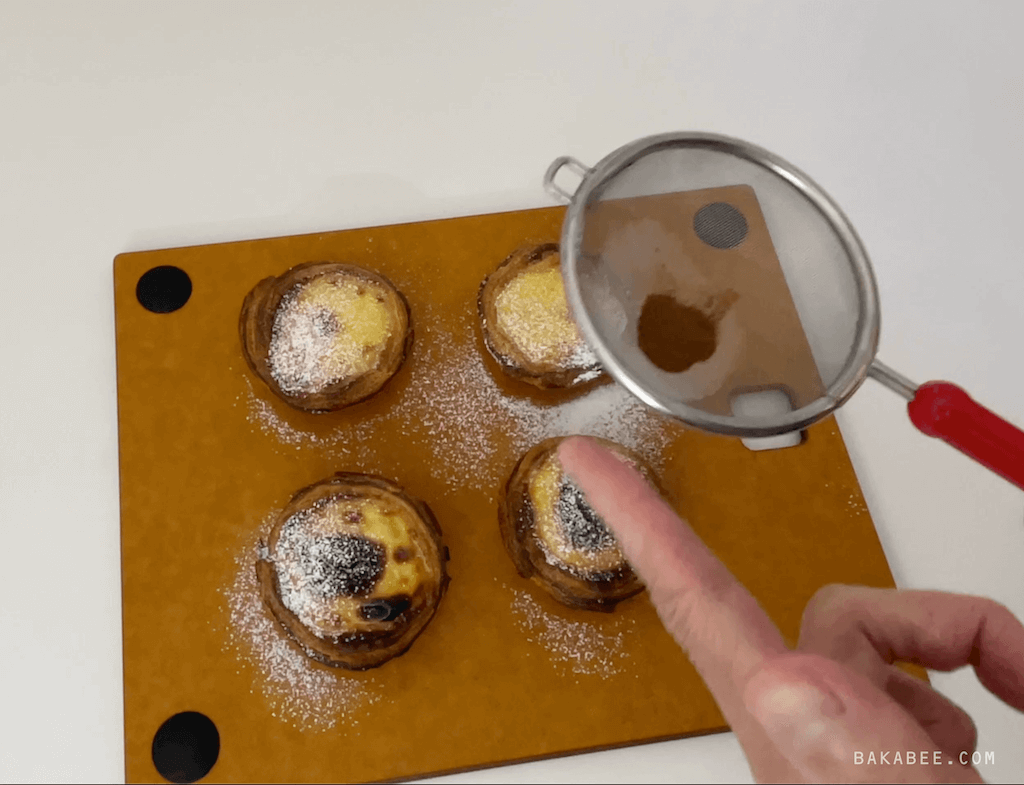
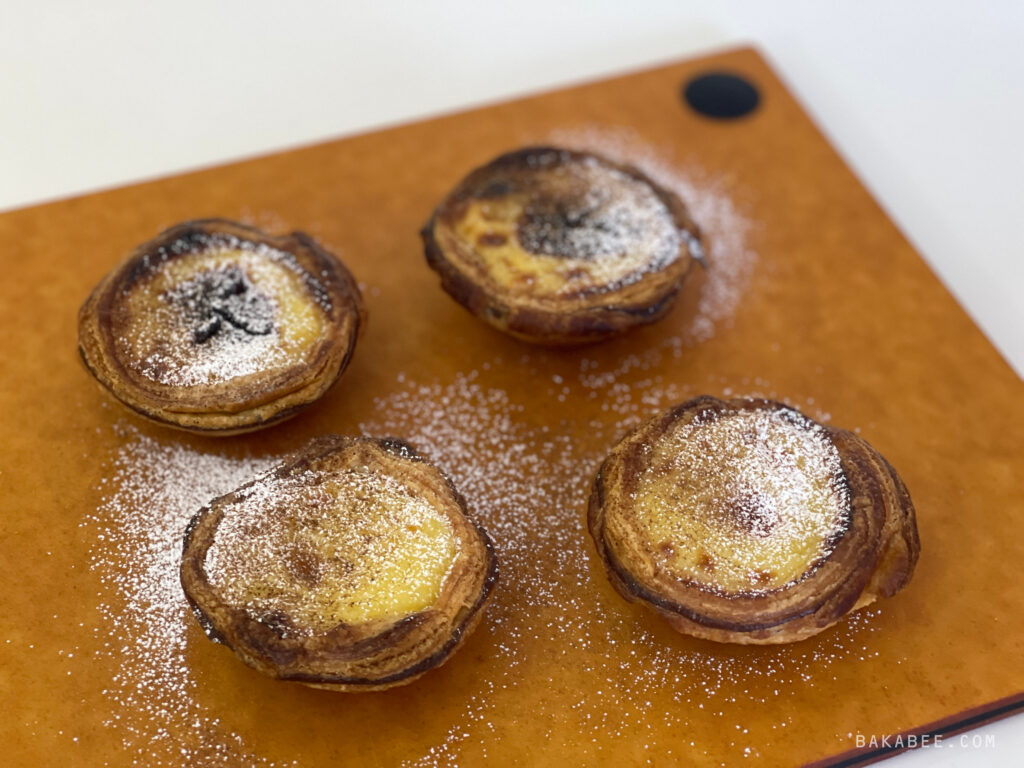
Pastéis de Nata ~ Portuguese custard tarts
INGREDIENTS
Chinese puff pastry – butter block
- 227 g unsalted butter (chilled)
- 150 g all purpose flour
Chinese puff pastry – flour dough
- 210 g all purpose flour
- 1 large egg
- ½ tsp sea salt
- 75 ml ice water
Egg custard
- 250 ml milk
- 165 ml water
- 240 g caster sugar
- 40 g all purpose flour
- ½ tsp vanilla extract
- 60 ml milk
- 6 egg yolks
- 1 cinnamon stick (6" long)
INSTRUCTIONS
Prepare the butter block
- Place the chilled butter and the flour in a food processor. Pulse it for a few times until they turn into a wet dough-like texture.
- Prepare a sheet of cling film on the surface. Transfer the mixture from the food processor using a spatula and place it on the cling film. Wrap it well but not too tight.
- Roughly roll it out into a 5" square, using a rolling pin.
- Store it in the fridge until it becomes firmed.
Prepare the flour dough
- Place the flour, egg, sea salt and ice water in the food processor.
- Pulse a few times until the ingredients turn into a dough.
- Prepare a sheet of cling film on the surface. Transfer the dough from the food processor onto the cling film. Wrap it on both sides first and squeeze all the air.
- Wrap well to prevent it drying out and chill in the fridge for about 30 – 60 minutes until it becomes firmed.
Make the Chinese puff pastry
- Slightly dust the surface with flour. Unwrap the flour dough and place it onto the surface. Roll out the flour dough to a rectangle (which needs to be big enough to encase the butter block in completely.
- Unwrap the butter block and place it in the centre of the rolled out flour dough. Fold the edges of the dough over the butter block.
- Firmly press down the dough using a rolling pin (press don't roll) to prevent it from tearing. When finished from one direction, rotate the dough 90° and continue to press it down until the dough becomes a roughly 9 x 14" rectangle. Feel free to dust the dough or the work surface if it starts to stick.
- Fold the dough in thirds, like a letter, and repeat to press down the dough with a rolling pin until it is flattened and becomes the size approximately 9 x 14" again.
- Repeat, folding the dough in thirds, pressing the dough one more time to finish this lamination process.
- Place the rolling pin on the long side of the dough and use it as a tool to transfer the dough onto a lined baking tray. Wrap it tightly to avoid it from drying out. Refrigerate the dough for at least 60 minutes before working it again.
- Slightly dust the work surface and place the dough onto it. Start from the long side and roll it into a log. Roll it out again to get an even log.
- Trim off both ends and cut the log in half using a shape knife. Wrap each log well in cling film and place it in the refrigerator for at least 3 hours or even overnight. At this point, you can also freeze the dough for future use.
Make the egg custard
- Place the all purpose flour and 60 ml milk in a large mixing bowl. Whisk them well until you can't see any flour. Set it aside.
- Add the caster sugar and water into a heavy duty saucepan. Turn on the medium heat. You may shake the pan to make sure the sugar is fully covered by the water but do not stir.
- Add the cinnamon stick into the pan and let it simmer until it reaches 100°C. You can place a thermometer to check it. DO NOT stir the sugar syrup.
- Remove the cinnamon stick using a clip.
- Boil 250 ml milk in another saucepan at medium low heat until you see some bubbles on the sides. Turn it off and set it aside.
- Pour the warm milk into the flour mixture (step 1) while whisking it at the same time.
- Add vanilla extract and mix them well gently.
- Add the sugar syrup. Keep stirring it until it cools to a point where it is warm to touch.
- Add the egg yolks into the warm syrup mixture. Using a whisk to break the egg yolks first, continue to whisk them well until all the ingredients are well incorporated.
- Sieve the egg mixture once in a jug. Cover it with cling film and place it in the refrigerator until needed.
Mould the tart shells
- Preheat the oven to 240°C.
- Prepare the aluminium tart shell moulds. You do not need to grease them before placing the dough into it.
- Take the chilled log out from the fridge and unwrap it. Cut 24 g of pastry for each tart and place it in the centre of each mould.
- Dip both thumbs in water. Start by pressing down the pastry against the bottom of the mould. Once the bottom of it is covered, keep turning the mould and gradually push and stretch the pastry up along the sides of the mould. The bottom of the pastry should be thinner than the sides.
- Try to push and stretch the pastry against the mould as evenly as you can to achieve an even bake.
- When the pastry reaches to the top of the mould, try to stretch it above the rim of the mould. Continue to make as many as you need. Arrange the pastry moulds on a baking tray and cover them with cling film.
- Place the pastry moulds in the refrigerator for at least 20 minutes or until they become firm again.
Assemble and bake the tarts
- Arrange the pastry moulds on a baking tray and space them 2 inches apart.
- Take the chilled custard out from the fridge and whisk it thoroughly before pouring it into the tart shells.
- Fill each tart shell 3/4 full with custard. Do not overfill the shells.
- Place the tarts into top ⅓ of the oven and bake them for about 12 to 14 minutes until the pastry turns deeply golden brown and the custard has the caramelisation on top. Keep a very close eye on them to avoid burning.
- Let the tarts cool down for about 5 minutes in the moulds. Un-mould them on a wire rack to avoid any steam softening the crispy pastry.
- Place the tarts on a serving plate. Dust some icing sugar and a touch of ground cinnamon before serving.
- Enjoy it with a cup of coffee! Yum!
VIDEO TUTORIAL
NOTES
- watch my video tutorial to see how I exactly made it
- Return the dough to the fridge at any point of the lamination if you find the dough starts to go soft.
- It is better to serve the tarts on the same day. However, the tarts can be stored in an air-tight container for up to 2 days.
- The well wrapped pastry log can be kept in the freezer for up to 3 months.
- Alternatively, mould the pastry in the tart shell moulds. Stack them and wrap them tightly using cling film. Store them in the freezer for any instant treats.
NUTRITION
Save it to Pinterest for later
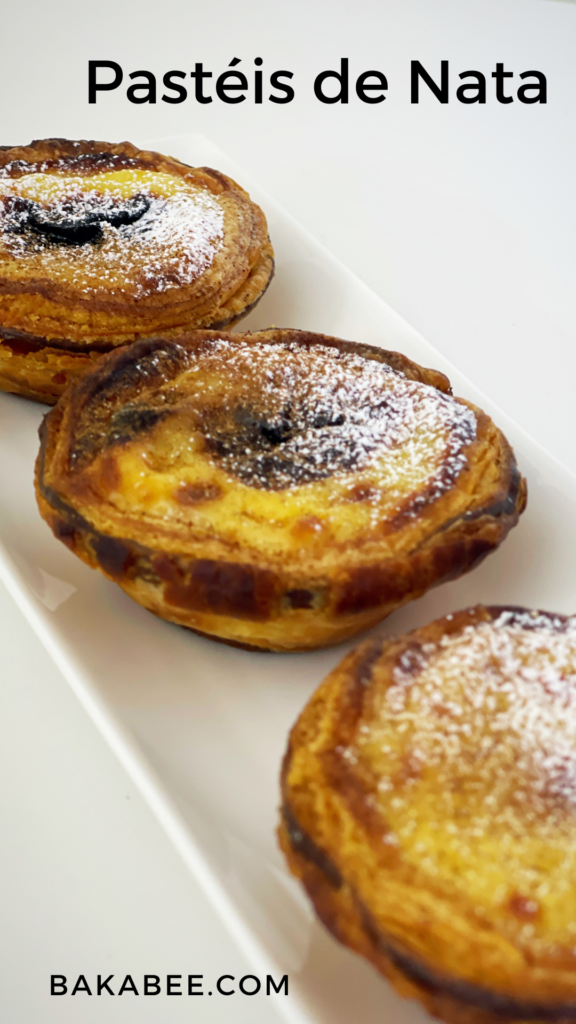
FAQs for Pastéis de Nata ~ Portuguese Custard Tarts
How long can I keep the tarts?
The tarts are best served on the same day as they taste their very best when fresh. But if you are unable to eat them all (never a problem in my family), you can keep them in an airtight container for up to two days.
Can the tarts be served cold?
Yes, they can be. Personally, I like them to be served still slightly warm.
Can I keep the leftover pastry in the freezer?
Yes, you can. This is what I always do in case any unexpected guests pop in for a cup of coffee. You can amaze friends with an instant fresh bake in minutes!
How long can I keep the custard mixture in the fridge?
The mixture can be kept in the fridge for up to 3 days. Remember to whisk it thoroughly each time before pouring it into the tart shells.
More delicious recipes for your next bake
- Banana Cinnamon Bundt Cake – they taste as good as they look
- Cheese Straw Twists – cheesy pastry that you can’t resist
Keep baking! 😉

