Share this!
Flourless walnut Swiss roll with coffee cream
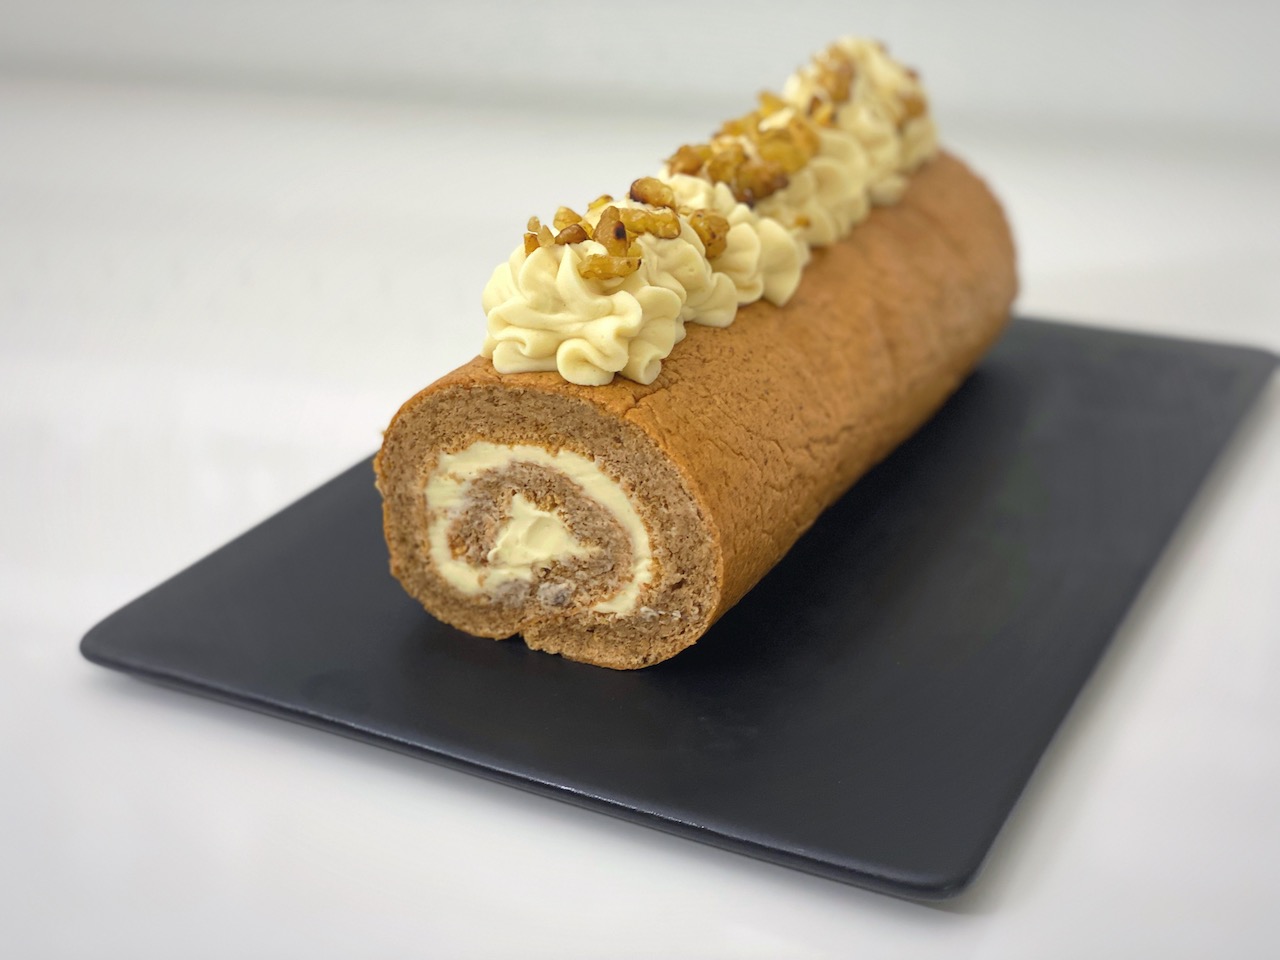
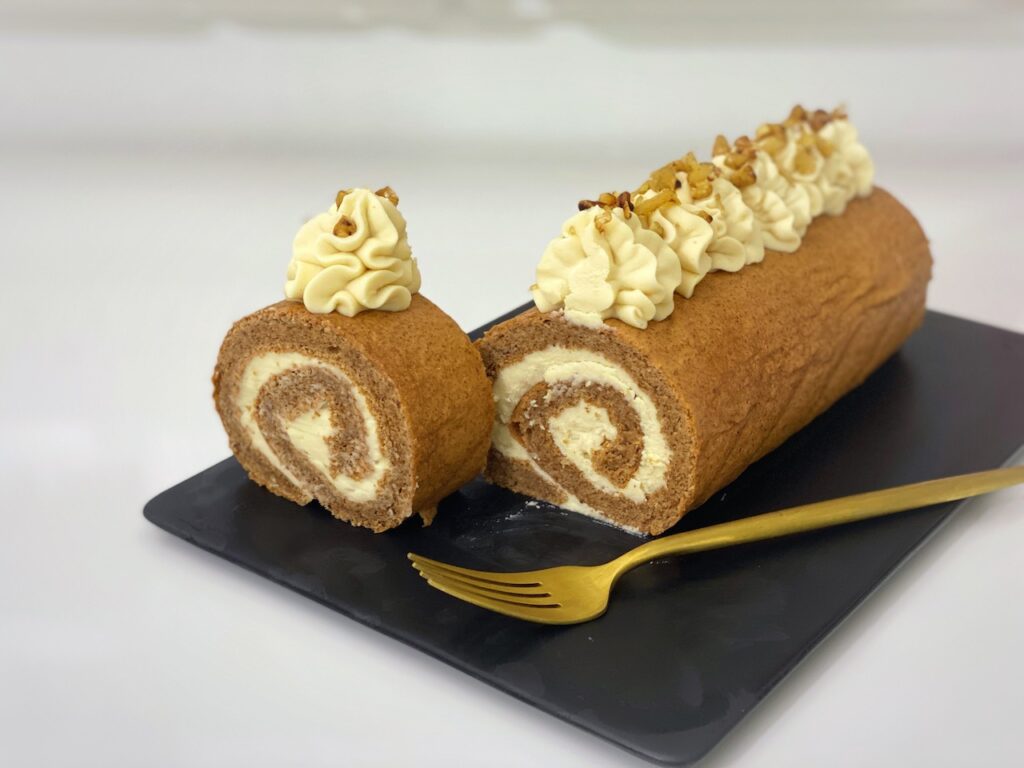
Swiss roll is one of my childhood favourites, this flourless walnut Swiss roll has an ultimate light and fluffy texture and is filled with aromatic coffee whipped cream. It’s not too sweet but is full of deep nutty flavour from the toasted walnuts. This definitely qualifies as a healthy choice for your family or a great option if you run out of flour at home. There is never an excuse not to get the apron on and bake!
This flourless walnut Swiss roll might sound complicated to make … but honestly it isn’t at all and it is much more simple than you might think. All you need to do is to follow my carefully explained recipe and video tutorial and perfection will be yours; I’m confident you can do it!
“Life is short, eat cake first!”
Watch this video tutorial
How to bake a cake without flour?
Have you ever run out of flour in your kitchen but you still want to bake a cake? No worries … there actually is a kind of cake called ‘flourless’ cake. Yes, correct … a cake without flour. Amazing.
If you just google the term ‘flourless cake’, you’ll find a lot of different substitutes, such as ground nuts, polenta, or even mashed potato, now who would have thought that? I have to admit I haven’t tried that one yet.
In this Flourless Walnut Swiss Roll recipe, I use ground walnuts – love it! Walnuts are always my favourite choice of nuts, if it’s the same for you, you might like my other really delicious recipes which use this ingredient as well. Check out Coffee Walnut Loaf Cake and Banana Walnut Cake and prepare to be tempted.
Ok, diversion, back to the ground walnuts…
How to prepare the walnuts?
First, toast the walnuts in a cast iron pan. If you don’t have one, you can use any pans in your kitchen. However, I recommend using cast iron pan because it prevents any damage to your pans from the high heat when you’re toasting the walnuts. In addition, I think the toasted walnuts actually taste better from this heavy duty type of pan … it might be just my psychological perception but I don’t think so. The main point is that you need to toast the walnuts until they release their fragrant nutty flavour. Keep an eye on them, because once you can smell the aroma, they are about to burn so turn off the heat fast to avoid charcoaled walnuts. If they are even a little bit burnt your Swiss roll will taste bitter.
Alternatively, you can bake the walnuts in the oven at 200℃ for about 5 to 10 mins. Once again, please keep a close eye on them because the little rascals burn in there too!
What next?
Cool the toasted walnuts completely on a sheet of aluminium foil before grinding them in a food processor with ½ teaspoon of baking powder. You just need a few pulses. DO NOT grind them too fine. Otherwise, they will turn into a paste instead of a powder. This part is all about paying attention to the ingredients.
Now, we are ready to get baking!!
How to prepare the eggs?
Preparing the eggs is another crucial part of making a flourless Swiss roll. This falls into two parts, preparing the egg yolks and then preparing the whites.
Let’s talk about separating the egg whites from the egg yolks first. You need to be super careful. Even if there is just a tiny bit of yolk falling into the whites, the fat from the yolks will stop the egg whites from foaming. If you are confident enough, you can just simply use two bowls. Once you crack the shells, carefully let the whites fall into one bowl and then pour the remaining yolk into the other bowl.
However, if you’re not so confident, you might wonder if there is a safer way: the answer is … YES there is!!!
Try the three-bowl method
Using this method is a more controllable way to do it. It doesn’t mean that you are not a skilled baker but it is safer, especially when you need to separate SIX eggs and you don’t want to mess it all up on egg six.
Shall we try? Ok, let’s do it!
First, get three bowls, then crack an egg gently into one bowl – make sure the yolk is not broken in this step. Then pour the whole egg gently into your palm and let the egg whites drain through the gaps between your fingers into the second bowl. Then gently slide the yolk from your palm to the third bowl. Repeat the whole process until all SIX eggs are separated. Ta-da … this is my ultimate way to separate the whites and the yolks without any risk!
How to prepare the egg yolks?
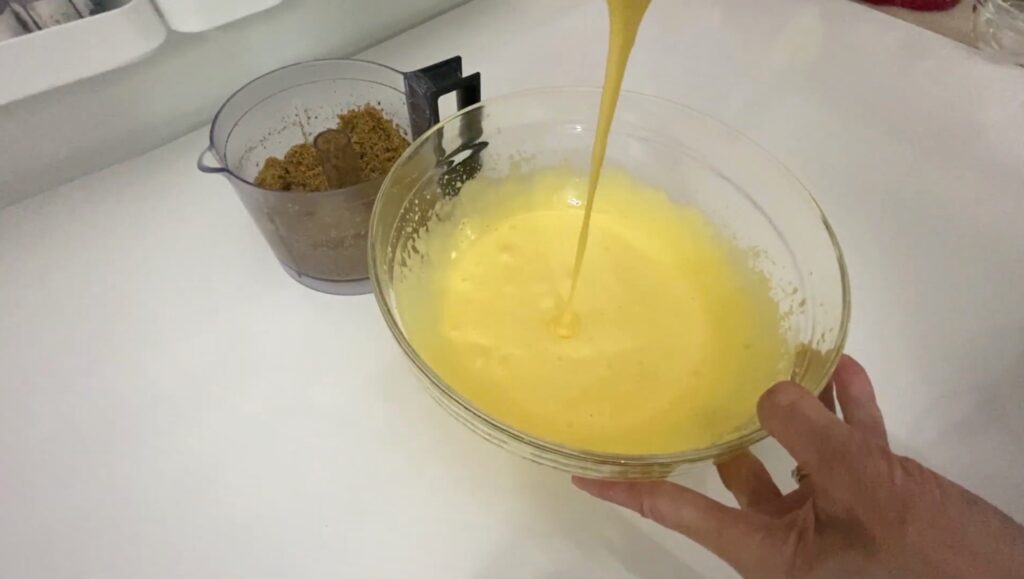
Put the egg yolks and the sugar into a mixing bowl. Using either a hand held mixer or stand mixer is up to you but it has to have the whisk attachment because we need to incorporate as much air into the yolk mixture as we can in order to create a light and fluffy texture. The key issue is BE PATIENT!!! You need to whisk the yolk mixture for around 4 minutes until the mixture becomes thicker in texture and more pale in colour. You can watch my video tutorial to see how the texture and the colour change during those 4 minutes.
Then add today’s star of the show – our ground walnut mixture. You’ve already added baking powder which also helps the cake become fluffy and light.
Be gentle and be patient in this step, whatever we incorporate with the egg mixture, what we don’t want to do is to knock the air out! So, I use a kind of half fold and half mix method to incorporate them well.
How to prepare the egg whites?
First, make sure your equipment – I mean the whisk and the mixing bowl are grease-free. Egg whites contain water and protein. Therefore, any grease will prevent the whites from foaming.
Pour the egg whites into a grease-free bowl with a whisk attachment in a stand mixer. If you want to know my secret to whisking egg whites 100% successfully, read my blog post Black Sesame Swiss Roll. Start by beating the egg whites at a low speed. At the beginning, you won’t see any difference. Once again – BE PATIENT and don’t get discouraged!!! After a couple of minutes, you will see some air bubbles forming, at that point, it’s time to add cream of tartar to stabilise the mix. Keep beating until you see a layer of bubbles, then you can add the sugar, spoonful by spoonful to ensure the sugar is fully dissolved. After all the sugar is added, turn the speed to high and keep whisking until the mix has formed a stiff peak.
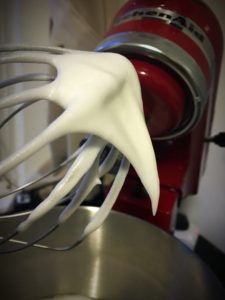
Stiff peak form means that the egg whites can hold their shape when you withdraw the whisk and hold it upside down. The peak should stand up firmly at the tip. When you see this, it means your egg whites are ready. Congratulations for getting this far, you are doing brilliantly!
You are now a BIG step closer to a ‘successful’ flourless Swiss roll!!
Fold in the egg whites
This is a crucial step!!! Using a spatula, add a small amount of egg white into the walnut mixture in order to loosen it up a little bit. Then put ⅓ of the egg white at a time into the walnut mix. Really GENTLY, I said REALLY gently, fold the egg whites into the mixture and mix them well. Then add another ⅓ and fold again; then the remainder. Mix until you do not see any egg white blobs – but really gently.
How to fold the egg whites in more efficiently without knocking the air out?
I do have a trick here… I call it ‘TURNING & FOLDING’.
I don’t mean that you physically turn (although dancing and cooking is a great combination), I mean turn your mixing bowl towards yourself with your left hand while you are folding the egg whites in away from yourself with your right hand (I’m right-handed, left handers reverse this tip).
By doing this, you are creating more movement with your mixing bowl so that the mixture and the egg whites will mix together faster, decreasing the chance of losing the air in the egg whites.
Give it a try and let me know if it works.
Baking the cake
Right, ready to bake. Prepare a 15” x 9” shallow pan, watch my how to line your baking tins with parchment paper video tutorial to learn how I exactly line this shallow pan, and then gently pour in the mixture and spread it evenly with an offset spatula. As you spread, you should be able to quietly celebrate the fluffy, airy feeling in the mix – you did it right! Yay!
The oven should be preheated to 180℃ and bake for 10 to 12 minutes on a middle shelf. If you want to be sure, test the cake with a cake tester or toothpick after around 10 minutes. If the tester comes out clean – it’s baked.
How to make a good Swiss roll?
A good Swiss roll does not crack. It sounds quite challenging to do it but you’ve got this. Trust me!
Once the cake is out of the oven, it is HOT! Prepare a sheet of parchment paper or a clean tea towel on a flat surface. While the cake is warm enough to touch, flip it over onto a prepared sheet of parchment paper. The best way to flip is to hold the two corners of one side of the baked parchment paper and then gently flip the whole cake over.
Then peel off the baked parchment paper carefully because we do not want to tear the cake off. Warm cakes are quite fragile. Next, roll it tightly with the parchment paper or tea towel while it is still warm to touch. Place the seam of the roll face down and let it cool completely on a wire rack. That’s it! It is the so-called ‘secret’ of making a non crack Swiss roll. It really will work if you are careful.
Make the coffee cream
The main ingredient of making coffee cream is the COFFEE! You can use your favourite freshly brewed coffee… or an easier choice is using instant coffee powder. It’s up to you but bear in mind, your choice of it will affect the taste of the cream. In the recipe, we need 6 tablespoon of brewed coffee. The stronger your brewed coffee is, the more intense flavour you will get. If it isn’t right first time, make a note for yourself and adjust the intensity next time you bake the cake.
Then mix the sifted icing sugar with some melted butter in a stand mixer with a whisk attachment. Keep mixing it for about 4 to 5 mins until it turns into a smooth texture, something like mashed potatoes … sweet mashed potatoes … mashed potatoes twice in a cake blog!!
Next, add the chilled brewed coffee, of course it must be completely cold, followed by the chilled fresh cream. Once you add them, the texture of the icing sugar mixture will turn a bit curdled…don’t worry…keep whisking. After around 1 or 2 mins, they will become a smooth and aromatic coffee cream.
Cover the mix with a lid or cling film and chill it in the fridge. Take it out just before you start to assemble the Swiss roll. We need to keep it as cool as we can in order to prevent it from liquifying.
How to assemble the Swiss roll?
Unroll the cooled cake on a flat surface and put generous blobs of fragrant coffee cream onto it. Spread the cream evenly and a little bit more in the curved area. Leave a centimeter clear at the end.
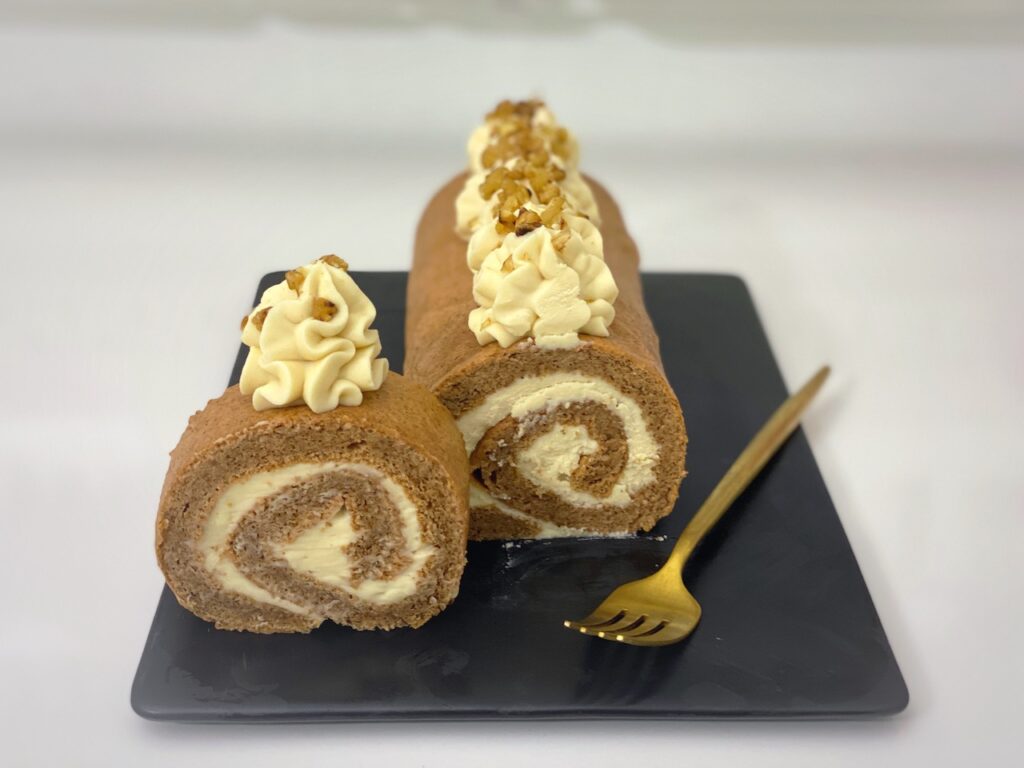
Start rolling the cake back tightly into a log – without the parchment paper this time! The cake has been set into a curved shape so it will not be a problem to roll it back. When you come to the end, place it seam down because we just want to see a nice round roll. Choose your desired serving plate and gently place the Swiss roll onto it. You can’t really move it once the cake is placed, so choose wisely … 😉 people always eat with their eyes first.
Ta-da!!! Flourless walnut Swiss roll filled with coffee cream!!! Done!
The following steps are totally optional. If you just want a humble and homely and incredibly tasty Swiss roll for your afternoon tea, that’s it!!!
But, what if I want to impress my friends and family … what else can I do?
Save it to Pinterest for later!
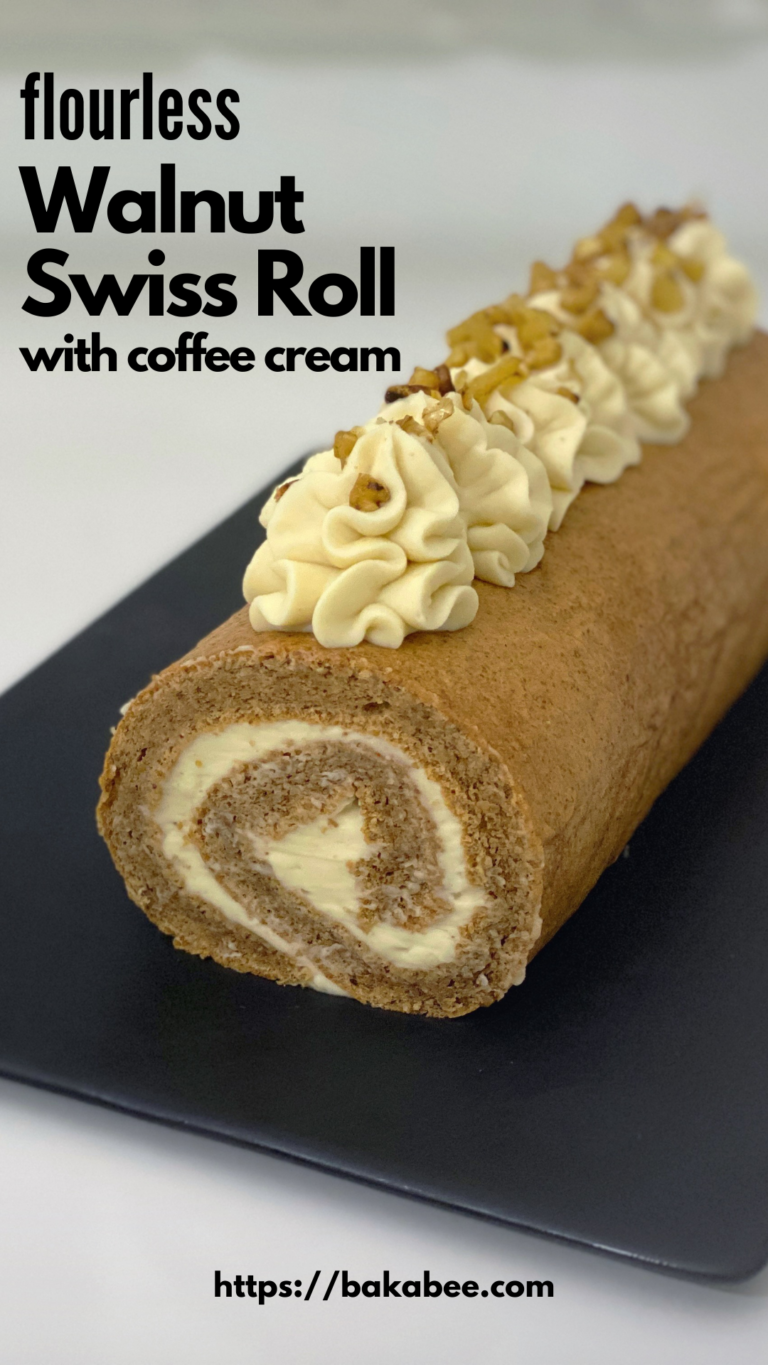
How to make it look more appetising?
Here are the steps:
- Get a piping bag, if you don’t have one, a ZipLock bag also can do the job.
- Cut a hole at the end (don’t cut it too big, you can always go back and cut it bigger) and place in a star piping nozzle.
- Fill the bag with the remaining coffee cream.
- Prepare some chopped toasted walnuts.
- Place the piping bag straight and apply gentle pressure to pipe some stars on top of the Swiss roll.
- Sprinkle the chopped toasted walnuts onto the cream in an artistic way!
Ta-da encore!!!
Personally I think this little bit of window dressing makes for a really special elegant cake. It only takes a few minutes.
Other little details you need to know before you start
This recipe is for a 15” x 9” shallow pan. If you use a different size, please adjust the amount of the ingredients proportionately. Otherwise, the cake layer may turn out too thin or too thick. As a result, the swirls may not have the right thickness or the rolling could be a problem.
Watch my video tutorial before you start. In my video, I show you exactly how I made this in my own baking studio. If I can bake it, so can you! Let me know how it turns out. 😉
Print
Flourless Walnut Swiss Roll with Coffee Cream
- Prep Time: 40 minutes
- Cook Time: 12 minutes
- Total Time: 3 hours 2 minutes
- Yield: 7 slices 1x
- Category: afternoon tea, cakes, cream cakes, dessert
- Cuisine: American, British
Description
Seductively smooth coffee whipped cream filling, the finest ground walnut Swiss roll. It is so light it almost floats off the plate and is made completely without flour. An easy four-step recipe, some elegant finishing touches and you will make the perfect cake for a family tea or to impress guests at a coffee morning. Really, who can say no to coffee and walnut?
Ingredients
Walnut Swiss roll
- 150 g walnuts (toasted)
- 1/2 tsp baking powder
- 6 pc eggs (separated)
- 150 g caster sugar (divided into 2 portions (75g + 75g))
- 1/4 tsp cream of tartar
Coffee cream filling
- 250 g unsalted butter (melted)
- 400 g icing sugar (sifted)
- 6 tbsp brewed coffee (chilled)
- 6 tbsp chilled double cream (35% fat )
Swiss roll decoration
- 10 g toasted walnuts (chopped)
- remaining whipped coffee cream
Instructions
Make the Swiss roll
- Preheat the oven to 180°C. Grease the Swiss roll pan 15" x 9" with butter and line with a sheet of parchment paper.
- Prepare the walnuts Toast 150g walnuts in a cast iron pan until they turn golden brown or you can smell the nutty flavour. You can also bake them in the oven at 200°C for about 5-10 mins.
- Cool the toasted walnuts on foil for about an hour.
- Pour the cooled toasted walnuts into a food processor and add ½ tsp baking powder. Grind them until sandy-texture; stop the processor just before they turn into a paste.
- Prepare the eggs Separate egg yolks and egg whites into two bowls. DO NOT let any egg yolk drop into the egg whites.
- Beat the egg whites Pour the whites into a stand mixer with a whisk attachment. Whisk the whites at a low speed for a few minutes. When you see some air bubbles are formed at the edge of the whites, add ¼ tsp of cream of tartar to help stabilise the whipped egg whites.
- After a couple of minutes, when you see a layer of bubbles has formed, add 75g caster sugar, spoonful by spoonful to ensure the sugar is fully dissolved. After all the sugar is added, increase the speed to high and keep whisking until a stiff peak forms.
- Beat the egg yolks Put 6 egg yolks into a large mixing bowl and add the remaining 75g caster sugar. Use a hand-held or stand mixer with a whisk attachment and start beating the yolks at medium speed. Beat the yolks and sugar mixture for around 4 minutes or until the mixture becomes thick in texture and pale in colour.
- Add the ground walnut mixture into the egg yolk mixture. Gently fold and mix them together using a spatula until they are well combined.
- Mix the mixture Scoop a little bit of egg white into the walnut mixture to loosen the texture first. Then fold the egg whites into the walnut mixture in 3 portions. Do not forget to scrape the bottom and the sides of the bowl to make sure everything is well mixed. Be patient at this stage because you do not want to knock any air out by whisking. Keep folding and mixing until you cannot see any blobs of egg white.
- Carefully pour the mixture into the prepared tin. Spread it evenly using an offset spatula.
- Bake the cake Bake the cake in a preheated oven (180°C) for about 10-12 mins or until the sponge is golden brown and springy to the touch.
- While the cake is baking, prepare a sheet of parchment paper which is slightly larger than the cake on a flat surface.
- After 12 mins, the cake is done. Make sure the sides of the cake are not sticking onto the baking pan. Be careful, the cake and the pan are very hot.
- Lift up the cake and flip it onto the prepared parchment paper. Peel off the baked parchment paper carefully.
- While the cake is still warm, start rolling it from the short side. Use the parchment paper to help roll the cake tightly. Place the seam down and let it cool completely on a wire rack.
Make the coffee cream filling
- Prepare the mixture Melt 250g unsalted butter in a saucepan at low to medium heat. When the butter comes to the boil, turn off the heat and let it cool down a bit.
- Put 400g sifted icing sugar into a stand mixer with a whisk attachment. Pour the melted butter into the icing sugar slowly. If you have white residue from the melted butter, leave it in the pan.
- Keep whisking the mixture for around 5-7 mins or until it becomes smooth in texture. Stop the mixer once or twice in between to scrape down the sides and the bottom of the bowl to make sure everything is well combined.
- Whisk the cream and the coffee After around 5-7 mins whisking, if your bowl is still warm, keep whisking it until it becomes a bit cooler (not warm to touch) before adding the brewed coffee and the chilled cream.
- Keep the mixer at low or medium speed, then add 6 tbsp chilled double cream before then adding 6 tbsp brewed coffee. Initially, the mixture will curdle.
- Turn the speed to high for 2-3 minutes and keep whisking, until the mix acquires a smooth texture.
- Cover the whipped coffee cream with a lid or cling film. Keep it cool in the fridge and take it out just before assembling the cake.
Assemble the cake
- Gently unroll the cooled Swiss roll. Scoop a few generous blobs of chilled coffee cream onto the cake and spread it evenly using an offset spatula. Make sure there is enough cream inside the curved areas. Leave around 1 centimetre at one end. Don't worry about the sides, they will be trimmed to become the ends of the cake.
- Without parchment paper, start rolling the cake back into a tight log. Make sure the seam is facing downwards.
- Use a sharp knife to trim both sides to make the roll look tidy.
- Ready a serving plate and place the Swiss roll onto it using a cake lifter or a spatula.
Decorate the Swiss roll
- Pipe the stars Cut a hole at the end of a piping bag and insert an open star piping tip. Use a tall glass to hold the bag while loading the remaining coffee cream into it. Secure it with a clip at the top.
- Hold the piping bag straight and apply gentle pressure. Pipe a star in the middle of the roll. Then pipe three more each in front of it and behind it.
- Sprinkle the Walnuts Finally, sprinkle some chopped toasted walnuts on the stars. Slice cake and enjoy!
Notes
- This recipe is for a baking pan 15″ x 9″. If your pan is a different size, please adjust the quantity of the ingredients proportionally.
- Make sure the mixing bowl and the whisk for beating the egg whites are grease free and dry. You can use lemon juice or white vinegar to wipe them before whisking the whites.
- A hand held and a stand mixer are interchangeable in this recipe – instructions are as Bakabee uses them. Some timings may vary slightly if you choose to use a hand held mixer where stand mixer is specified.
- You can also chill the Swiss roll in the fridge for about 1 to 2 hours before serving.
- Watch my video tutorial to see the whole process.
- Leave me comments if you have any questions.
Nutrition
- Calories: 790
- Sugar: 77.9
- Sodium: 265
- Fat: 27
- Saturated Fat: 23.2
- Carbohydrates: 81.4
- Fiber: 1.5
- Protein: 10.5
- Cholesterol: 235
Bake it
Give this recipe a try! I love connecting and seeing your pictures. It really makes my day.
Try Bakabee’s Other Recipes
- Coffee Walnut Loaf Cake (video tutorial)
- Banana Chocolate Chip Muffins (Gluten Free & Refined Sugar Free) (video tutorial)
- Healthy Savoury Sweetcorn and Carrot Muffins (Gluten Free & Dairy Free)
Thanks so much for stopping by! Hope you will enjoy this recipe.
If you’ve tried my Flourless Walnut Swiss Roll with Coffee Cream recipe, please feel free to leave me a comment and let me know what you thought. The more we chat the more I know what recipes I should be making and sharing. If you have any recipe suggestions I would also love to hear them.
Rating the recipe once you’ve made this Flourless Walnut Swiss Roll with Coffee Cream may also help other readers decide whether to make my cakes, so I would love it if you could come back and let everyone know what you think.
Share this!

